メインコンテンツにスキップ

LG G Pad X 8.3 Screen Replacement

必要な工具と部品

  1. LG G Pad X 8.3 Screen Replacement, Battery: 手順 1、 1の画像 1
    • Remove the cover of the SD card. Find it on the right side of the back of the tablet.

    • Press the SD card in to make it pop out.

  2. LG G Pad X 8.3 Screen Replacement: 手順 2、 1の画像 1
    • Slide the stylus out from the bottom left corner of the back panel.

  3. LG G Pad X 8.3 Screen Replacement: 手順 3、 1の画像 1
    • Start at a corner and pry the screen up with a plastic opening tool.

    • You can also use a plastic spudger for this task, but do not use metal tools. They can be dangerous to you and the device.

    • Slide the tool in the seam at the edge of the screen.

    • Wedge additional plastic opening tools in the seam to help lift the screen.

    • Slide both wedged plastic opening tools towards the bottom to pop the screen loose.

    • If your screen is cracked, work slowly to avoid flinging glass shards when prying.

  4. LG G Pad X 8.3 Screen Replacement: 手順 4、 3の画像 1 LG G Pad X 8.3 Screen Replacement: 手順 4、 3の画像 2 LG G Pad X 8.3 Screen Replacement: 手順 4、 3の画像 3
    • With a Phillips #000 screwdriver, unscrew the six 4.0 mm screws that hold down the battery.

    • With the Phillips #000 screwdriver, unscrew the two 4.0 mm screws that hold down the battery ribbon connector.

    • Use a magnetic mat to keep track of these tiny screws for later reassembly.

  5. LG G Pad X 8.3 Screen Replacement: 手順 5、 1の画像 1
    • Lift the battery ribbon connector with your finger.

  6. LG G Pad X 8.3 Screen Replacement: 手順 6、 1の画像 1
    • Lift the battery with your fingers and remove it from the device.

  7. LG G Pad X 8.3 Screen Replacement, Speaker: 手順 7、 1の画像 1
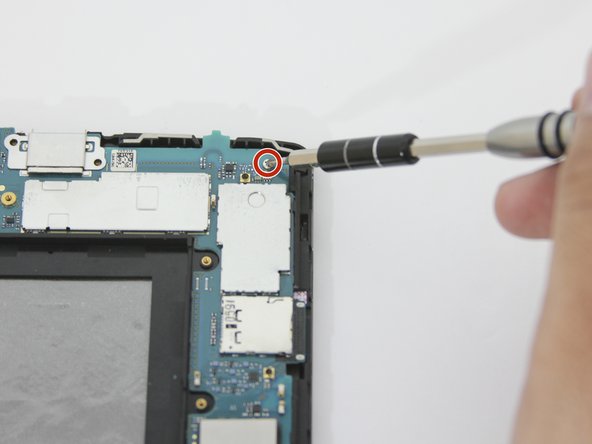
    • With a Phillips #000 screwdriver, unscrew the one 4.0 mm screw that is holding down the speaker.

    • Use the magnetic mat to keep track of the tiny screw(s).

  8. LG G Pad X 8.3 Screen Replacement: 手順 8、 1の画像 1
    • Lift and remove the speaker with your finger.

  9. LG G Pad X 8.3 Screen Replacement, Motherboard: 手順 9、 2の画像 1 LG G Pad X 8.3 Screen Replacement, Motherboard: 手順 9、 2の画像 2
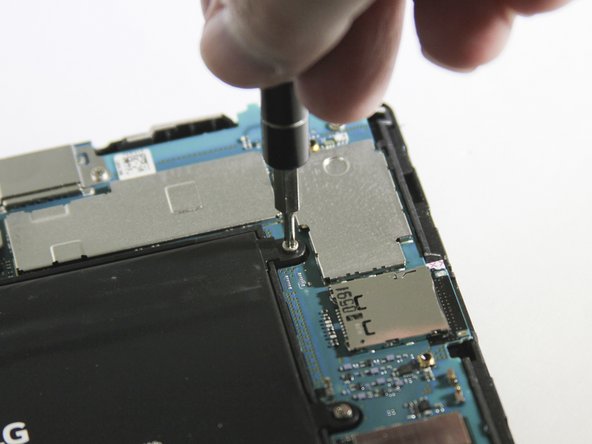
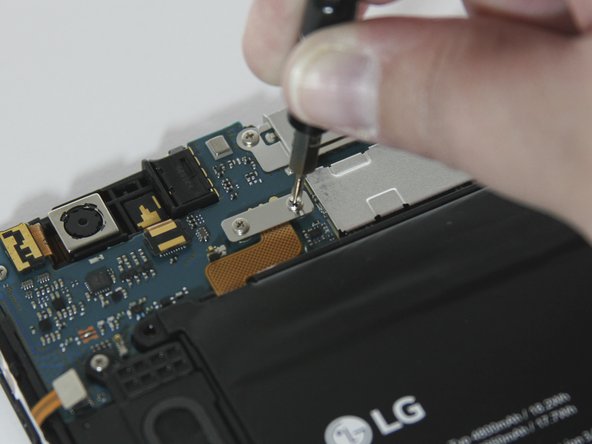
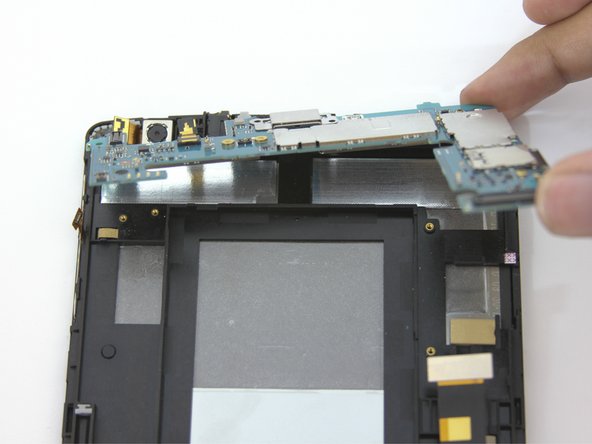
    • With the Phillips #000 screwdriver, unscrew the four 4.0 mm screw that are holding down the motherboard.

  10. LG G Pad X 8.3 Screen Replacement: 手順 10、 2の画像 1 LG G Pad X 8.3 Screen Replacement: 手順 10、 2の画像 2
    • Use a plastic opening tool to lift up the ribbon connector at the bottom of the motherboard.

    • Only lift up the end of the ribbon connector that is attached to the motherboard. The end at the base of the tablet should stay attached.

  11. LG G Pad X 8.3 Screen Replacement: 手順 11、 3の画像 1 LG G Pad X 8.3 Screen Replacement: 手順 11、 3の画像 2 LG G Pad X 8.3 Screen Replacement: 手順 11、 3の画像 3
    • Lift and release the remaining ribbon connectors in the upper left corner of the motherboard with a plastic opening tool.

    • Avoid bending the tips of the ribbon connectors to prevent damage.

  12. LG G Pad X 8.3 Screen Replacement: 手順 12、 2の画像 1 LG G Pad X 8.3 Screen Replacement: 手順 12、 2の画像 2
    • With your fingers, lift up the motherboard from the upper right corner.

    • Carefully remove the fragile motherboard from the device.

  13. LG G Pad X 8.3 Screen Replacement, Rear-facing camera: 手順 13、 1の画像 1
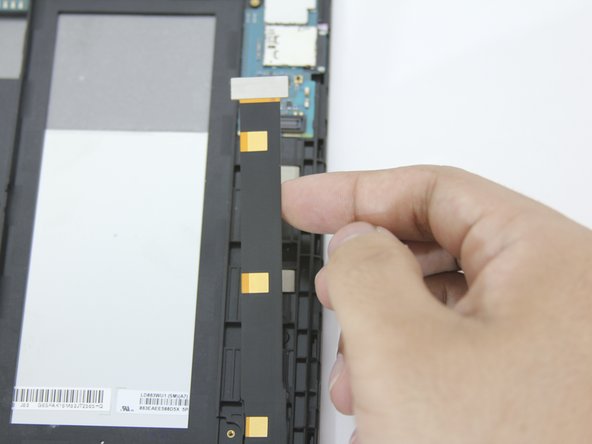
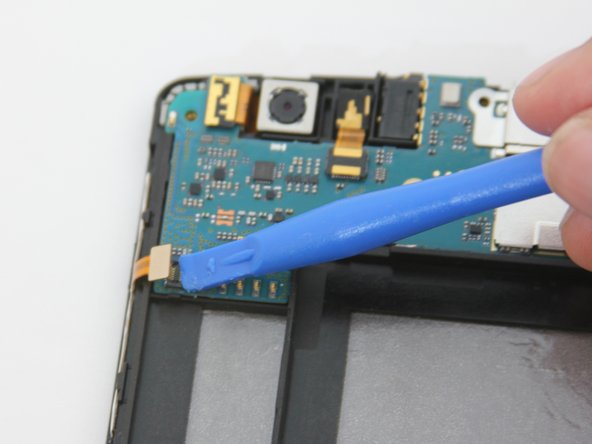
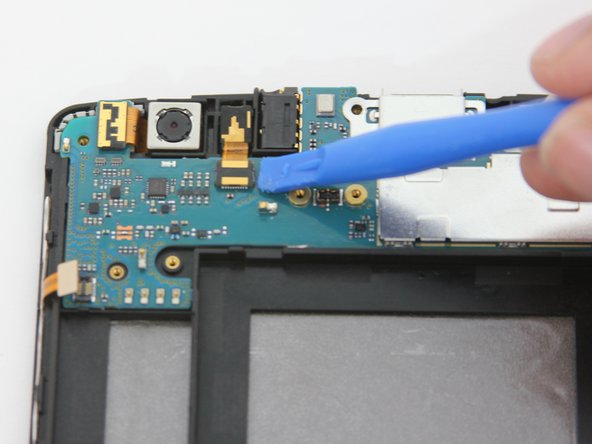
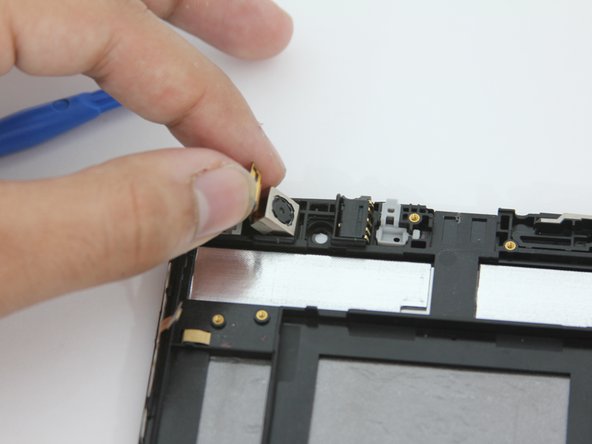
    • Insert the plastic opening tool under the ribbon connector that is holding the rear-facing camera down and lift it up.

  14. LG G Pad X 8.3 Screen Replacement: 手順 14、 2の画像 1 LG G Pad X 8.3 Screen Replacement: 手順 14、 2の画像 2
    • After prying ribbon connector, the rear-facing camera should be ready for removal.

    • Gently lift the rear-facing camera with your fingers and remove.

  15. LG G Pad X 8.3 Screen Replacement, Screen: 手順 15、 1の画像 1
    • Cover the screen with duct tape.

    • This step is optional. Recommended for cracked screens.

    • The tablet screen has a lot of adhesive, which makes the removal longer. Be patient.

  16. LG G Pad X 8.3 Screen Replacement: 手順 16、 1の画像 1
    • Insert the plastic opening tool on one of the corners of the device.

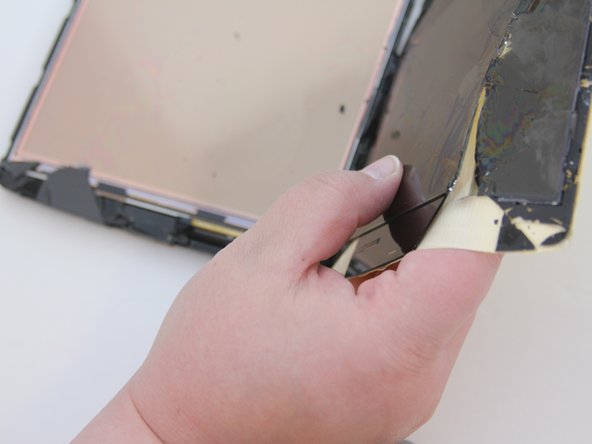
    • Slowly go around the edge of the tablet with the plastic opening tool and pry upward.

    • Use multiple plastic opening tools underneath areas that have been pried open. This will prevent the screen from sticking back to the adhesive and it will make removal easier.

    • Gift, Debit or Credit cards work effectively to keep screen pried opening.

  17. LG G Pad X 8.3 Screen Replacement: 手順 17、 2の画像 1 LG G Pad X 8.3 Screen Replacement: 手順 17、 2の画像 2
    • Lift upward and slowly remove screen.

終わりに

To reassemble your device, follow these instructions in reverse order.

3 の人々がこのガイドを完成させました。

作成者

1人の作成者と共同作成されました。

Michael H

メンバー登録日: 04/09/18

531 ポイント

4のガイドは作成済み

チーム

2 件のコメント

It was very helpful!

Pepelad Z - 返信

I have a question. Mine was dropped and has a crack across the screen - I’d keep using it with a glass screen protector on it if I could, it’s not that bad. HOWEVER, when it dropped and broke the screen, the digitizer stopped working.

Does anybody know if the digitizer is integrated with the back light or if it’s closer to the screen? I don’t see any ribbon cables being removed in this guide so I’m assuming that it’s deeper than just the screen.

Any help would be wonderful I’m trying to decide if I want to fix this thing or just recycle it, I love the pen and the size, but it’s fairly outdated now and not the fastest thing in the world. I have another tablet and a nice phone, but was going to give this to my brother.

Nice guide, I’ve used iFixIt guides a few times in the past to fix friend’s devices… my phone/tablet/laptop repair tool, screw driver, and screw kit collection is pretty massive and impressive now LOL.

Thanks!

Adam Bacon - 返信

コメントを追加

統計データ:

過去 24時間: 0

過去 7 日: 5

過去 30 日: 18

今までの合計 2,858