メインコンテンツにスキップ

LG G Pad 8.3 4G Battery Replacement

必要な工具と部品

  1. LG G Pad 8.3 4G Battery Replacement, Back Panel: 手順 1、 1の画像 1
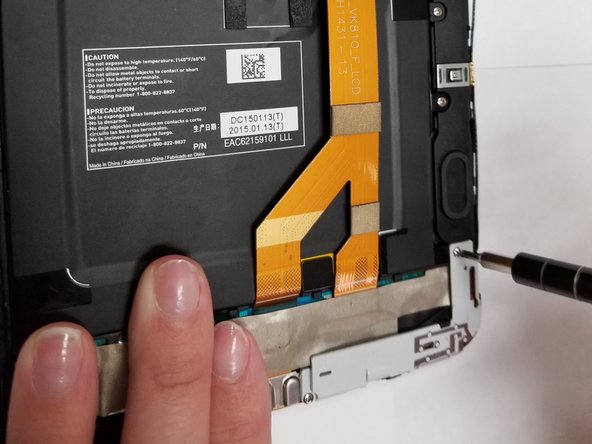
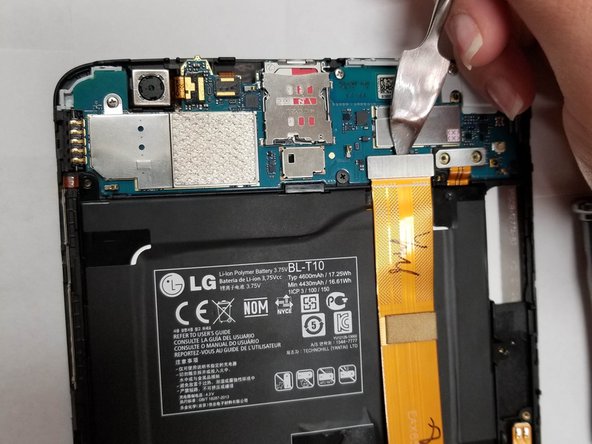
    • With the screen faced up, insert the metal spudger into the crevice so that it is sticking out between the side panel and the screen.

    • Be gentle when popping the panel off.

  2. LG G Pad 8.3 4G Battery Replacement: 手順 2、 3の画像 1 LG G Pad 8.3 4G Battery Replacement: 手順 2、 3の画像 2 LG G Pad 8.3 4G Battery Replacement: 手順 2、 3の画像 3
    • Take the spudger and slide it around the perimeter of the device.

    • Pull gently on the edges to get the panel to pop up.

    • If the panel does not budge, be aware that there is adhesive on the back of the battery holding the back shut. Make sure to just move around the perimeter of the back panel until the panel is able to lift forward.

  3. LG G Pad 8.3 4G Battery Replacement, Speakers: 手順 3、 2の画像 1 LG G Pad 8.3 4G Battery Replacement, Speakers: 手順 3、 2の画像 2
    • Remove the 4 1.5 mm screws holding the speakers in place.

  4. LG G Pad 8.3 4G Battery Replacement: 手順 4、 3の画像 1 LG G Pad 8.3 4G Battery Replacement: 手順 4、 3の画像 2 LG G Pad 8.3 4G Battery Replacement: 手順 4、 3の画像 3
    • Put the spudger underneath the gold cap of the cable and lift to disconnect from device.

    • This cable can be damaged easily.

  5. LG G Pad 8.3 4G Battery Replacement: 手順 5、 1の画像 1
    • Pull the cable back and out of the way of the speaker.

  6. LG G Pad 8.3 4G Battery Replacement: 手順 6、 2の画像 1 LG G Pad 8.3 4G Battery Replacement: 手順 6、 2の画像 2
    • Place the spudger in between the speaker and the device to pop the speaker out of place.

    • Pull the speaker out of the device.

  7. LG G Pad 8.3 4G Battery Replacement, Vibrator: 手順 7、 2の画像 1 LG G Pad 8.3 4G Battery Replacement, Vibrator: 手順 7、 2の画像 2
    • Remove the two screws on the white panel on the bottom right side.

  8. LG G Pad 8.3 4G Battery Replacement: 手順 8、 2の画像 1 LG G Pad 8.3 4G Battery Replacement: 手順 8、 2の画像 2
    • Remove the white panel.

  9. LG G Pad 8.3 4G Battery Replacement: 手順 9、 1の画像 1
    • Remove the vibrator from the underside of the white panel.

  10. LG G Pad 8.3 4G Battery Replacement, Battery: 手順 10、 2の画像 1 LG G Pad 8.3 4G Battery Replacement, Battery: 手順 10、 2の画像 2
    • Remove the 3 silver 1.5 mm screws that remain.

  11. LG G Pad 8.3 4G Battery Replacement: 手順 11、 2の画像 1 LG G Pad 8.3 4G Battery Replacement: 手順 11、 2の画像 2
    • Remove the 2 black 1.5 mm screws.

  12. LG G Pad 8.3 4G Battery Replacement: 手順 12、 2の画像 1 LG G Pad 8.3 4G Battery Replacement: 手順 12、 2の画像 2
    • Insert metal spudger under the side of the gold strip and pull.

  13. LG G Pad 8.3 4G Battery Replacement: 手順 13、 2の画像 1 LG G Pad 8.3 4G Battery Replacement: 手順 13、 2の画像 2
    • Place spudger under the top of the gold bar and gently pry up.

  14. LG G Pad 8.3 4G Battery Replacement: 手順 14、 1の画像 1
    • Pull on top of the silver block until gold bar lifts.

  15. LG G Pad 8.3 4G Battery Replacement: 手順 15、 1の画像 1
    • Place spudger under the battery and run it around the edge to loosen it.

  16. LG G Pad 8.3 4G Battery Replacement: 手順 16、 1の画像 1
    • Pull the battery out.

終わりに

To reassemble your device, follow these instructions in reverse order.

作成者

4人の作成者と共同で作成されました。

Charlie Castorena

メンバー登録日: 09/18/18

417 ポイント

3のガイドは作成済み

チーム

University of North Texas, Team S4-G3, Raign Fall 2018 University of North Texas, Team S4-G3, Raign Fall 2018人のメンバー

UNT-RAIGN-F18S4G3

4 メンバー

5のガイドは作成済み

コメント 1 件

I have followed your guide (LG G Pad 8.3 4G Battery Replacement) but what see when I pry off the screen is not what is on your pic of step 2.

It appears that I have to pry off the back panel to actually see the battery, the speakers and the gold cable.

How can I pry off the back panel?

Thanks,

Ed

Ed Miller - 返信

コメントを追加

統計データ:

過去 24時間: 0

過去 7 日: 2

過去 30 日: 8

今までの合計 499