メインコンテンツにスキップ

LG Encore GT550 Audio Jack Replacement

必要な工具と部品

  1. LG Encore GT550 Audio Jack Replacement, Audio Jack: 手順 1、 2の画像 1 LG Encore GT550 Audio Jack Replacement, Audio Jack: 手順 1、 2の画像 2
    • Turn the device over so the backside is facing up.

    • Use your fingers or an opening tool to remove the back cover in order to expose the battery.

  2. LG Encore GT550 Audio Jack Replacement: 手順 2、 2の画像 1 LG Encore GT550 Audio Jack Replacement: 手順 2、 2の画像 2
    • Use your fingers or a spudger to remove the battery. Lift it from the side opposite of the camera.

  3. LG Encore GT550 Audio Jack Replacement: 手順 3、 1の画像 1
    • Use a Phillips #0 screwdriver to remove six screws around the perimeter of the phone.

  4. LG Encore GT550 Audio Jack Replacement: 手順 4、 2の画像 1 LG Encore GT550 Audio Jack Replacement: 手順 4、 2の画像 2
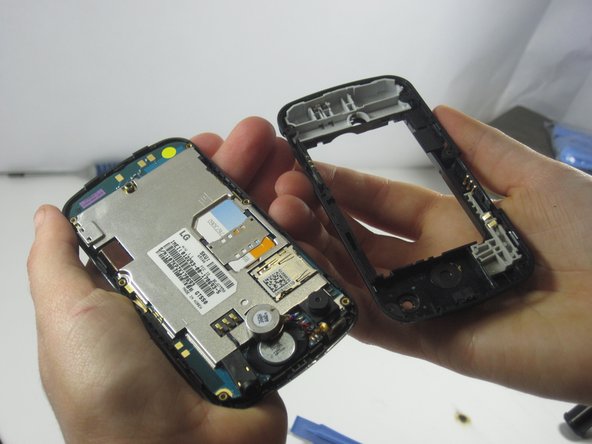
    • Place the opening tool in the seam of the device and pry around the perimeter to separate the top case from the bottom case.

  5. LG Encore GT550 Audio Jack Replacement: 手順 5、 2の画像 1 LG Encore GT550 Audio Jack Replacement: 手順 5、 2の画像 2
    • Place the opening tool on the top on the device between the phone casing and motherboard.

    • Separate the screen and the motherboard.

  6. LG Encore GT550 Audio Jack Replacement: 手順 6、 1の画像 1
    • Push the audio jack out and replace it.

終わりに

To reassemble your device, follow these instructions in reverse order.

ある他の人がこのガイドを完成しました。

作成者

6人の作成者と共同で作成されました。

Lindsey Harding

メンバー登録日: 11/04/13

501 ポイント

5のガイドは作成済み

チーム

UMass Dartmouth, Team 1-4, Shastany Fall 2013 UMass Dartmouth, Team 1-4, Shastany Fall 2013人のメンバー

UMASSD-SHASTANY-F13S1G4

2 メンバー

10のガイドは作成済み

0 件のコメント

コメントを追加

統計データ:

過去 24時間: 0

過去 7 日: 1

過去 30 日: 1

今までの合計 212