メインコンテンツにスキップ

このバージョンは誤った内容を含んでいる可能性があります。最新の承認済みスナップショットに切り替えてください。

必要な工具と部品

  1. この手順は未翻訳です。 翻訳を手伝う。

    : 手順 1、 2の画像 1 : 手順 1、 2の画像 2
    • Use your thumb to press down and slide off the back cover of the phone.

  2. この手順は未翻訳です。 翻訳を手伝う。

    : 手順 2、 3の画像 1 : 手順 2、 3の画像 2 : 手順 2、 3の画像 3
    • Take out the battery by levering it out towards the bottom of the phone.

  3. この手順は未翻訳です。 翻訳を手伝う。

    : 手順 3、 1の画像 1
    • Push the spudger between each of the two rubber cushions and the body of the phone. Then turn the spudger to pop each cushion out.

  4. この手順は未翻訳です。 翻訳を手伝う。

    : 手順 4、 1の画像 1
    • Remove six 3.0 mm Phillips #00 screws from the back of the phone.

  5. この手順は未翻訳です。 翻訳を手伝う。

    : 手順 5、 3の画像 1 : 手順 5、 3の画像 2 : 手順 5、 3の画像 3
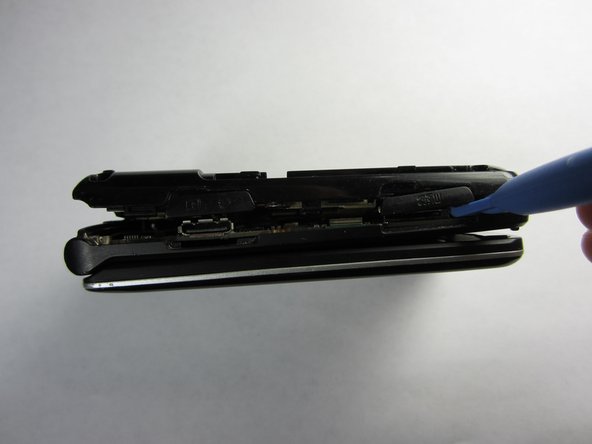
    • Push the spudger into the crack separating the two pieces of the phone.

    • Then use the plastic opening tools to pry the back off by separating the two pieces of the phone.

    • Repeat as necessary around the perimeter of the phone until the casing pops off. Use force as necessary without breaking the cover.

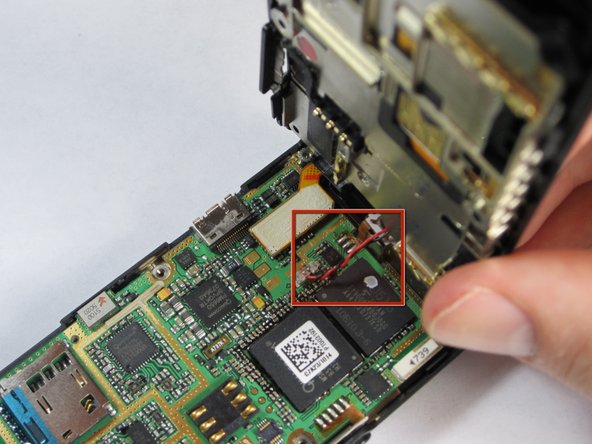
    • The back is attached to the motherboard by a wire, so don't pull the back casing off just yet.

  6. この手順は未翻訳です。 翻訳を手伝う。

    : 手順 6、 1の画像 1
    • Gently pull the wire up from the motherboard, separating the back of the phone and the motherboard.

  7. この手順は未翻訳です。 翻訳を手伝う。

    : 手順 7、 1の画像 1
    • Remove the plastic tab connecting the screen to the motherboard by pulling the tab up from the board.

  8. この手順は未翻訳です。 翻訳を手伝う。

    : 手順 8、 1の画像 1
    • Gently grasp one of the corners of the motherboard and simply lift it straight up out of the phone casing.

    • Replace the motherboard with a new one.

ゴール

作成者

6人の作成者と共同で作成されました。

Zack Mintzer

メンバー登録日: 04/16/13

1 ポイント

6のガイドは作成済み

チーム

Cal Poly, Team 21-55, Johann Spring 2013 Cal Poly, Team 21-55, Johann Spring 2013人のメンバー

CPSU-JOHANN-S13S21G55

4 メンバー

12のガイドは作成済み

0 件のコメント

コメントを追加

統計データ:

過去 24時間: 0

過去 7 日: 7

過去 30 日: 13

今までの合計 351