メインコンテンツにスキップ

LG CG180 Hardshell Case Replacement

必要な工具と部品

  1. LG CG180 Hardshell Case Replacement, Battery: 手順 1、 1の画像 1
    • Power down the cell phone by pressing and holding down the red "end call" button.

  2. LG CG180 Hardshell Case Replacement: 手順 2、 1の画像 1
    • Turn the phone screen-down so you are looking at the back cover.

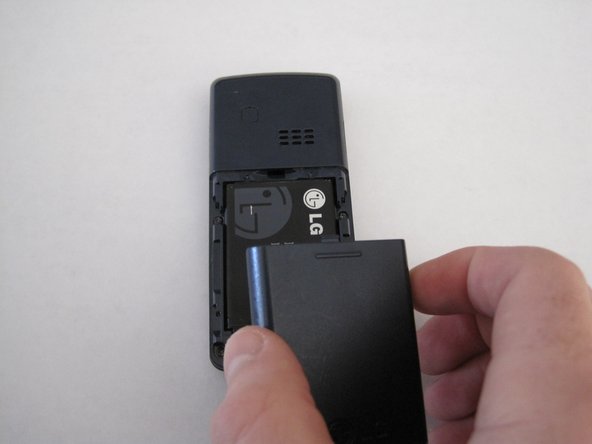
  3. LG CG180 Hardshell Case Replacement: 手順 3、 2の画像 1 LG CG180 Hardshell Case Replacement: 手順 3、 2の画像 2
    • Slide the back cover down using your finger to remove the cover from the phone.

  4. LG CG180 Hardshell Case Replacement: 手順 4、 1の画像 1
    • Place your finger at the top of the battery in small gap.

  5. LG CG180 Hardshell Case Replacement: 手順 5、 1の画像 1
    • Press downward while pulling outward to remove the battery.

  6. LG CG180 Hardshell Case Replacement, Hardshell Case: 手順 6、 1の画像 1
    • Remove all four screws on the back of the phone using a Phillips #00 screwdriver.

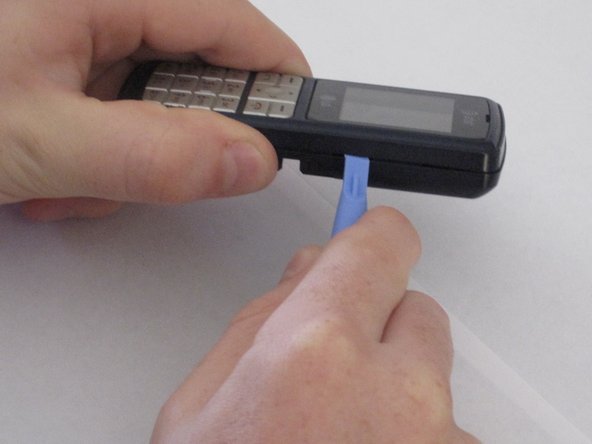
  7. LG CG180 Hardshell Case Replacement: 手順 7、 1の画像 1
    • Insert a plastic opening tool in the seam.

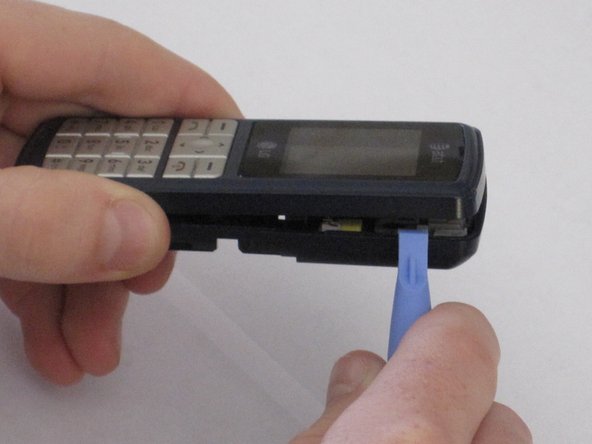
  8. LG CG180 Hardshell Case Replacement: 手順 8、 2の画像 1 LG CG180 Hardshell Case Replacement: 手順 8、 2の画像 2
    • Run the tool along the seam to release all the tabs.

  9. LG CG180 Hardshell Case Replacement: 手順 9、 2の画像 1 LG CG180 Hardshell Case Replacement: 手順 9、 2の画像 2
    • Pull the phone back cover off once all the tabs are released.

  10. LG CG180 Hardshell Case Replacement: 手順 10、 1の画像 1
    • Push the contents of the phone away from the hardshell case by applying pressure to the keypad with both thumbs.

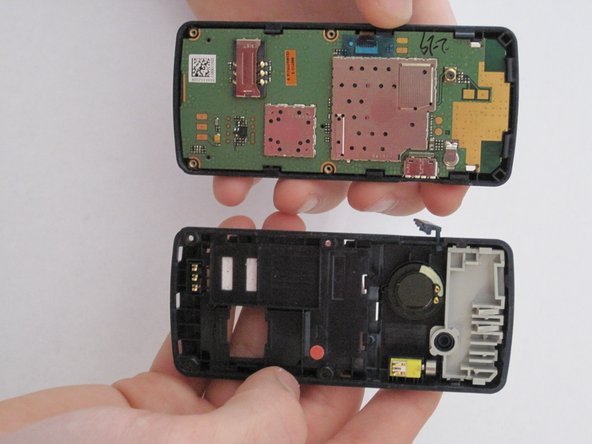
  11. LG CG180 Hardshell Case Replacement: 手順 11、 1の画像 1
    • The hardshell case is separated from the rest of the phone.

終わりに

To reassemble your device, follow these instructions in reverse order.

作成者

4人の作成者と共同で作成されました。

Justin Helmer

メンバー登録日: 01/25/10

1 ポイント

1ガイドが承認済み

チーム

Cal Poly, Team 14-42, Regan Winter 2010 Cal Poly, Team 14-42, Regan Winter 2010人のメンバー

CPSU-REGAN-W10S14G42

4 メンバー

10のガイドは作成済み

0 件のコメント

コメントを追加

統計データ:

過去 24時間: 0

過去 7 日: 0

過去 30 日: 0

今までの合計 1,764