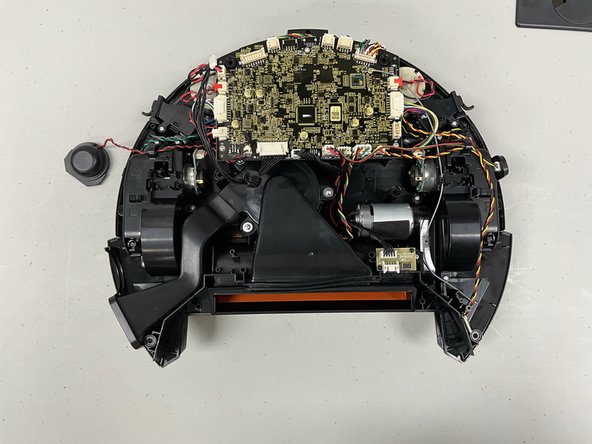
メインコンテンツにスキップ

Kyvol Cybovac L20 Motherboard Replacement

必要な工具と部品

  1. Kyvol Cybovac L20 Motherboard Replacement, Battery: 手順 1、 1の画像 1
    • Begin with the device laying on a flat surface with the power button facing up.

  2. Kyvol Cybovac L20 Motherboard Replacement: 手順 2、 2の画像 1 Kyvol Cybovac L20 Motherboard Replacement: 手順 2、 2の画像 2
    • Remove both of the side brushes.

  3. Kyvol Cybovac L20 Motherboard Replacement: 手順 3、 1の画像 1
    • Use a Phillips #1 screwdriver to remove two 1 mm screws that secure the panel.

    • Remove the battery panel.

  4. Kyvol Cybovac L20 Motherboard Replacement: 手順 4、 2の画像 1 Kyvol Cybovac L20 Motherboard Replacement: 手順 4、 2の画像 2
    • Slightly lift the battery out of the compartment.

    • Disconnect the battery connector.

    • Completely remove the battery.

  5. Kyvol Cybovac L20 Motherboard Replacement, Motherboard: 手順 5、 1の画像 1
    • Use a Phillips #1 screwdriver to remove 8 screws from the device as shown.

  6. Kyvol Cybovac L20 Motherboard Replacement: 手順 6、 2の画像 1 Kyvol Cybovac L20 Motherboard Replacement: 手順 6、 2の画像 2
    • Lift base up and unplug any cable connected form the motherboard into the rest of the components.

  7. Kyvol Cybovac L20 Motherboard Replacement: 手順 7、 1の画像 1
    • Use a Phillips #1 screwdriver to remove the 4 screws holding the motherboard in place.

    • Lift the motherboard up and out of the chassis.

終わりに

To reassemble your device, follow these instructions in reverse order.

作成者

1人の作成者と共同作成されました。

ErickAmaya

メンバー登録日: 09/12/23

97 ポイント

1ガイドが承認済み

チーム

University of North Texas, Team 3-5, Coppersmith Fall 2023 University of North Texas, Team 3-5, Coppersmith Fall 2023人のメンバー

UNT-COPPERSMITH-F23S3G5

4 メンバー

3のガイドは作成済み

0 件のコメント

コメントを追加

統計データ:

過去 24時間: 0

過去 7 日: 1

過去 30 日: 7

今までの合計 45