メインコンテンツにスキップ

この修理ガイドは変更されています。最新の未承認バージョンに切り替えます。

Kyocera Hydro Life Main Speaker Replacement

必要な工具と部品

  1. Kyocera Hydro Life Main Speaker Replacement, Main Speaker: 手順 1、 1の画像 1
    • Remove back cover.

    • Pry from the gap above charger port as displayed.

  2. Kyocera Hydro Life Main Speaker Replacement: 手順 2、 1の画像 1
    • Remove battery.

    • Pry from charger port side.

  3. Kyocera Hydro Life Main Speaker Replacement: 手順 3、 2の画像 1 Kyocera Hydro Life Main Speaker Replacement: 手順 3、 2の画像 2
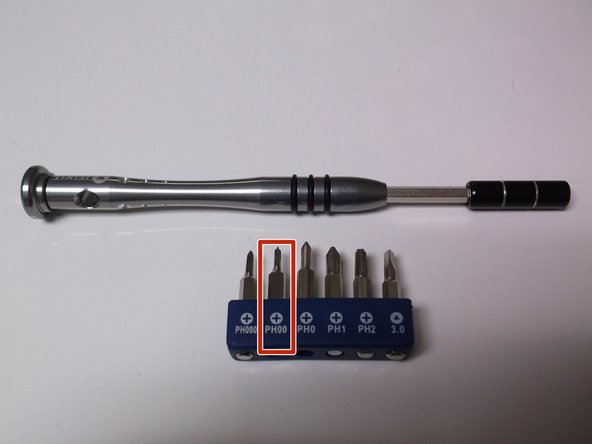
    • Use a PH00 screwdriver to remove the 6 screws from the mid-frame.

    • 4 screws located around the border of the phone, 2 located around the battery terminal.

    • Press down and firmly turn screws to prevent slippage. Avoid letting the screw driver slip, as this will result in stripped screws and prevent further progress.

  4. Kyocera Hydro Life Main Speaker Replacement: 手順 4、 2の画像 1 Kyocera Hydro Life Main Speaker Replacement: 手順 4、 2の画像 2
    • Remove back panel trim.

    • Use the image when prying to effectively dislodge plastic clips.

    • The trim piece is extremely delicate, do not use the phone as leverage when prying or plastic will be broken.

  5. Kyocera Hydro Life Main Speaker Replacement: 手順 5、 1の画像 1
    • Remove back panel, pry in same locations as trim panel in the previous step.

    • Lift up with pry tool. If you use the phone as leverage, the outer plastic ring will bend and break.

    • Industrial glue holds this plastic layer, so expect difficulty. Use a second pry tool to cut away glue and assist in removal.

  6. Kyocera Hydro Life Main Speaker Replacement: 手順 6、 1の画像 1
    • Use tweezers to pull away insulation from speaker, and expose positive and negative terminal points.

    • Do not remove the white manufacture sticker contrary to what is pictured.

  7. Kyocera Hydro Life Main Speaker Replacement: 手順 7、 2の画像 1 Kyocera Hydro Life Main Speaker Replacement: 手順 7、 2の画像 2
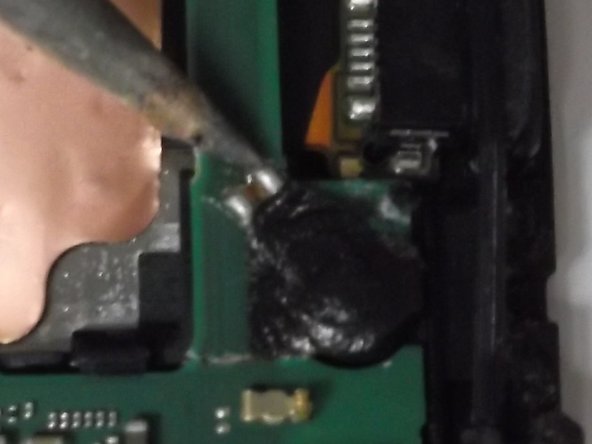
    • Plug in solder iron, allow 2-4 minutes to come to temperature.

    • Apply solder iron to each speaker terminal, and melt connection.

    • When connection is melted, use tweezers to remove defective speaker from the motherboard.

    • Solder cools quickly, so the connections will solidify without heat.

    • Avoid dripping, adding, or removing solder to prevent short circuitry.

  8. Kyocera Hydro Life Main Speaker Replacement: 手順 8、 2の画像 1 Kyocera Hydro Life Main Speaker Replacement: 手順 8、 2の画像 2
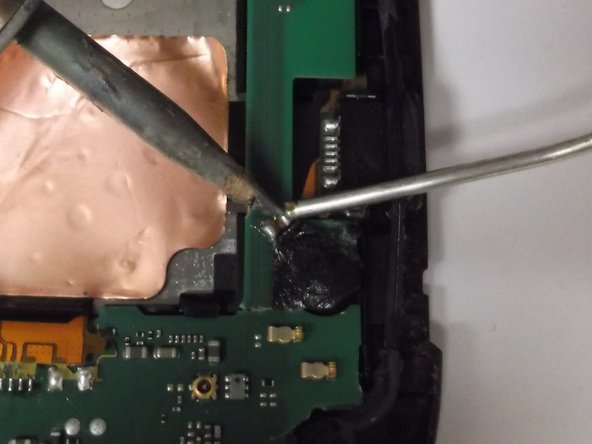
    • Insert new speaker into speaker slot.

    • Solder new positive and negative terminals.

    • Align connection points, apply solder iron to motherboard connection points, then apply solder to heated connection for precise application.

終わりに

To reassemble your device, perform steps 5 through 1 constructively.

作成者

1人の作成者と共同作成されました。

cory pritchard

メンバー登録日: 09/21/18

467 ポイント

2のガイドは作成済み

チーム

University of North Texas, Team S2-G6, Riccardelli Fall 2018 University of North Texas, Team S2-G6, Riccardelli Fall 2018人のメンバー

UNT-RICCARDELLI-F18S2G6

4 メンバー

7のガイドは作成済み

0 件のコメント

コメントを追加

統計データ:

過去 24時間: 0

過去 7 日: 0

過去 30 日: 0

今までの合計 99