メインコンテンツにスキップ

Kyocera DuraForce Pro Headphone Jack Replacement

必要な工具と部品

  1. Kyocera DuraForce Pro Headphone Jack Replacement, Headphone Jack: 手順 1、 3の画像 1 Kyocera DuraForce Pro Headphone Jack Replacement, Headphone Jack: 手順 1、 3の画像 2 Kyocera DuraForce Pro Headphone Jack Replacement, Headphone Jack: 手順 1、 3の画像 3
    • Flip the phone on its side so that the volume button is facing up.

    • Use the plastic opening tool to remove outer case of the phone.

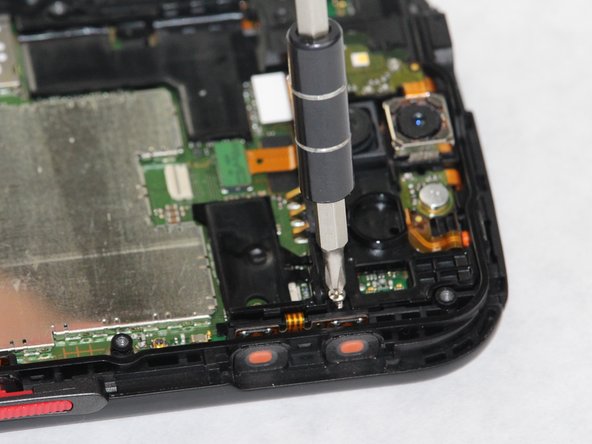
    • Remove the 8 screws around the outer portion of the phone with a JIS #0 screwdriver.

  2. Kyocera DuraForce Pro Headphone Jack Replacement: 手順 2、 3の画像 1 Kyocera DuraForce Pro Headphone Jack Replacement: 手順 2、 3の画像 2 Kyocera DuraForce Pro Headphone Jack Replacement: 手順 2、 3の画像 3
    • Remove the 2 screws with the same screwdriver bit.

    • Remove battery from the phone with plastic opening tool.

  3. Kyocera DuraForce Pro Headphone Jack Replacement: 手順 3、 3の画像 1 Kyocera DuraForce Pro Headphone Jack Replacement: 手順 3、 3の画像 2 Kyocera DuraForce Pro Headphone Jack Replacement: 手順 3、 3の画像 3
    この手順で使用する道具:
    Tweezers
    $4.99
    購入する
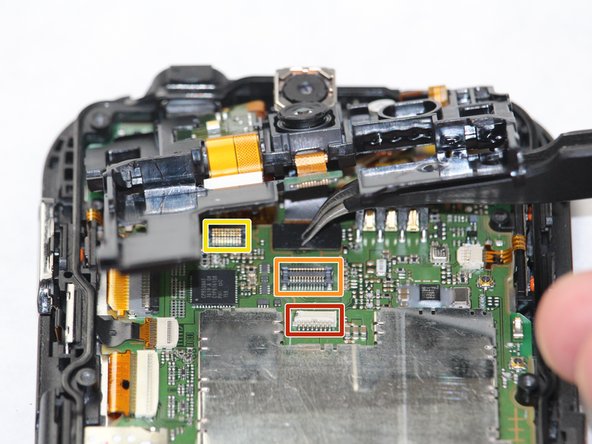
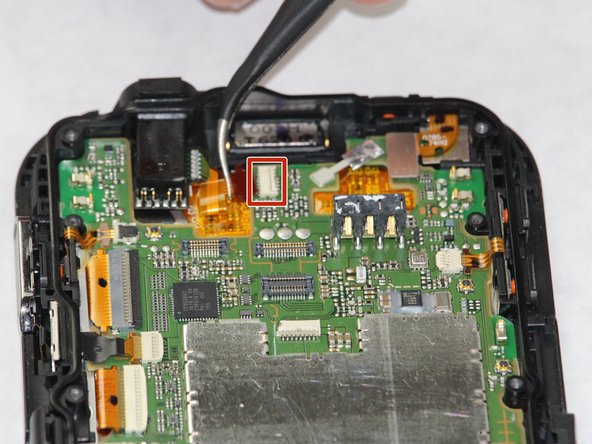
    • Once the battery pops out, use tweezers to gently pull the ribbon out along with it.

    • Remove the 2 screws along the sides of the mounting bracket, then remove the bracket.

  4. Kyocera DuraForce Pro Headphone Jack Replacement: 手順 4、 3の画像 1 Kyocera DuraForce Pro Headphone Jack Replacement: 手順 4、 3の画像 2 Kyocera DuraForce Pro Headphone Jack Replacement: 手順 4、 3の画像 3
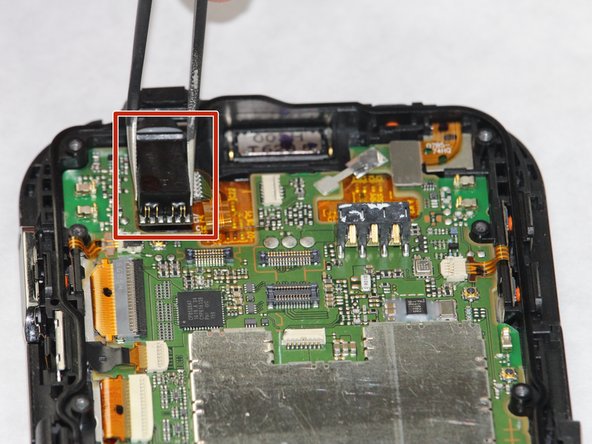
    • Remove final ribbon cable, lift the latch up, and then slide it down. The audio jack will then slide out.

終わりに

To reassemble your device, follow these instructions in reverse order.

ある他の人がこのガイドを完成しました。

作成者

4人の作成者と共同で作成されました。

Dylan Ulbricht

メンバー登録日: 10/08/18

735 ポイント

5のガイドは作成済み

チーム

Sam Houston State, Team S15-G4, Blackburne Fall 2018 Sam Houston State, Team S15-G4, Blackburne Fall 2018人のメンバー

SHSU-BLACKBURNE-F18S15G4

3 メンバー

10のガイドは作成済み

0 件のコメント

コメントを追加

統計データ:

過去 24時間: 0

過去 7 日: 2

過去 30 日: 11

今までの合計 1,313