メインコンテンツにスキップ

Kushlan Cement Mixer 600DDS 2014 Power Components Replacement

必要な工具と部品

  1. Kushlan Cement Mixer 600DDS 2014 Power Components Replacement, Remove the motor cover bolts: 手順 1、 1の画像 1
    • Before you begin, ensure the power cord is unplugged and the power switch is in the OFF position.

    • Use a 13 mm socket to remove the two bolts securing the motor cover to the frame.

  2. Kushlan Cement Mixer 600DDS 2014 Power Components Replacement, Remove the motor cover: 手順 2、 1の画像 1
    • Remove the motor cover.

  3. Kushlan Cement Mixer 600DDS 2014 Power Components Replacement, Remove the electrical panel: 手順 3、 1の画像 1
    • Use a Phillips screwdriver to remove the four screws securing the electrical panel.

  4. Kushlan Cement Mixer 600DDS 2014 Power Components Replacement, Remove the electrical panel: 手順 4、 1の画像 1
    • Remove the electrical panel.

  5. Kushlan Cement Mixer 600DDS 2014 Power Components Replacement, Remove the on/off switch: 手順 5、 3の画像 1 Kushlan Cement Mixer 600DDS 2014 Power Components Replacement, Remove the on/off switch: 手順 5、 3の画像 2 Kushlan Cement Mixer 600DDS 2014 Power Components Replacement, Remove the on/off switch: 手順 5、 3の画像 3
    • Use a pair of needle-nose pliers to disconnect the four wires from the back of the on/off switch.

    • During reassembly, ensure the wires are connected back into their original locations and the on/off switch is not upside-down.

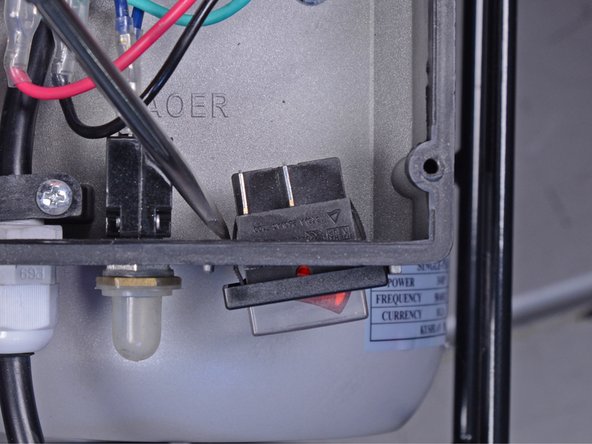
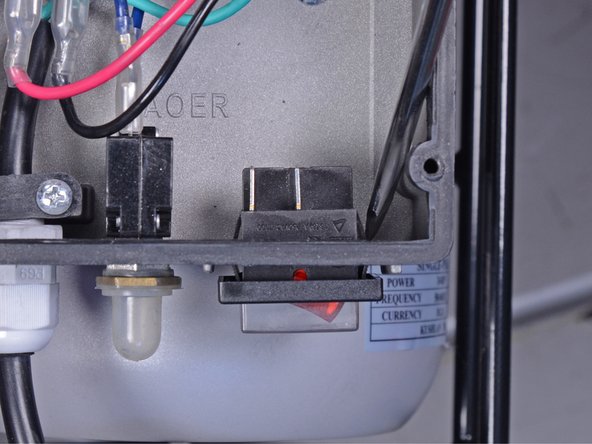
  6. Kushlan Cement Mixer 600DDS 2014 Power Components Replacement: 手順 6、 3の画像 1 Kushlan Cement Mixer 600DDS 2014 Power Components Replacement: 手順 6、 3の画像 2 Kushlan Cement Mixer 600DDS 2014 Power Components Replacement: 手順 6、 3の画像 3
    • Use a flathead screwdriver to press the sides of the on/off switch through the opening in the electrical box.

  7. Kushlan Cement Mixer 600DDS 2014 Power Components Replacement: 手順 7、 1の画像 1
    • Remove the on/off switch.

  8. Kushlan Cement Mixer 600DDS 2014 Power Components Replacement, Remove the power cord: 手順 8、 1の画像 1
    • Use a Phillips screwdriver to remove the two screws securing the fastener behind the strain relief fitting.

  9. Kushlan Cement Mixer 600DDS 2014 Power Components Replacement: 手順 9、 2の画像 1 Kushlan Cement Mixer 600DDS 2014 Power Components Replacement: 手順 9、 2の画像 2
    • Remove the fastener.

  10. Kushlan Cement Mixer 600DDS 2014 Power Components Replacement: 手順 10、 1の画像 1
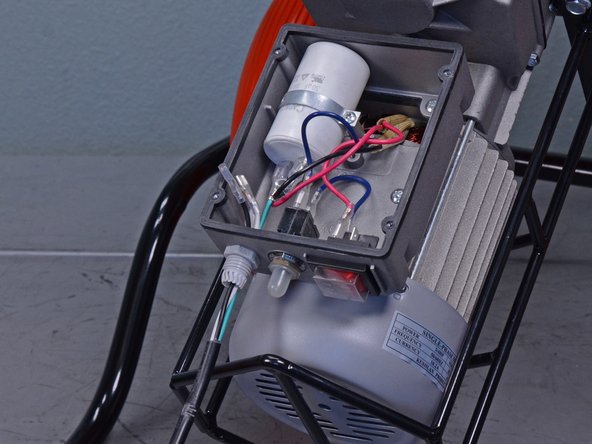
    • Use a Phillips screwdriver to remove the screw securing the green ground wire to the bottom of the electrical box.

  11. Kushlan Cement Mixer 600DDS 2014 Power Components Replacement: 手順 11、 1の画像 1
    • Use an adjustable wrench to remove the power cord's strain relief fitting cap.

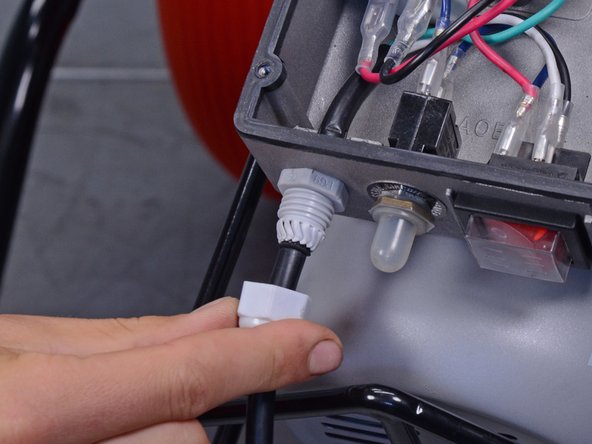
  12. Kushlan Cement Mixer 600DDS 2014 Power Components Replacement: 手順 12、 2の画像 1 Kushlan Cement Mixer 600DDS 2014 Power Components Replacement: 手順 12、 2の画像 2
    • Slide the cap off of the strain relief fitting.

  13. Kushlan Cement Mixer 600DDS 2014 Power Components Replacement: 手順 13、 3の画像 1 Kushlan Cement Mixer 600DDS 2014 Power Components Replacement: 手順 13、 3の画像 2 Kushlan Cement Mixer 600DDS 2014 Power Components Replacement: 手順 13、 3の画像 3
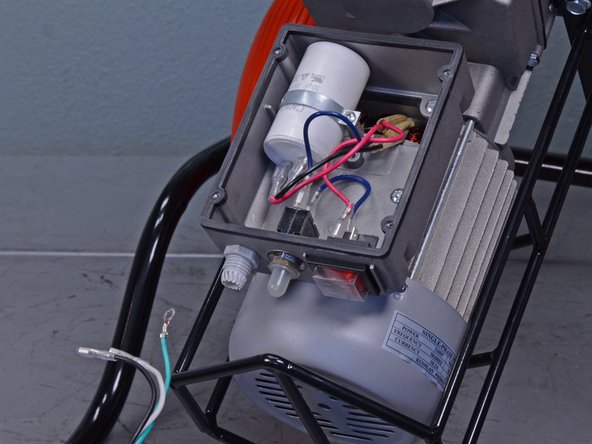
    • Feed the power cord and its black, white, and green wires out through the strain relief fitting.

    • Transfer the strain relief fitting cap onto the new power cord.

  14. Kushlan Cement Mixer 600DDS 2014 Power Components Replacement, Remove the capacitor: 手順 14、 1の画像 1
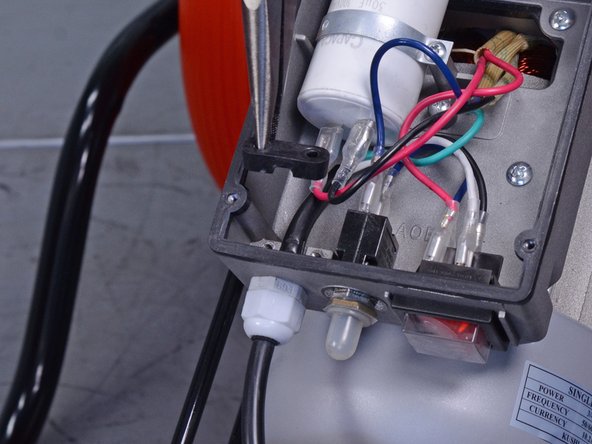
    • Use a Phillips screwdriver to remove the screw securing the capacitor support.

  15. Kushlan Cement Mixer 600DDS 2014 Power Components Replacement: 手順 15、 1の画像 1
    • Remove the capacitor support.

  16. Kushlan Cement Mixer 600DDS 2014 Power Components Replacement: 手順 16、 3の画像 1 Kushlan Cement Mixer 600DDS 2014 Power Components Replacement: 手順 16、 3の画像 2 Kushlan Cement Mixer 600DDS 2014 Power Components Replacement: 手順 16、 3の画像 3
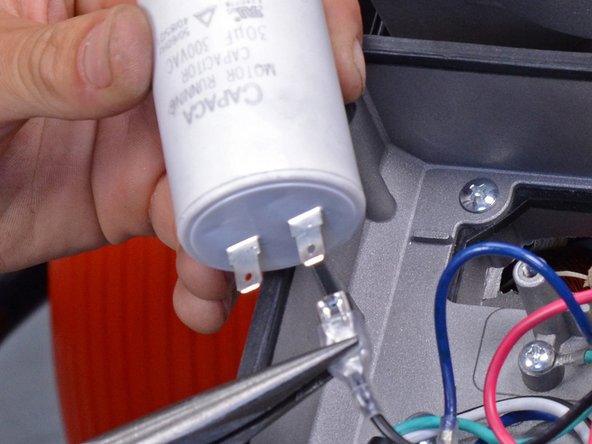
    • Use a pair of needle nose pliers to disconnect the red and black wires from the capacitor.

    • Remove the capacitor.

    • Use tape or a zip tie to differentiate this set of red and white wires from the other set of red and white wires running to the on/off switch to ensure proper reinstallation.

終わりに

To reassemble your device, follow these instructions in reverse order.

5 の人々がこのガイドを完成させました。

作成者

1人の作成者と共同作成されました。

Sam Omiotek

メンバー登録日: 02/25/19

73,134 ポイント

288のガイドは作成済み

0 件のコメント

コメントを追加

統計データ:

過去 24時間: 4

過去 7 日: 23

過去 30 日: 114

今までの合計 2,517