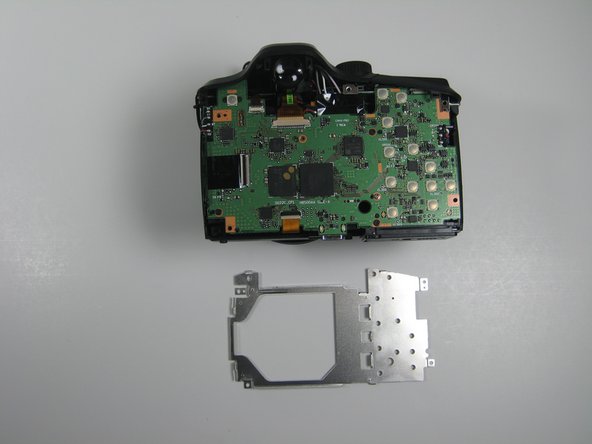
メインコンテンツにスキップ

Kodak EasyShare Z1015 IS Internal frame Replacement

必要な工具と部品

  1. Kodak EasyShare Z1015 IS Internal frame Replacement, Battery: 手順 1、 2の画像 1 Kodak EasyShare Z1015 IS Internal frame Replacement, Battery: 手順 1、 2の画像 2
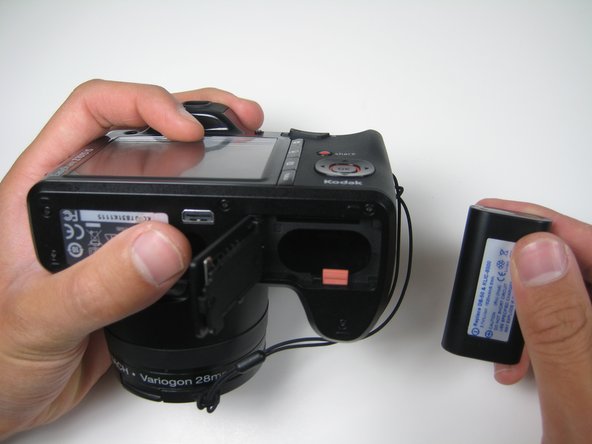
    • Begin by sliding the switch towards the open symbol. Release your finger from the switch and the battery case will pop open.

  2. Kodak EasyShare Z1015 IS Internal frame Replacement: 手順 2、 1の画像 1
    • Next, press down on the red lever which holds the battery in place.

  3. Kodak EasyShare Z1015 IS Internal frame Replacement: 手順 3、 2の画像 1 Kodak EasyShare Z1015 IS Internal frame Replacement: 手順 3、 2の画像 2
    • Once the battery has popped out of the compartment, simply pull it out of the camera.

  4. Kodak EasyShare Z1015 IS Internal frame Replacement, Back Cover: 手順 4、 3の画像 1 Kodak EasyShare Z1015 IS Internal frame Replacement, Back Cover: 手順 4、 3の画像 2 Kodak EasyShare Z1015 IS Internal frame Replacement, Back Cover: 手順 4、 3の画像 3
    • Make sure that the lens cover is on the Kodak EasyShare whenever working with one of these guides.

    • Also, make sure to keep track of the screws you remove throughout these step by step guides. Losing a screw could inhibit the ability to reassemble the camera.

    • Begin by removing the first screw located on the back of the camera.

  5. Kodak EasyShare Z1015 IS Internal frame Replacement: 手順 5、 2の画像 1 Kodak EasyShare Z1015 IS Internal frame Replacement: 手順 5、 2の画像 2
    • Next, remove the two screws located on the right side of the camera.

  6. Kodak EasyShare Z1015 IS Internal frame Replacement: 手順 6、 2の画像 1 Kodak EasyShare Z1015 IS Internal frame Replacement: 手順 6、 2の画像 2
    • After removing the screws located on the right side, remove the six screws located on the bottom of the camera.

  7. Kodak EasyShare Z1015 IS Internal frame Replacement: 手順 7、 2の画像 1 Kodak EasyShare Z1015 IS Internal frame Replacement: 手順 7、 2の画像 2
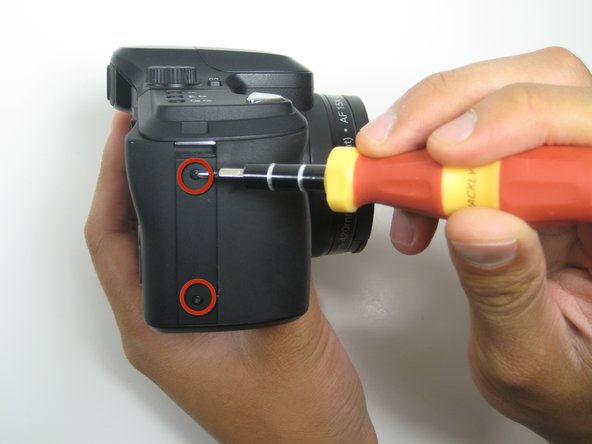
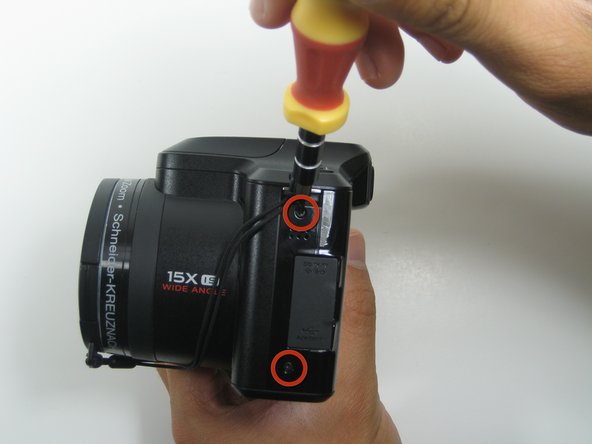
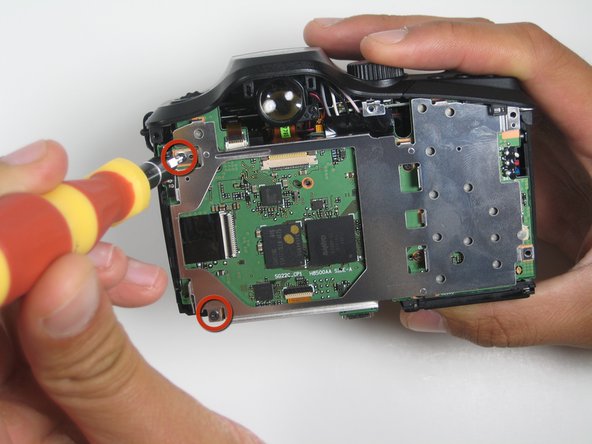
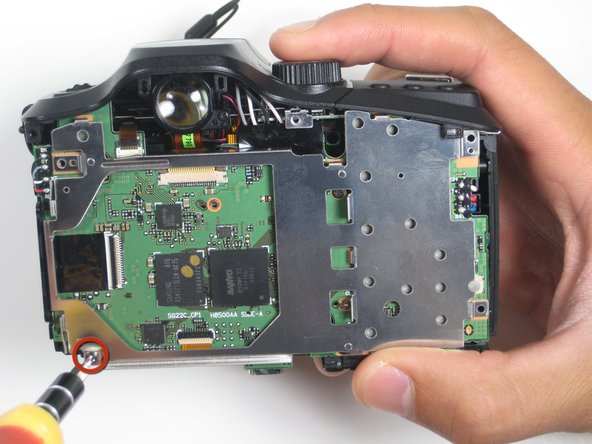
    • Lastly, remove the two screws located on the left side of the camera.

    Trés bon tuto !!! bravo

    Aprés, comment réparer les contacts des touches de selection ,

    André kremer - 返信

  8. Kodak EasyShare Z1015 IS Internal frame Replacement: 手順 8、 3の画像 1 Kodak EasyShare Z1015 IS Internal frame Replacement: 手順 8、 3の画像 2 Kodak EasyShare Z1015 IS Internal frame Replacement: 手順 8、 3の画像 3
    • Once all eleven screws have been removed, use Plastic Opening Tools to take off the back cover.

    • Insert the plastic opening tool and apply leverage on each side of the camera. The recommended spots to apply leverage are shown in these pictures.

  9. Kodak EasyShare Z1015 IS Internal frame Replacement: 手順 9、 3の画像 1 Kodak EasyShare Z1015 IS Internal frame Replacement: 手順 9、 3の画像 2 Kodak EasyShare Z1015 IS Internal frame Replacement: 手順 9、 3の画像 3
    • Apply pressure on the left and right side of the camera and pull the back cover away from the device.

    • Once the back cover has been successfully removed, you should have a total of eleven screws as well as the bottom cover separated from the camera.

  10. Kodak EasyShare Z1015 IS Internal frame Replacement, LCD: 手順 10、 2の画像 1 Kodak EasyShare Z1015 IS Internal frame Replacement, LCD: 手順 10、 2の画像 2
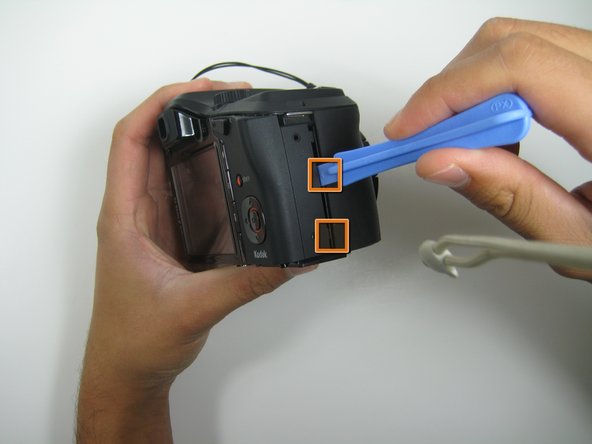
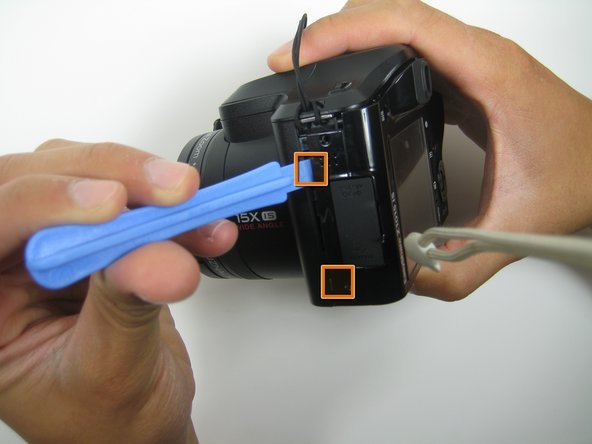
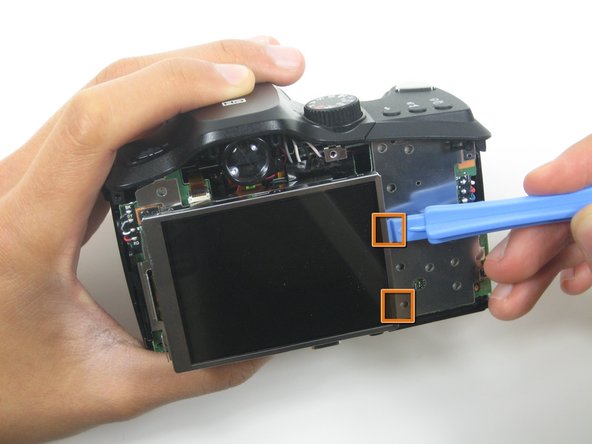
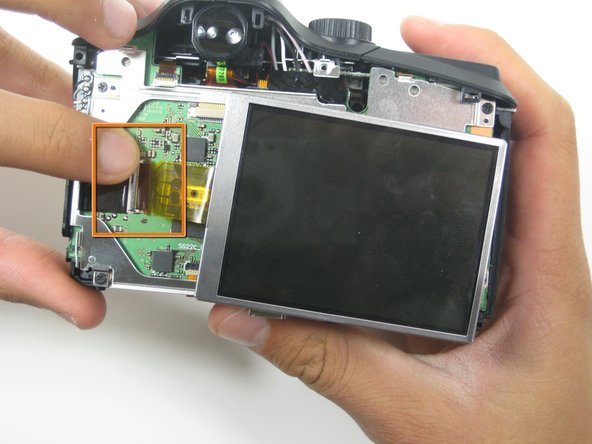
    • Begin by using Plastic Opening Tools to remove the LCD Screen from it's interior casing. To do this, place the opening tool in between the screen and casing and apply leverage to remove the screen. Do this around the rim of the casing, especially where orange squares appear in the pictures.

  11. Kodak EasyShare Z1015 IS Internal frame Replacement: 手順 11、 1の画像 1
    • Gently remove the LCD screen from it's interior casing by lifting and pulling from the right side.

    • Be incredibly cautious not to pull to hard on the screen, doing so may rip the ribbon that connects the screen to the logic board and permanently damage your camera.

  12. Kodak EasyShare Z1015 IS Internal frame Replacement: 手順 12、 3の画像 1 Kodak EasyShare Z1015 IS Internal frame Replacement: 手順 12、 3の画像 2 Kodak EasyShare Z1015 IS Internal frame Replacement: 手順 12、 3の画像 3
    • To completely remove the LCD screen from the interior of the camera, you must unhook the ribbon from the logic board.

    • To do this, simply lift up the tab connecting the ribbon to the logic board and pull gently on the LCD screen.

  13. Kodak EasyShare Z1015 IS Internal frame Replacement, Internal frame: 手順 13、 3の画像 1 Kodak EasyShare Z1015 IS Internal frame Replacement, Internal frame: 手順 13、 3の画像 2 Kodak EasyShare Z1015 IS Internal frame Replacement, Internal frame: 手順 13、 3の画像 3
    • Begin by unscrewing all four screws found in each corner of the frame

  14. Kodak EasyShare Z1015 IS Internal frame Replacement: 手順 14、 1の画像 1
    • Next, use Plastic Opening Tools to loosen the frame from the camera. Do this by placing the tool in between the frame and the camera and applying leverage.

    • Avoid placing the opening tool in between the frame and camera on the bottom side of the device. There is ribbon there that could easily be damaged if not carefully avoided.

  15. Kodak EasyShare Z1015 IS Internal frame Replacement: 手順 15、 2の画像 1 Kodak EasyShare Z1015 IS Internal frame Replacement: 手順 15、 2の画像 2
    • After loosening the frame with the opening tools, gently remove the frame from the interior of the camera.

終わりに

To reassemble your device, follow these instructions in reverse order.

2 の人々がこのガイドを完成させました。

作成者

7人の作成者と共同で作成されました。

Jack

メンバー登録日: 10/10/10

190 ポイント

3のガイドは作成済み

チーム

Cal Poly, Team 5-16, Maness Fall 2010 Cal Poly, Team 5-16, Maness Fall 2010人のメンバー

CPSU-MANESS-F10S5G16

4 メンバー

11のガイドは作成済み

コメント 1 件

I have a Kodac DX7630 and a Kodac DX4530 both with the same problem..the monitor is black.The rest functions perfectly.Cam they be repaired and will there still be parts available?

Many thanks

Denzil

Denzil Terblanche - 返信

コメントを追加

統計データ:

過去 24時間: 0

過去 7 日: 2

過去 30 日: 3

今までの合計 2,747