メインコンテンツにスキップ

Kodak EasyShare C195 LCD Screen Replacement

必要な工具と部品

  1. Kodak EasyShare C195 LCD Screen Replacement, LCD Screen: 手順 1、 3の画像 1 Kodak EasyShare C195 LCD Screen Replacement, LCD Screen: 手順 1、 3の画像 2 Kodak EasyShare C195 LCD Screen Replacement, LCD Screen: 手順 1、 3の画像 3
    • To start, remove the Philips #00 4.5 mm screws on both sides of the camera.

    • On the bottom, there are three Philips #00 4.5 mm screws. Two are for the front panel and one is for the back panel. To remove the back panel, take out the screws indicated in the final picture of the sequence.

  2. Kodak EasyShare C195 LCD Screen Replacement: 手順 2、 3の画像 1 Kodak EasyShare C195 LCD Screen Replacement: 手順 2、 3の画像 2 Kodak EasyShare C195 LCD Screen Replacement: 手順 2、 3の画像 3
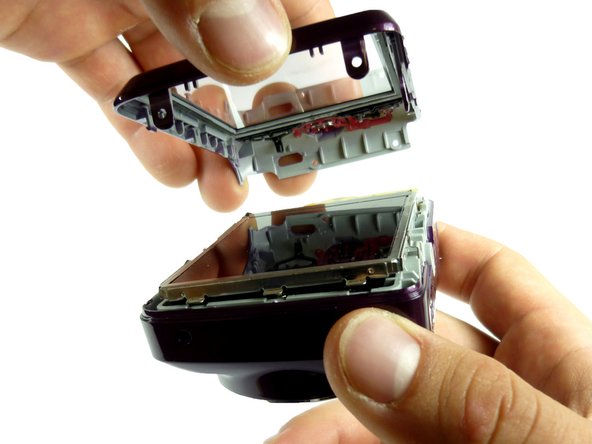
    • Once all the screws are out, remove the back panel.

    • The front panel does not need to be removed for replacing the LCD or the Lens.

    • To do this, start by removing the bottom of the panel.

  3. Kodak EasyShare C195 LCD Screen Replacement: 手順 3、 2の画像 1 Kodak EasyShare C195 LCD Screen Replacement: 手順 3、 2の画像 2
    • Once the bottom part is unhooked, unhook the top, and the whole panel should come off.

    • Be sure to gently pry the cover off.

  4. Kodak EasyShare C195 LCD Screen Replacement: 手順 4、 1の画像 1
    • In the top right hand corner of the inside of the camera, there is a Philips #00 4 mm screw that needs to be removed.

  5. Kodak EasyShare C195 LCD Screen Replacement: 手順 5、 3の画像 1 Kodak EasyShare C195 LCD Screen Replacement: 手順 5、 3の画像 2 Kodak EasyShare C195 LCD Screen Replacement: 手順 5、 3の画像 3
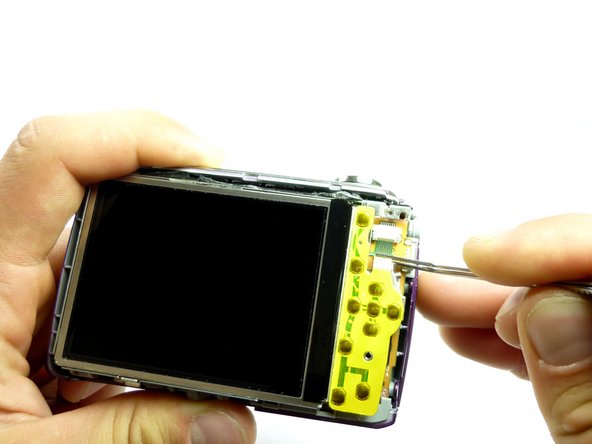
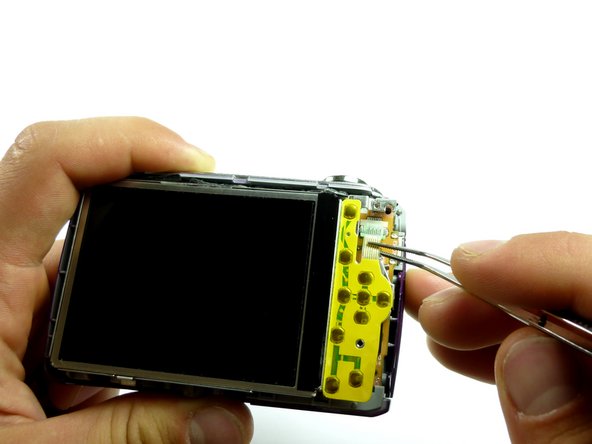
    • The next step is to remove the white ribbon on the upper right hand corner next to the LCD screen.

    • This can be done with or without tweezers.

    • The screen is still attached at the bottom, so do not take the screen off yet.

  6. Kodak EasyShare C195 LCD Screen Replacement: 手順 6、 3の画像 1 Kodak EasyShare C195 LCD Screen Replacement: 手順 6、 3の画像 2 Kodak EasyShare C195 LCD Screen Replacement: 手順 6、 3の画像 3
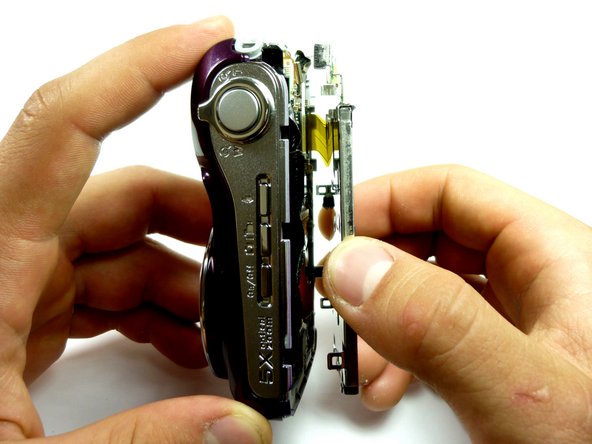
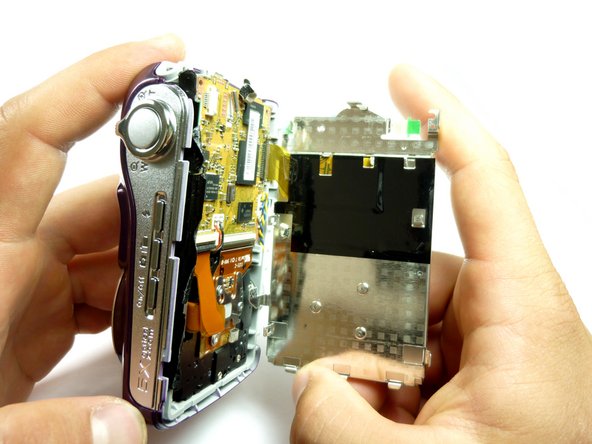
    • Carefully pry the top portion of the screen from the camera.

    • The screen is still attached to the camera via a yellow ribbon at the bottom of the camera.

  7. Kodak EasyShare C195 LCD Screen Replacement: 手順 7、 3の画像 1 Kodak EasyShare C195 LCD Screen Replacement: 手順 7、 3の画像 2 Kodak EasyShare C195 LCD Screen Replacement: 手順 7、 3の画像 3
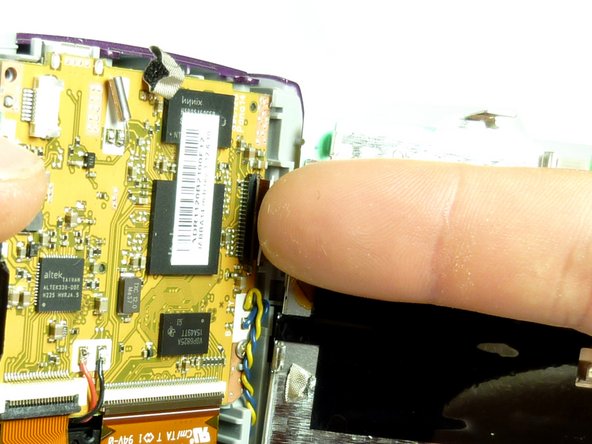
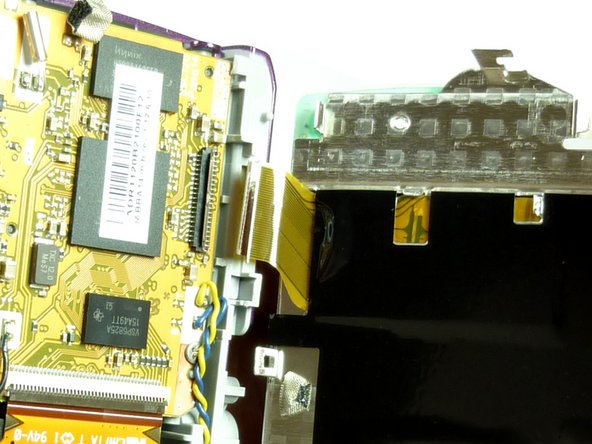
    • To remove the screen completely, push down on the rectangular tab indicated in the picture.

  8. Kodak EasyShare C195 LCD Screen Replacement: 手順 8、 2の画像 1 Kodak EasyShare C195 LCD Screen Replacement: 手順 8、 2の画像 2
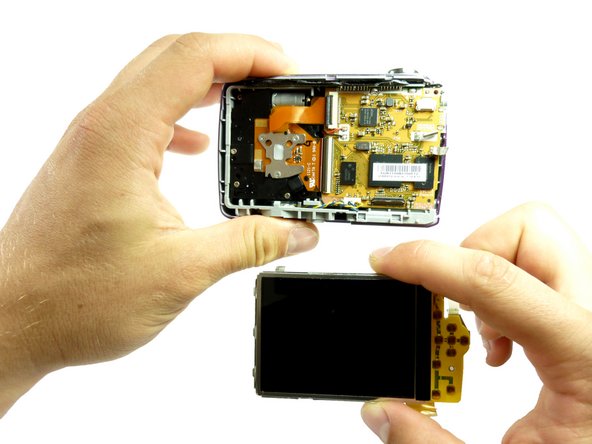
    • The LCD screen is now completely removed from the rest of the camera.

終わりに

To reassemble your device, follow these instructions in reverse order. NOTE: be sure to put the internal screws on the inside and the external screws on the outside.

4 の人々がこのガイドを完成させました。

作成者

5人の作成者と共同で作成されました。

Alyssa

メンバー登録日: 04/12/12

81 ポイント

4のガイドは作成済み

チーム

Cal Poly, Team 6-22, Amido Spring 2012 Cal Poly, Team 6-22, Amido Spring 2012人のメンバー

CPSU-AMIDO-S12S6G22

4 メンバー

8のガイドは作成済み

0 件のコメント

コメントを追加

統計データ:

過去 24時間: 0

過去 7 日: 2

過去 30 日: 7

今までの合計 2,687