メインコンテンツにスキップ

KitchenAid KHM512ER Eject Button Spring Replacement

必要な工具と部品

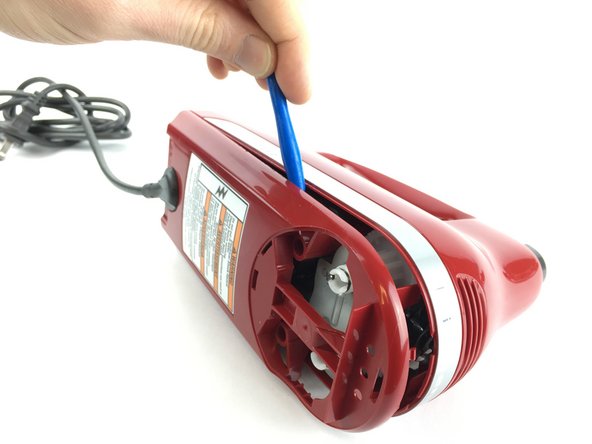
  1. KitchenAid KHM512ER Eject Button Spring Replacement, Eject Button Spring: 手順 1、 2の画像 1 KitchenAid KHM512ER Eject Button Spring Replacement, Eject Button Spring: 手順 1、 2の画像 2
    • Insert the back of a plastic opening tool into one of the beater holes.

    • Apply force to pull the circular plastic part off.

    • If necessary, use the other side of the plastic opening tool to pry the circular plastic part off.

  2. KitchenAid KHM512ER Eject Button Spring Replacement: 手順 2、 3の画像 1 KitchenAid KHM512ER Eject Button Spring Replacement: 手順 2、 3の画像 2 KitchenAid KHM512ER Eject Button Spring Replacement: 手順 2、 3の画像 3
    • Use a plastic opening tool to remove the speed knob.

    • Use a plastic opening tool to remove the long plastic piece

    • Use a plastic opening tool to remove the speed switch.

  3. KitchenAid KHM512ER Eject Button Spring Replacement: 手順 3、 2の画像 1 KitchenAid KHM512ER Eject Button Spring Replacement: 手順 3、 2の画像 2
    • Use a Phillips 2 screwdriver to remove the two 20.0mm screws holding the bottom plastic piece on.

    • Your screwdriver may not be long or narrow enough to reach the screws in these holes. If that's the case, use another screwdriver.

    • Remove the bottom plastic piece using a plastic opening tool.

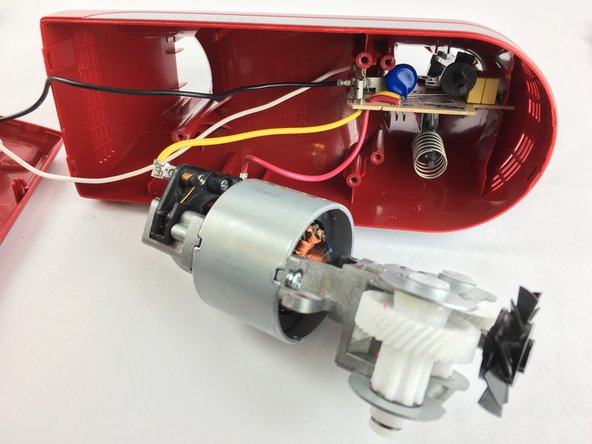
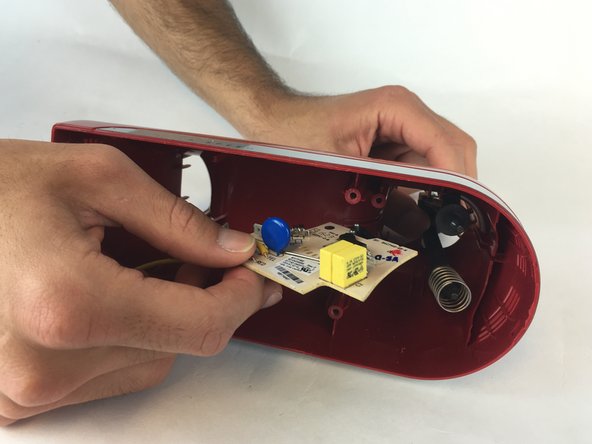
  4. KitchenAid KHM512ER Eject Button Spring Replacement: 手順 4、 3の画像 1 KitchenAid KHM512ER Eject Button Spring Replacement: 手順 4、 3の画像 2 KitchenAid KHM512ER Eject Button Spring Replacement: 手順 4、 3の画像 3
    • Using a Phillips 2 screwdriver, remove the three 20.0mm screws holding the motor assembly in place.

    • Use your hands to remove the motor assembly.

    • Use your hands to hold the eject button from one side while using the other hand to remove the circuit board.

  5. KitchenAid KHM512ER Eject Button Spring Replacement: 手順 5、 2の画像 1 KitchenAid KHM512ER Eject Button Spring Replacement: 手順 5、 2の画像 2
    • Remove the eject button by pulling it from the inside of the mixer.

    • Hold the eject button firmly while pulling out the spring.

終わりに

To reassemble your device, follow these instructions in reverse order.

2 の人々がこのガイドを完成させました。

作成者

4人の作成者と共同で作成されました。

Yuriy Zaynulin

メンバー登録日: 02/10/16

191 ポイント

1ガイドが承認済み

チーム

USF Tampa, Team 2-3, Sullivan Spring 2016 USF Tampa, Team 2-3, Sullivan Spring 2016人のメンバー

USFT-SULLIVAN-S16S2G3

3 メンバー

4のガイドは作成済み

0 件のコメント

コメントを追加

統計データ:

過去 24時間: 2

過去 7 日: 13

過去 30 日: 21

今までの合計 1,587