メインコンテンツにスキップ

Kindle Voyage Ambient Light Sensor Replacement

必要な工具と部品

  1. Kindle Voyage Ambient Light Sensor Replacement, Back Panel: 手順 1、 2の画像 1 Kindle Voyage Ambient Light Sensor Replacement, Back Panel: 手順 1、 2の画像 2
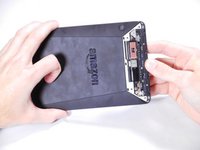
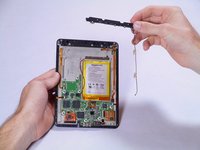
    • Insert a plastic opening tool between the plastic panel shown on the device.

    • Use the tool to pry the plastic away from the device.

    • There will be adhesive holding this piece of plastic to the device. You may have to pull pretty hard to get it separated.

  2. Kindle Voyage Ambient Light Sensor Replacement: 手順 2、 1の画像 1
    • Use an aluminum driver attached with a Phillips head size #00 to remove the four 3mm screws shown in the picture. For reassembly, note that the top two and bottom two screws are different sizes.

  3. Kindle Voyage Ambient Light Sensor Replacement: 手順 3、 3の画像 1 Kindle Voyage Ambient Light Sensor Replacement: 手順 3、 3の画像 2 Kindle Voyage Ambient Light Sensor Replacement: 手順 3、 3の画像 3
    • Once the screws are removed, the back panel can slide off the device.

  4. Kindle Voyage Ambient Light Sensor Replacement: 手順 4、 2の画像 1 Kindle Voyage Ambient Light Sensor Replacement: 手順 4、 2の画像 2
    • Remove the magnetic component with the magnetic head of the aluminum driver.

  5. Kindle Voyage Ambient Light Sensor Replacement, Wifi Antenna: 手順 5、 2の画像 1 Kindle Voyage Ambient Light Sensor Replacement, Wifi Antenna: 手順 5、 2の画像 2
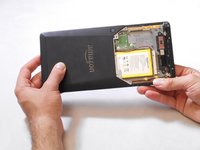
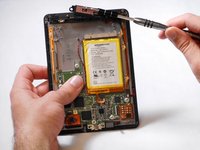
    • Use an aluminum driver with Phillips head #00 to remove the four 3 mm screws shown in the picture.

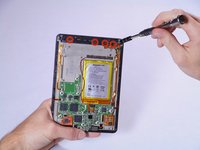
    • Use the same driver to remove the two 2.5 mm screws.

  6. Kindle Voyage Ambient Light Sensor Replacement: 手順 6、 3の画像 1 Kindle Voyage Ambient Light Sensor Replacement: 手順 6、 3の画像 2 Kindle Voyage Ambient Light Sensor Replacement: 手順 6、 3の画像 3
    • Using the tweezers, undo the attached clip.

    • Remove the three 3 mm screws holding down the rest of the antenna with an aluminum driver and the Phillips #00 head.

    • You should now be able to simply take the WiFi bar off of the device.

  7. Kindle Voyage Ambient Light Sensor Replacement, Ambient Light Sensor: 手順 7、 2の画像 1 Kindle Voyage Ambient Light Sensor Replacement, Ambient Light Sensor: 手順 7、 2の画像 2
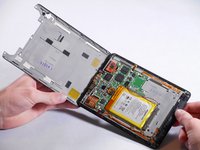
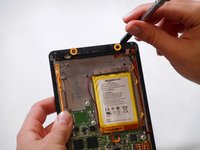
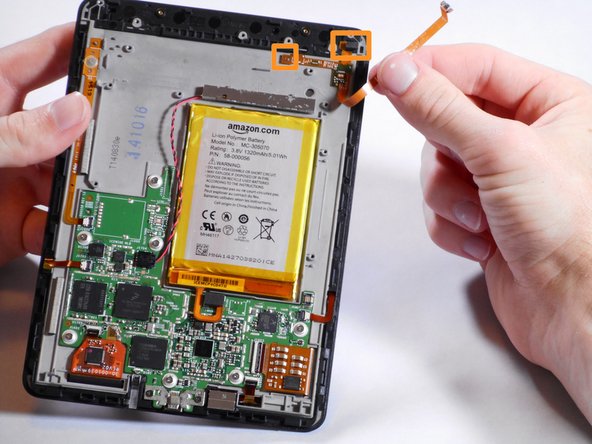
    • Gently remove the connector to the motherboard using tweezers.

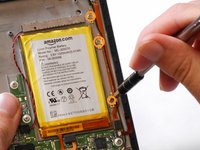
    • Continue to carefully pull the rest of the connector from the adhesive connecting it to the Voyage.

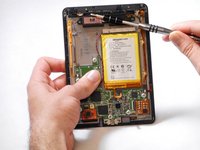
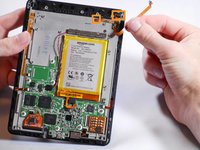
    • Detach sensor from the top using fingers

終わりに

To reassemble your device, follow these instructions in reverse order.

ある他の人がこのガイドを完成しました。

作成者

4人の作成者と共同で作成されました。

Sean Yap

メンバー登録日: 01/22/15

1,253 ポイント

6のガイドは作成済み

チーム

Cal Poly, Team 19-12, Maness Winter 2015 Cal Poly, Team 19-12, Maness Winter 2015人のメンバー

CPSU-MANESS-W15S19G12

5 メンバー

8のガイドは作成済み

コメント 1 件

If i do this wiithout putting the lightsensor back on, can i then use the kindle without light ?

Best regards

Lasse

Beck - 返信

コメントを追加

統計データ:

過去 24時間: 0

過去 7 日: 2

過去 30 日: 9

今までの合計 2,278