はじめに
Amazon Kindle Fireの破損した電源ボタンボードを交換するには、このガイドを参照してください。
必要な工具と部品
-
-
プラスチックの開口ツールをKindle Fireの右下コーナーに差し込みます。
-
ケースをこじ開け、Kindle Fire周囲に沿ってプラスチック製の開口ツールをスライドして、ケースを固定しているクリップを外します。
-
Kindle Fire本体の上側から本体下側をこじ開けると作業がしやすいです。(横から外す) 2つを引き離さずに2つに分けようとする力をかけすぎると、内側のタブにダメージを与えてしまう可能性があります。
-
-
-
プラスチックのクリップを外したら、Kindle Fireからバックケースを両側に引っ張り、外します。
-
-
-
左側バッテリーセルを外すには、前の手順を繰り返します。
The CPU got extremely hot and just now getting repaired 5 days or so
I can't get the battery to charge
-
-
-
-
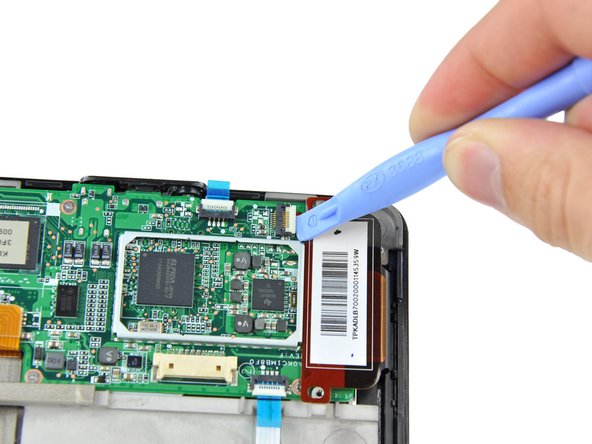
タッチスクリーンコントローラーから2.3mm #00プラスネジを外します。
-
プラスチックの開口ツールを使って、タッチスクリーンコントローラーのコネクタを外します。
-
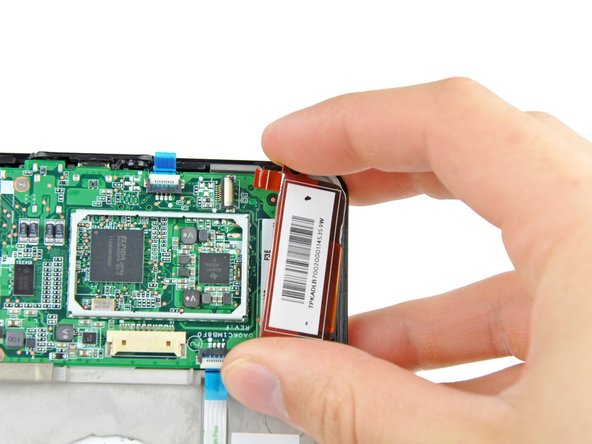
タッチスクリーンコントロラーを持ち上げて、右側にスライドしながら、取り出します。
-
-
-
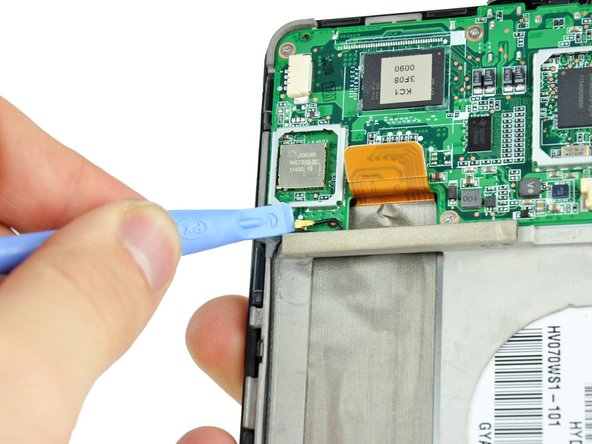
プラスチックの開口ツールを使って、電源ボタンのZIFコネクタを持ち上げます。
-
環境光センサーのZIFソケットをプラスチックで持ち上げます。
-
ピンセットを使って、環境光センサーのケーブル上にあるブルーのタブを引き抜いて、ソケットから取り出します。
Make sure to mark what ZIF connector goes where, they are not interchangeable even though a first glance the appear to be the same size
It took about 2 hours, but that is, mainly, because reconnecting the ZIF connectors can be overly tedios.
I cannot get the zif connectors to go back in ..what can i do...been trying for hours to get them back in...im talking bout the white flip pieces that lock in film..some one please help me with this!!
Stand it up on its end, lining up the holes to the wires. Slide into holes and 'flip'/rotate white plastic piece down into a flat position.
-
-
-
プラスチックの開口ツールを使って、ディスプレイデータケーブルを持ち上げて、接続を外します。
-
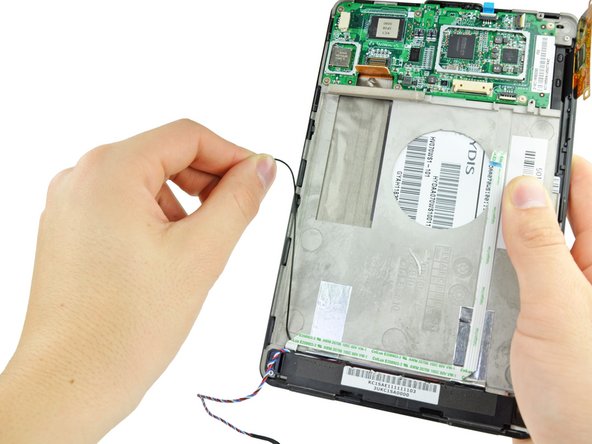
プラスチックの開口ツールを使って、アンテナコネクタを持ち上げて、接続を外します。
-
アンテナケーブルを解きます。
Be very careful when disconnecting the antenna, and be sure to note how the cable is routed into the little socket on the motherboard. The reconnecting of the antenna cable into its motherboard port can be tricky and will require patience, persistence and perhaps a magnifier and tweezers.
Jeff Jones - 返信
Followed the steps but once reassembled the screen comes on but doesn't respond to touch. It was working fine even with broken glass screen. Any suggestions?
John Moore - 返信
Mine is doing the same thing! What did you do to fix it?
Tara -
I order a replacement motherboard from ifixit and for some reason it had a plastic increasing around the outer edge of the "display data cable connection port" on the motherboard, which makes it impossible to connect the cable to the motherboard. I called ifixit and they said send a picture and a description. Hopefully the customer who owns the kindle fire will understand that after waiting on the part for a week. :\
-
-
-
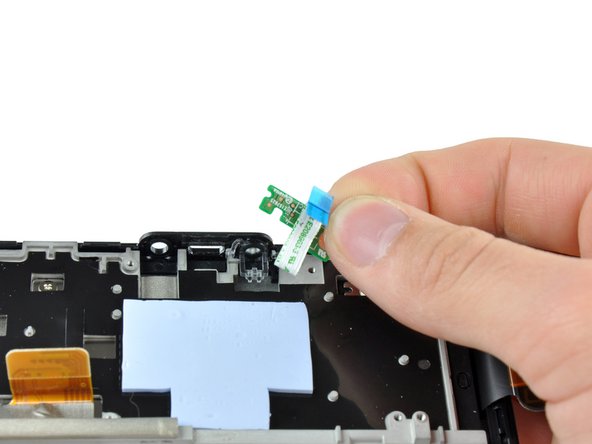
Kindle Fireに電源ボタンボードを固定している、2.5mm #00 プラスネジを外します。
-
電源ボタンボードをKindle Fireから持ち上げて取り出します。
-


デバイスを再組立する際は、これらのインストラクションを逆の順番に従って作業を進めてください。
デバイスを再組立する際は、これらのインストラクションを逆の順番に従って作業を進めてください。
18 の人々がこのガイドを完成させました。
以下の翻訳者の皆さんにお礼を申し上げます:
100%

Midori Doiさんは世界中で修理する私たちを助けてくれています! あなたも貢献してみませんか?
翻訳を始める ›

コメント 1 件
This PCB does not contain the power button, only the power LED. The button is located on the main PCB next to the USB port.
jcross1986 - 返信
Where can I buy a battery for my kindle fire
nannyto2 - 返信
Try EBay or Amazon. make sure you get the right battery for your Kindle , one is for a Kindle HD and the older version........both are 7 ".
vvenona1954 - 返信
Remember to remove any sd card first!!! Snapped mine in half.
lucy_lady_bug - 返信
I have the first kindle that came out and it doesn't have the same setup how can I open the back of my kindle?
Kris Sanders - 返信