メインコンテンツにスキップ

Kindle Fire HD 8.9" Display Assembly Replacement

必要な工具と部品

  1. Kindle Fire HD 8.9" Display Assembly Replacement, Screen: 手順 1、 3の画像 1 Kindle Fire HD 8.9" Display Assembly Replacement, Screen: 手順 1、 3の画像 2 Kindle Fire HD 8.9" Display Assembly Replacement, Screen: 手順 1、 3の画像 3
    • Remove the SIM card tray (if present in your model).

    • Insert a large plastic opening tool next to the Kindle's headphone jack.

    • Make sure the notch on the plastic opening tool is facing the back of the Kindle.

    • Move the plastic opening tool evenly around the Kindle, separating the two halves.

    • Be careful not to completely separate the rear cover. There are two delicate flex cables that connect the display assembly to the motherboard.

  2. Kindle Fire HD 8.9" Display Assembly Replacement: 手順 2、 1の画像 1
    • Set the Kindle down on the rear case.

    • Holding the display assembly near the camera, carefully open the display assembly up to about 90 degrees from the rear case.

    • These images show the Kindle laying flat. In order to prevent damage to the flex cables, keep the Kindle open at 90 degrees while disconnecting the display assembly.

  3. Kindle Fire HD 8.9" Display Assembly Replacement: 手順 3、 3の画像 1 Kindle Fire HD 8.9" Display Assembly Replacement: 手順 3、 3の画像 2 Kindle Fire HD 8.9" Display Assembly Replacement: 手順 3、 3の画像 3
    • Lift the retaining flap on the ZIF connector of the upper flex cable.

    • Gently pull the cable out of its socket.

    • This flex cable is delicate. Be careful not to crease or bend it while working.

  4. Kindle Fire HD 8.9" Display Assembly Replacement: 手順 4、 2の画像 1 Kindle Fire HD 8.9" Display Assembly Replacement: 手順 4、 2の画像 2
    • Lift the retaining flap on the ZIF connector of the lower flex cable.

    • Gently pull the flex cable from its socket.

    • This flex cable is delicate. Be careful not to crease or bend it while working.

  5. Kindle Fire HD 8.9" Display Assembly Replacement: 手順 5、 1の画像 1
    • Separate the display assembly from the rest of the device.

    • When reassembling the device, align the two halves of the case before connecting the flex cables.

終わりに

To reassemble your device, follow these steps in reverse order.

60 の人々がこのガイドを完成させました。

作成者

19人の作成者と共同で作成されました。

Jesus Perez

メンバー登録日: 01/11/13

1,007 ポイント

2のガイドは作成済み

チーム

Cal Poly, Team 5-16, Forte Winter 2013 Cal Poly, Team 5-16, Forte Winter 2013人のメンバー

CPSU-FORTE-W13S5G16

5 メンバー

14のガイドは作成済み

21 件のコメント

Where are the rest of the instructions???? I now have a disassembled Kindle and no idea how to install the new screen!

Lisa Comer - 返信

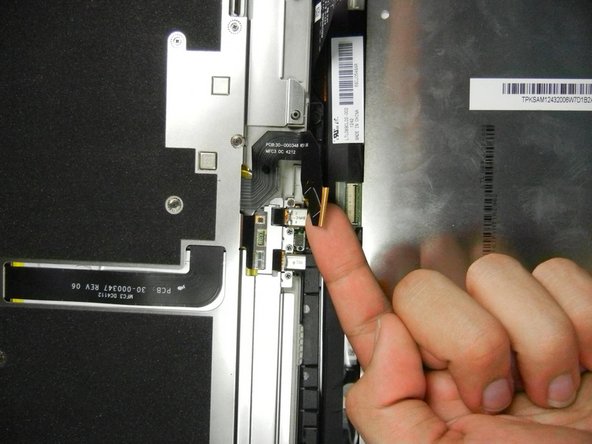
At the end of every iFixit guide, next to the "I did it! Success!" button, there is a message that says "To reassemble your kindle, follow these steps in reverse order." However in some cases, there will be a slightly different message. In the case of this guide, the message says "To reassemble your kindle, follow these steps in reverse order. Just make sure that you successfully connect the two flex cables to each half of your kindle and that you then align the two halves on the side opposite the camera before reassembling it."

Ian Meeder -

I think Lisa is asking for instructions concerning LCD display unmount. I got the same issue

Marlon - 返信

How do you put the screen on??????

Ally - 返信

while you are at it, try replacing the battery for a better experience.

I did, checkout this battery for kindle here :

http://bestbattery.biz/Amazon/219010-Kin...

Kermit45 - 返信

コメントを追加

統計データ:

過去 24時間: 1

過去 7 日: 4

過去 30 日: 14

今までの合計 43,676