はじめに
このガイドを参照して、Kindle Fire HD 6からバッテリーを取り出します。またマザーボードにアクセスするためにバッテリーを取り外すこともあります。
必要な工具と部品
-
-
デバイス前面を裏返して、柔らかい布などの上に置きます。
-
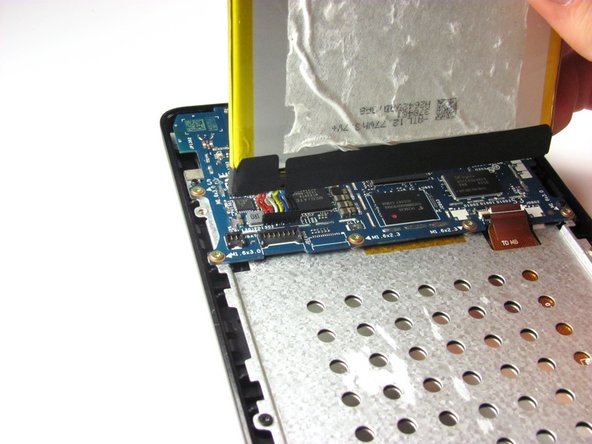
プラスチックの開口ツールをデバイスのフロントと背面パネルの間に差し込みます。隙間にツールを入れるには左右に少しずつ揺らしながら下ろしてください。
-
デバイス周辺をツールで少しずつ動かしながら、フロントパネルからクリップを外します。
-
-
-
-
バッテリーとマザーボードを繋いでいるマルチカラーのコネクタをまっすぐ引き抜いて外します。
-
バッテリーを取り出します。
What if the connector on the motherboard to the battery got damaged in the process of removing the battery?
-


このデバイスを再組み立てするには、インストラクションを逆の順番に従って作業を進めてください。
このデバイスを再組み立てするには、インストラクションを逆の順番に従って作業を進めてください。
18 の人々がこのガイドを完成させました。
以下の翻訳者の皆さんにお礼を申し上げます:
100%

Midori Doiさんは世界中で修理する私たちを助けてくれています! あなたも貢献してみませんか?
翻訳を始める ›
チーム

Cal Poly, Team 70-4, Forte Winter 2015 Cal Poly, Team 70-4, Forte Winter 2015人のメンバー
CPSU-FORTE-W15S70G4
4 メンバー
12のガイドは作成済み
2 件のコメント
Thank you it worked for me.
A bit nervous breaking it down, once I got the back plate off it was very simple, unplugged the battery, reconnected put it back together fired it up , great advice.
Thanks again
Regards
Terry
terry pils - 返信
The battery removal step did not sufficiently warn about how hard the adhesive used for the battery was, and using the spudger ended up piercing the battery when I tried to pry the battery off.
I wasn't sure that I would be able to fix my kindle. I did purchase another kindle, which was alright. I wanted a second kindle so with the purchase and my old one know fixed I am really glad. I feel if I have any future problems I will be able to fix it myself.
RUBY PEOPLES - 返信
i had a battery that wouldn't even last a full day in the end. by accident i let the battery fall below 10% charge and when turned on it only showed the battery icon. I fully charged it and now i am having no problems with it. what i think happened is it reset the batteries memory and that was the problem. worth trying anyway before buying a new battery.
soupamanx - 返信