必要な工具と部品
-
-
Open up the device by using a plastic opening tool in order to avoid damaging the device.
-
To do so, find the seam along the outer edge of the device and use the plastic tool to pry the back panel up. Doing so may take some force and patience.
-
-
-
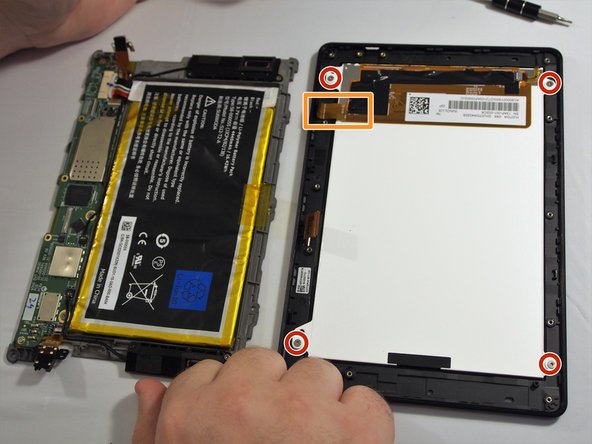
Before we can reach the screen, we must remove the plate that holds the rest of the components.
-
To do so, locate and remove the (10) 3mm T4 Torx screws highlighted.
-
There are also two ribbons connected the main device to the screen. To remove these, follow the ribbon to where they connect and use the spudger or a finger nail to lift the tab. Once open, gently pull the ribbon out.
-
-
-
-
Once the screws and ribbons are removed, use the nylon spudger to gently remove the plate holding the rest of the components and set to the side.
-
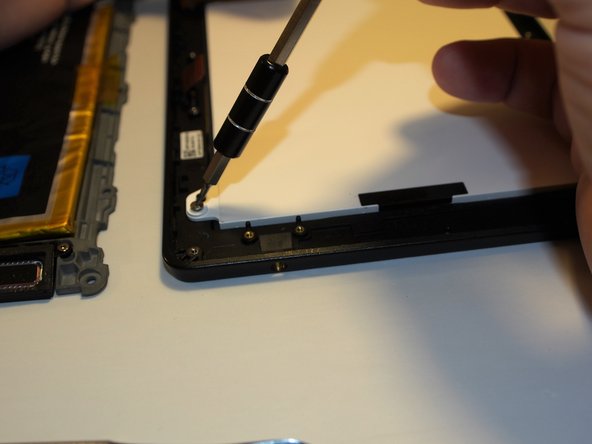
Once the plate has been removed, located the (4) 3mm T4 Torx screws and remove them.
-
There is a single ribbon here that has to be removed as well. Follow the ribbon to where it connects. Gently lift the tab using the spudger or a fingernail. Once the tab is open, gently pull the ribbon out and away.
-


To reassemble your device, follow these instructions in reverse order.
To reassemble your device, follow these instructions in reverse order.
7 の人々がこのガイドを完成させました。
チーム

USF Tampa, Team 2-3, Sullivan Fall 2016 USF Tampa, Team 2-3, Sullivan Fall 2016人のメンバー
USFT-SULLIVAN-F16S2G3
4 メンバー
6のガイドは作成済み
コメント 1 件
HI CAN U HELP WHERE TO BUY THE LCD AND DIGITIZER FOR THIS MODEL THANK YOU PLS EMAIL me
robert.vanderas@gmail.com