この翻訳は、ソースガイドの最新の更新を反映していない可能性があります。 翻訳の更新に協力してください。 または ソースガイドを参照してください。
必要な工具と部品


デバイスを再組み立てする際は、これらの手順を逆の順番に従って作業を進めてください。
デバイスを再組み立てする際は、これらの手順を逆の順番に従って作業を進めてください。
7 の人々がこのガイドを完成させました。
以下の翻訳者の皆さんにお礼を申し上げます:
77%

Midori Doiさんは世界中で修理する私たちを助けてくれています! あなたも貢献してみませんか?
翻訳を始める ›
チーム

Embry-Riddle Aeronautical University, Team S1-G5, Watkins Fall 2019 Embry-Riddle Aeronautical University, Team S1-G5, Watkins Fall 2019人のメンバー
ERAU-WATKINS-F19S1G5
4 メンバー
10のガイドは作成済み
8 件のコメント
I just completed this tutorial. I feel it is missing some important steps/tips.
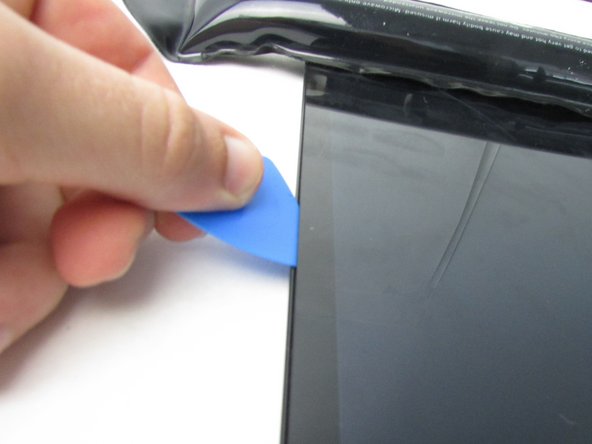
STEP 1 - Pry open using a plastic pry tool. Do not be afraid to use a little force after you have gone around the edges since there are plastic clips in the middle of the back panel. DO NOT insert any pry tools deep inside to pry it open. You could damage some wiring or the motherboard itself. Just use your hand and don’t try to go to fast.
STEPS 2 is good
STEP 3 - DO NOT use a metal tools at any time during this step. Use a small plastic pry tool to lift up the BACK part of the ZIF connector until it is vertical. It should not take much force at all. Do not try to pull the flex out prior to this step or you will damage the flex and/or the socket. once the ZIF socket is unlocked (vertical), you should be able to pull the display flex out by hand - NO BIG OR FAST MOVEMENTS.
STEP 4 - if using heat gun, use low heat and heat evenly. heat up the flex a little before transferring.
STEP 5 - I used 2 sided tape to replace the stock adhesive
Never mind gorilla glass -- Amazon used gorilla glue all around the screen/digitizer. In an hour of alternate heatgun, razor, and pry tool work, I got one corner and about 10cm of one edge free. An Amazon-refurbished tablet goes for $60-$75; unless you value your time (and curses) very little, I can't recommend this project.
Where are the steps to actually replace the screen? I only see the steps to remove the screen