メインコンテンツにスキップ

Kindle 3 Keyboard Replacement

アーカイブされたガイド
このガイドは将来的な使用のためにのみ保存されてます。ご自身の修理作業には更新バージョンをご利用ください。

必要な工具と部品

  1. Kindle 3 Keyboard Replacement, Keyboard: 手順 1、 1の画像 1
    • Insert a plastic opening tool into the seam between the back and front of the Kindle 3 (as indicated in the photograph).

    • If you have difficulty inserting the plastic opening tool, run the flat edge of the instrument along the seam to find a gap.

    • Using the plastic opening tool, lift the back cover of the device.

    • Remove the back cover.

  2. Kindle 3 Keyboard Replacement: 手順 2、 3の画像 1 Kindle 3 Keyboard Replacement: 手順 2、 3の画像 2 Kindle 3 Keyboard Replacement: 手順 2、 3の画像 3
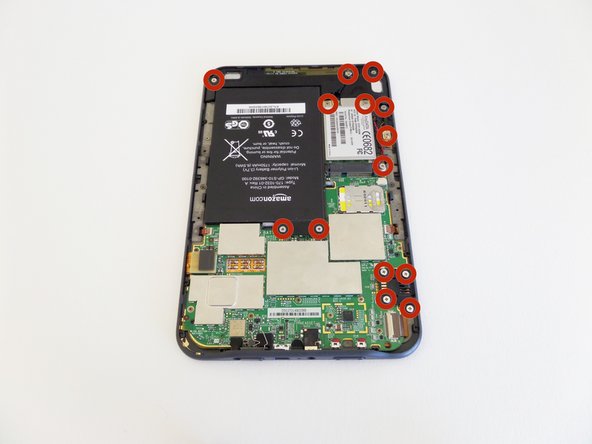
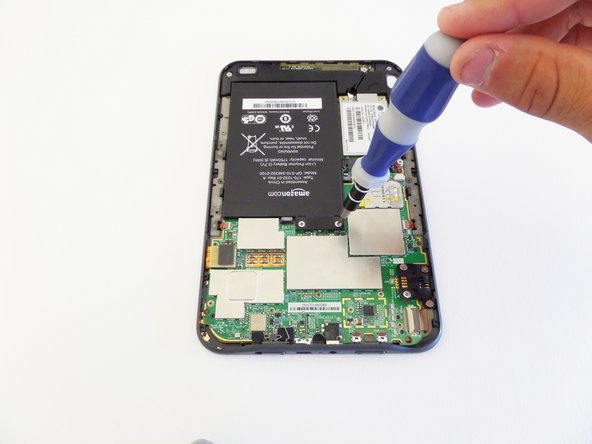
    • Using a Phillips #00 screwdriver, remove the 14 silver screws (4mm) that secure the components within the housing.

  3. Kindle 3 Keyboard Replacement: 手順 3、 1の画像 1
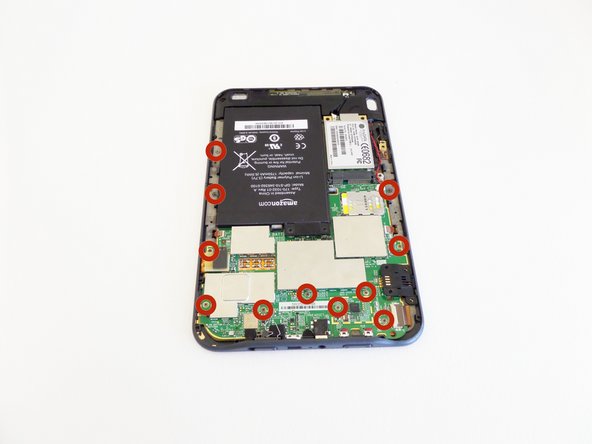
    • Using the screwdriver, remove the 11 gray screws (4mm) that secure the motherboard to the housing.

  4. Kindle 3 Keyboard Replacement: 手順 4、 1の画像 1
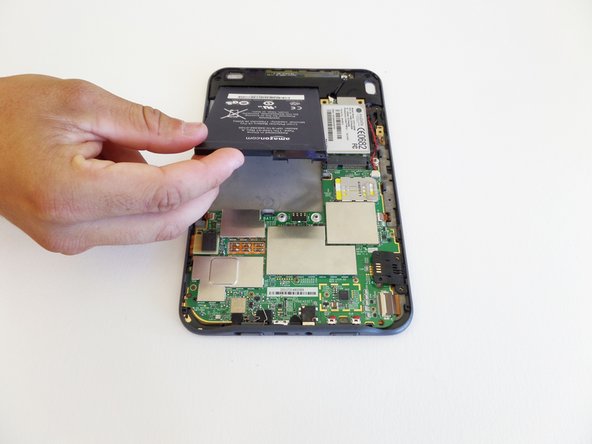
    • Remove the battery, starting from the side that was secured by the screws.

  5. Kindle 3 Keyboard Replacement: 手順 5、 3の画像 1 Kindle 3 Keyboard Replacement: 手順 5、 3の画像 2 Kindle 3 Keyboard Replacement: 手順 5、 3の画像 3
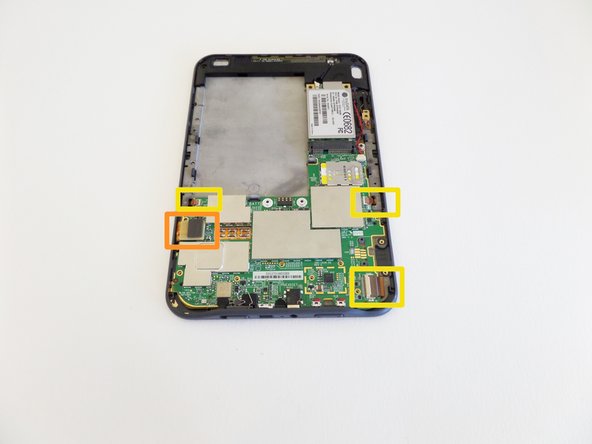
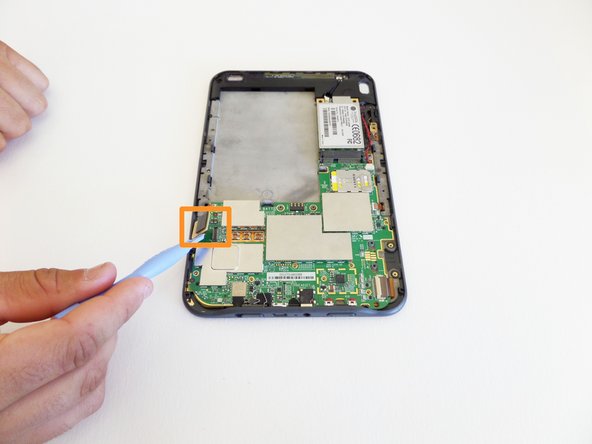
    • Using the plastic opening tool, carefully lift the ribbon cable to disconnect it from the motherboard.

    • Latches secure the three remaining ribbon cables to the motherboard.

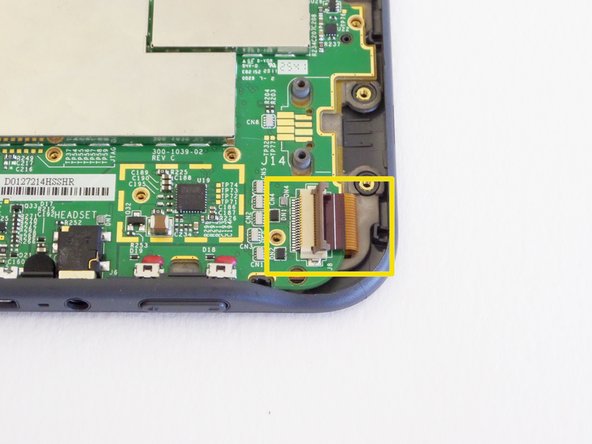
    • To disconnect the latched ribbon cable, open the latch and gently slide out the cable.

    • The rightmost photograph shows the ribbon cable with an open latch.

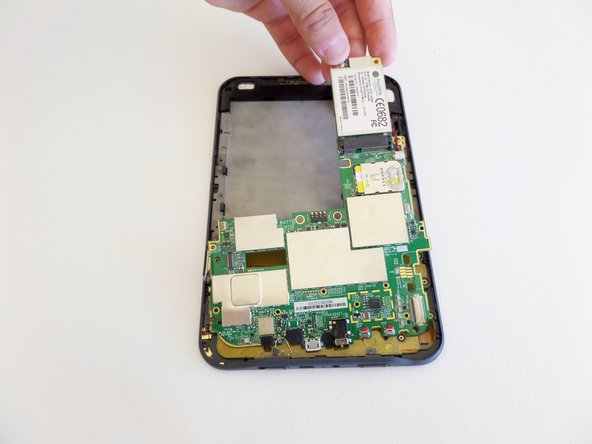
  6. Kindle 3 Keyboard Replacement, Remove the 3G card: 手順 6、 1の画像 1
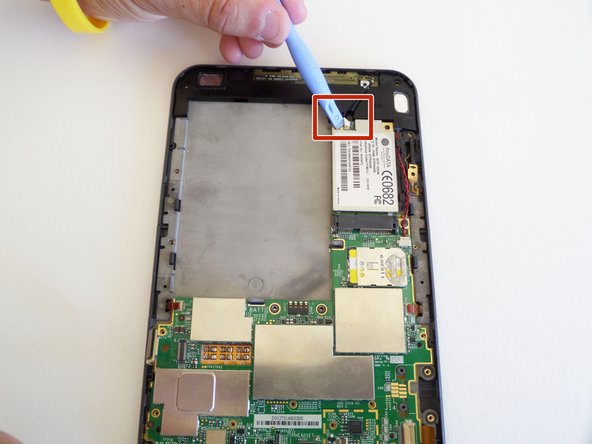
    • Insert the plastic opening tool underneath the silver-headed black cable and gently disconnect the cable from the motherboard.

  7. Kindle 3 Keyboard Replacement: 手順 7、 2の画像 1 Kindle 3 Keyboard Replacement: 手順 7、 2の画像 2
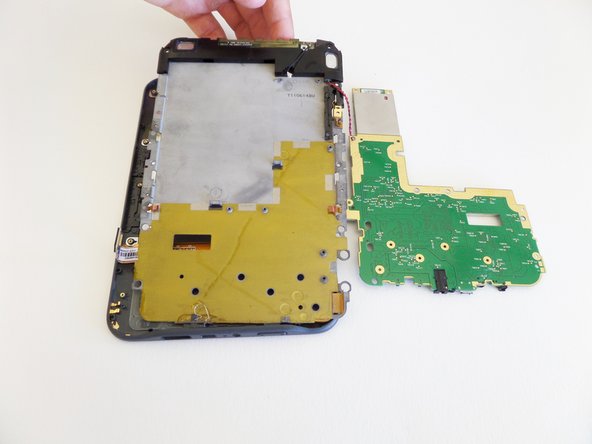
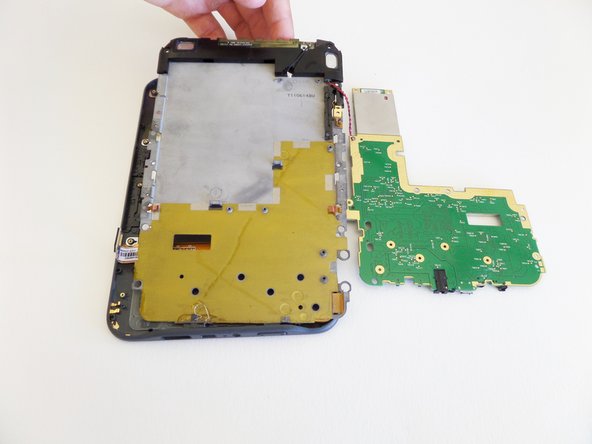
    • The motherboard is connected to the device by a red-and-black twisted pair cable. Do not detach the cable.

    • There are 3 spacers. Two of them are where the two screws attaching the battery were. The third is to the bottom right of the silver motherboard unit. Take care not to lose these spacers when moving the motherboard.

    • With the cable still attached, flip over the motherboard.

    • The silver motherboard unit with a serial number may fall out. If this occurs, slide the unit back into place.

  8. Kindle 3 Keyboard Replacement: 手順 8、 1の画像 1
    • Remove the gray and gold plates from the housing.

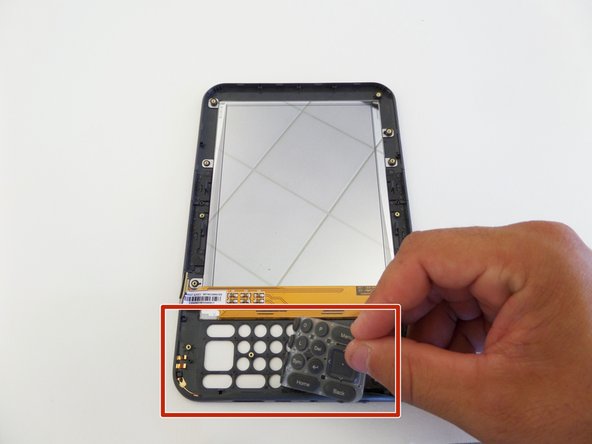
  9. Kindle 3 Keyboard Replacement: 手順 9、 1の画像 1
    • Replace the damaged keyboard.

    • When reassembling the Kindle 3, test the power switch to make sure it moves freely.

    • When reassembling the device, do not mix up the gray and silver screw slots.

終わりに

To reassemble your device, follow these instructions in reverse order.

作成者

1人の作成者と共同作成されました。

James Gauger

メンバー登録日: 09/08/14

554 ポイント

2のガイドは作成済み

チーム

CSU Fullerton, Team 1-5, Bruce Fall 2014 CSU Fullerton, Team 1-5, Bruce Fall 2014人のメンバー

CSUF-BRUCE-F14S1G5

4 メンバー

7のガイドは作成済み

0 件のコメント

コメントを追加

統計データ:

過去 24時間: 0

過去 7 日: 0

過去 30 日: 0

今までの合計 22