メインコンテンツにスキップ

Kidzlane Walkie-Talkie Power Button Replacement

必要な工具と部品

  1. Kidzlane Walkie-Talkie Power Button Replacement, Power Button: 手順 1、 2の画像 1 Kidzlane Walkie-Talkie Power Button Replacement, Power Button: 手順 1、 2の画像 2
    • Use a screwdriver to remove the four pictured 4mm screws.

  2. Kidzlane Walkie-Talkie Power Button Replacement: 手順 2、 1の画像 1
    • Slowly separate the cases of the device. Try not to damage the wires connecting the two pieces.

    • Keep the two pieces away from each other so you can follow the next step accordingly.

  3. Kidzlane Walkie-Talkie Power Button Replacement: 手順 3、 2の画像 1 Kidzlane Walkie-Talkie Power Button Replacement: 手順 3、 2の画像 2
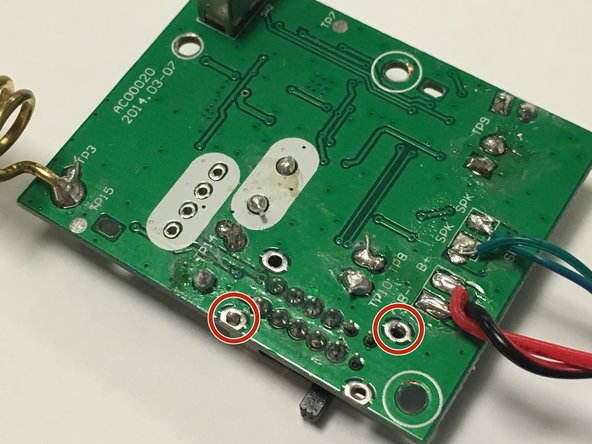
    • Use the soldering iron to remove the broken switch.

    • Push down on the metal locks to separate the switch from the motherboard.

終わりに

To reassemble your device, follow these instructions in reverse order.

2 の人々がこのガイドを完成させました。

作成者

5人の作成者と共同で作成されました。

Amin

メンバー登録日: 02/13/16

642 ポイント

5のガイドは作成済み

チーム

IUPUI, Team 1-1, Wilson Spring 2016 IUPUI, Team 1-1, Wilson Spring 2016人のメンバー

IUPUI-WILSON-S16S1G1

4 メンバー

5のガイドは作成済み

0 件のコメント

コメントを追加

統計データ:

過去 24時間: 0

過去 7 日: 3

過去 30 日: 9

今までの合計 550