メインコンテンツにスキップ

Keurig K70 Top Needle Replacement

必要な工具と部品

  1. Keurig K70 Top  Needle Replacement, Handle: 手順 1、 2の画像 1 Keurig K70 Top  Needle Replacement, Handle: 手順 1、 2の画像 2
    • Locate the handle on top of the unit

    • Locate the two Torx head screws on the underside of the handle. Remove them with a T15 screwdriver

  2. Keurig K70 Top  Needle Replacement: 手順 2、 3の画像 1 Keurig K70 Top  Needle Replacement: 手順 2、 3の画像 2 Keurig K70 Top  Needle Replacement: 手順 2、 3の画像 3
    • Bend the handle outward to remove

  3. Keurig K70 Top  Needle Replacement, Top  Needle: 手順 3、 1の画像 1
    • While looking upwards from underneath the Keurig, remove the two 8mm Phillips #2 screws from underneath the black plastic "shroud".

    • Remove the black plastic "shroud" by pushing inwards and then pulling upwards to disengage the plastic hooks that are not visible.

  4. Keurig K70 Top  Needle Replacement: 手順 4、 3の画像 1 Keurig K70 Top  Needle Replacement: 手順 4、 3の画像 2 Keurig K70 Top  Needle Replacement: 手順 4、 3の画像 3
    • Remove the two 8 mm screws with a PH #1 screwdrver

    • Pull on the plastic tube to remove it

    • This will require a generous amount of force

  5. Keurig K70 Top  Needle Replacement: 手順 5、 1の画像 1
    • Remove the two 8mm screws with a PH #2 screwdriver.

  6. Keurig K70 Top  Needle Replacement: 手順 6、 1の画像 1
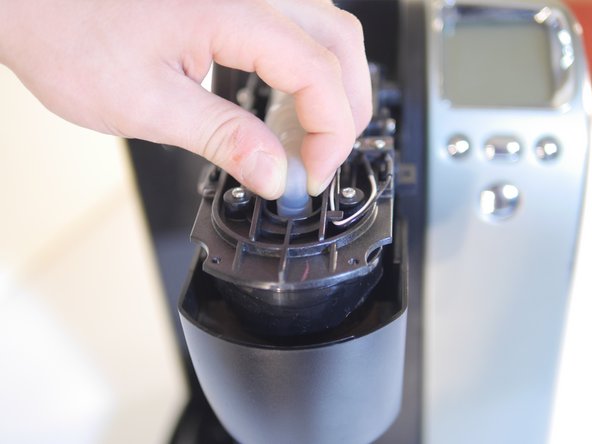
    • Pull out on the top component perpendicular to the top face as shown. It will pop out without too much effort.

    • The needle is now exposed on the bottom of the part being handled in this photo. Be careful where you grab this component, we recommend doing as we have done here. Grab the front "lip" of the component (see photo).

  7. Keurig K70 Top  Needle Replacement: 手順 7、 1の画像 1
    • This is the component that should detach after pulling down.

    • Be careful of the needle!

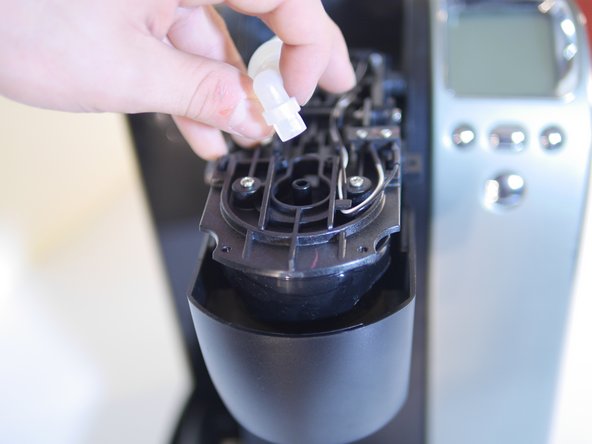
  8. Keurig K70 Top  Needle Replacement: 手順 8、 1の画像 1
    • On the bottom of the component is the exposed needle, which is now accessible.

    • If you remove the needle be careful as it may be sharp.

終わりに

To reassemble your device, follow these instructions in reverse order.

2 の人々がこのガイドを完成させました。

作成者

3人の作成者と共同で作成されました。

Alec Foster

メンバー登録日: 10/06/16

161 ポイント

1ガイドが承認済み

チーム

Cal Poly, Team 20-4, Livingston Fall 2016 Cal Poly, Team 20-4, Livingston Fall 2016人のメンバー

CPSU-LIVINGSTON-F16S20G4

4 メンバー

5のガイドは作成済み

2 件のコメント

If the needle were sharp this wouldn’t be necessary.

Can a replacement ‘needle’ be purchased somewhere? This must be almost universal and should be easily obtainable from Keurig.

krrjr49 - 返信

Did you find a place to purchase a replacement top needle? All I can find is the bottom exit needle assembly.

Liz Mark - 返信

コメントを追加

統計データ:

過去 24時間: 0

過去 7 日: 5

過去 30 日: 28

今までの合計 3,937