メインコンテンツにスキップ

Keurig K55 Secondary Water Pump Replacement

必要な工具と部品

  1. Keurig K55 Secondary Water Pump Replacement, Secondary Water Pump: 手順 1、 3の画像 1 Keurig K55 Secondary Water Pump Replacement, Secondary Water Pump: 手順 1、 3の画像 2 Keurig K55 Secondary Water Pump Replacement, Secondary Water Pump: 手順 1、 3の画像 3
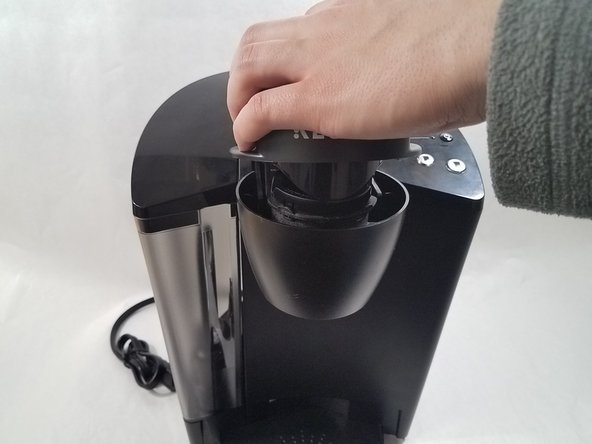
    • Lift the silver handle up.

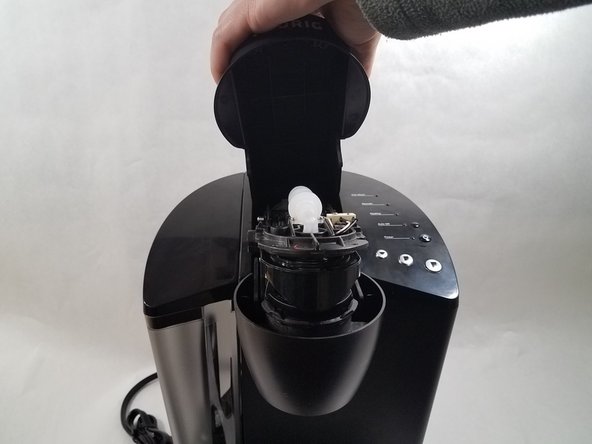
    • Locate the screw and washer holding the handle in place on each side.

    • Remove both 13mm screws and washers using a Phillips #0 screwdriver.

  2. Keurig K55 Secondary Water Pump Replacement: 手順 2、 2の画像 1 Keurig K55 Secondary Water Pump Replacement: 手順 2、 2の画像 2
    • Grab the handle and pull it upward and toward the rear of the device.

    • Lift the lid to the fully open position.

    • Remove the two 11mm Phillips screws located on the upper part of the device.

    • Be careful removing the screws; the needle here may be sharp.

  3. Keurig K55 Secondary Water Pump Replacement: 手順 3、 3の画像 1 Keurig K55 Secondary Water Pump Replacement: 手順 3、 3の画像 2 Keurig K55 Secondary Water Pump Replacement: 手順 3、 3の画像 3
    • Lower the lid to just before its closing position.

    • Grab the black top cover with the Keurig logo and gently push back toward the rear of the device to release it.

    • Gently pull the top cover upward and toward the front of the device to remove it.

  4. Keurig K55 Secondary Water Pump Replacement: 手順 4、 3の画像 1 Keurig K55 Secondary Water Pump Replacement: 手順 4、 3の画像 2 Keurig K55 Secondary Water Pump Replacement: 手順 4、 3の画像 3
    • Remove the two 11mm Phillips head screws securing the water pump.

    • Grab the secondary water pump firmly and pull one of the plastic water lines off of the pump.

    • Pull the other line from the water pump.

終わりに

To reassemble your device, follow these instructions in reverse order.

ある他の人がこのガイドを完成しました。

作成者

3人の作成者と共同で作成されました。

Mark Toujiline

メンバー登録日: 09/30/15

271 ポイント

1ガイドが承認済み

チーム

Cal Poly, Team S1-G3, Livingston Winter 2018 Cal Poly, Team S1-G3, Livingston Winter 2018人のメンバー

CPSU-LIVINGSTON-W18S1G3

4 メンバー

5のガイドは作成済み

コメント 1 件

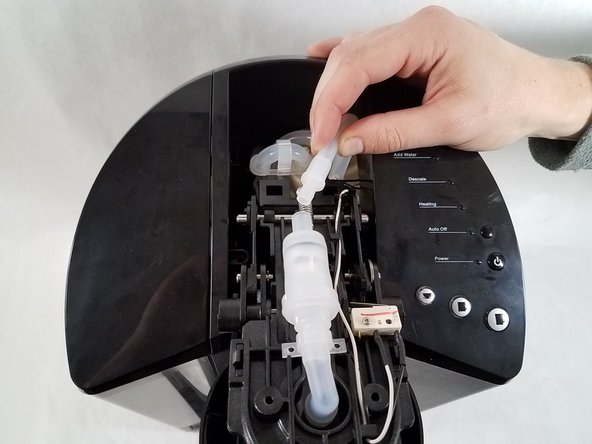
Great guide with wonderful pictures, but you solved a completely different problem. That isn’t a water pump. It’s a check valve. You cannot access the pumps without doing a fairly intensive teardown.

Also some notes.

- You don’t need to remove the handle to remove the lid casing. Just push straight back slightly to push the clips out of their holders, pull up to get the clips over them so they don’t realign, and pull forward through the open handle to remove it.

- Most of the time, the check valve does not need to be replaced outright. You can blow/suck hard through the proper end to try to clear it and that usually works. If it’s got buildup, sucking a little bit of vinegar through it (like it was a short, fat straw) and leaving it to sit in there for a while can clear that right up. Just remember to flush it through with plenty of water after or your coffee will taste awful.

Dan K - 返信

コメントを追加

統計データ:

過去 24時間: 2

過去 7 日: 6

過去 30 日: 23

今までの合計 3,345