メインコンテンツにスキップ

Kenwood Chef Drive Gear replace

必要な工具と部品

  1. Kenwood Chef Drive Gear replace, Tools: 手順 1、 1の画像 1
    • Prepare your Tools.

  2. Kenwood Chef Drive Gear replace, Open Electronic box: 手順 2、 1の画像 1
    • Remove five Screens T20 from the bottom and lift the bottom plate up.

  3. Kenwood Chef Drive Gear replace, Remove electronic box: 手順 3、 2の画像 1 Kenwood Chef Drive Gear replace, Remove electronic box: 手順 3、 2の画像 2
    • Separate nine cables.

    • Remove all screws from the electronic box.

    • Remove the electronic box.

  4. Kenwood Chef Drive Gear replace, Loosen the tilt mechanics: 手順 4、 3の画像 1 Kenwood Chef Drive Gear replace, Loosen the tilt mechanics: 手順 4、 3の画像 2 Kenwood Chef Drive Gear replace, Loosen the tilt mechanics: 手順 4、 3の画像 3
    • Tilt the machine head.

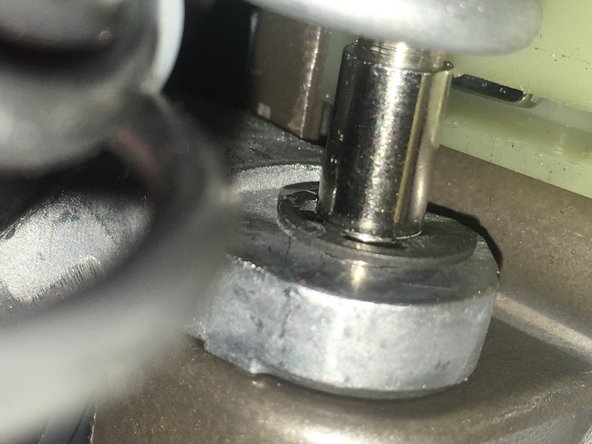
    • Remove the security washer from the hinge axle.

    • Remove the axle and the machine stand.

  5. Kenwood Chef Drive Gear replace, Spring and design plate: 手順 5、 3の画像 1 Kenwood Chef Drive Gear replace, Spring and design plate: 手順 5、 3の画像 2 Kenwood Chef Drive Gear replace, Spring and design plate: 手順 5、 3の画像 3
    • Pull the spring out.

    • Remove the screw.

    • Remove the design plate.

  6. Kenwood Chef Drive Gear replace, Remove cover: 手順 6、 3の画像 1 Kenwood Chef Drive Gear replace, Remove cover: 手順 6、 3の画像 2 Kenwood Chef Drive Gear replace, Remove cover: 手順 6、 3の画像 3
    • Remove four screws T20.

    • Remove the cover.

  7. Kenwood Chef Drive Gear replace, Remove top cover: 手順 7、 3の画像 1 Kenwood Chef Drive Gear replace, Remove top cover: 手順 7、 3の画像 2 Kenwood Chef Drive Gear replace, Remove top cover: 手順 7、 3の画像 3
    • Remove two screws T20.

    • Remove the top cover. Note: the cable connecting the top cover and the lower case is very short.

    • Remove the screws from the "Light on/off"-unit and separate it from the top cover.

  8. Kenwood Chef Drive Gear replace, Remove motor cover: 手順 8、 1の画像 1
    • Remove three screws T20 and the washers.

    • Take the cover off.

  9. Kenwood Chef Drive Gear replace, Motor: 手順 9、 1の画像 1
    • Remove three screws T20 and the plastic washers.

  10. Kenwood Chef Drive Gear replace, Remove drive gear: 手順 10、 3の画像 1 Kenwood Chef Drive Gear replace, Remove drive gear: 手順 10、 3の画像 2 Kenwood Chef Drive Gear replace, Remove drive gear: 手順 10、 3の画像 3
    • Using a punch and a hammer push out the pin. (Note: support the gear on the opposite side to protect the the motor shaft from damage).

    • The gear ist free.

    • When inserting the pin, support the gear on the opposite side to protect the the motor shaft from damage.

終わりに

To reassemble your device, follow these steps in reverse order.

5 の人々がこのガイドを完成させました。

以下の翻訳者の皆さんにお礼を申し上げます:

de en

100%

VauWehさんは世界中で修理する私たちを助けてくれています! あなたも貢献してみませんか?
翻訳を始める ›

作成者

2人の作成者と共同で作成されました。

Dominik Kübelsbeck

メンバー登録日: 07/08/19

279 ポイント

1ガイドが承認済み

13 件のコメント

super Anleitung

hat problemlos geklappt

vielen Dank.

PS: ist schon ein bisschen aufwendig, nur um den Antriebszahn zu wechseln, die gesamte Maschine zu zerlegen.

Gruß Rainer

Rainer Jourdan - 返信

Great tutorial, however it does not apply for me, as I have a Kenwood titanium KMY60 model, this spare part does NOT have a pin. I can’t say how it is fixed to the gear, could you advice on how to disassemble it?

landrieu - 返信

Hi, how did you manage to disassemble the part without the pin? How is it fixed? Thank you!

Christian Bolleter -

vielen Dank für die Anleitung. Hat (fast) alles funktioniert, außer das Kabel für das Licht. Es rutscht beim Einsetzen des Oberteils immer wieder ab. Gibt es einen besonderen Tip?

Andre2111 - 返信

Danke für die Anleitung. Wir haben angefangen, nach Gutdünken loszuschrauben und sind kläglich gescheitert. Mit der Anleitung hat es geklappt. Vielen Dank dafür!

Ich bin selber Ingenieur und konstruiere mechanische Bauteile und bin doch sehr verwundert, das Kenwood dermaßen kompliziert baut.

Niels Rütthard - 返信

コメントを追加

統計データ:

過去 24時間: 10

過去 7 日: 47

過去 30 日: 250

今までの合計 8,700