メインコンテンツにスキップ

Kensington Hi-Fi Headphones 33137 Headband Adjustment Piece

必要な工具と部品

  1. Kensington Hi-Fi Headphones 33137 Headband Adjustment Piece, Inner Headband Cover: 手順 1、 3の画像 1 Kensington Hi-Fi Headphones 33137 Headband Adjustment Piece, Inner Headband Cover: 手順 1、 3の画像 2 Kensington Hi-Fi Headphones 33137 Headband Adjustment Piece, Inner Headband Cover: 手順 1、 3の画像 3
    • Starting with the left speaker first, pull out one side of the speaker clamp where the clamp enters the hole on the speaker cover.

    • Do not pull out the speaker clamp with too much force, or it may break.

    • After one side of the speaker clamp is removed from the speaker cover, pull the other side of the speaker clamp out.

  2. Kensington Hi-Fi Headphones 33137 Headband Adjustment Piece: 手順 2、 3の画像 1 Kensington Hi-Fi Headphones 33137 Headband Adjustment Piece: 手順 2、 3の画像 2 Kensington Hi-Fi Headphones 33137 Headband Adjustment Piece: 手順 2、 3の画像 3
    • Repeat the process in Step 1 to remove the right speaker clamp.

  3. Kensington Hi-Fi Headphones 33137 Headband Adjustment Piece: 手順 3、 2の画像 1 Kensington Hi-Fi Headphones 33137 Headband Adjustment Piece: 手順 3、 2の画像 2
    • This picture shows the headphones with the speakers detached. Steps 1 and 2 are not necessary to replace the headband covers, however they do make the process easier.

    • Turn the headphones so that the inner headphone cover is visible.

  4. Kensington Hi-Fi Headphones 33137 Headband Adjustment Piece: 手順 4、 2の画像 1 Kensington Hi-Fi Headphones 33137 Headband Adjustment Piece: 手順 4、 2の画像 2
    • Use the Phillips #00 screwdriver to loosen and remove the screw holding the inner headphone cover in place.

    • The screw dimensions are as follows: Length to Head = 4 mm, Head Length = 1.5 mm, Head Diameter = 3.5 mm, Major Diameter = 2 mm, Pitch = 0.5 mm.

    • All steps can be followed on both the left or right side of the headphones to remove inner coverings.

  5. Kensington Hi-Fi Headphones 33137 Headband Adjustment Piece: 手順 5、 3の画像 1 Kensington Hi-Fi Headphones 33137 Headband Adjustment Piece: 手順 5、 3の画像 2 Kensington Hi-Fi Headphones 33137 Headband Adjustment Piece: 手順 5、 3の画像 3
    • Use the screwdriver to pry the inner headband covering loose.

    • Do not push the inner covering panel too hard, or the plastic will break. Only apply enough pressure to lift the panel up slightly.

    • Once the inner covering is loose, pull it free from the headband with your fingers and set it aside.

    • Make sure to pull the inner cover free gently do avoid losing the adjustment piece within the cover. It falls out easily and can be lost.

  6. Kensington Hi-Fi Headphones 33137 Headband Adjustment Piece, Speaker Clamp: 手順 6、 3の画像 1 Kensington Hi-Fi Headphones 33137 Headband Adjustment Piece, Speaker Clamp: 手順 6、 3の画像 2 Kensington Hi-Fi Headphones 33137 Headband Adjustment Piece, Speaker Clamp: 手順 6、 3の画像 3
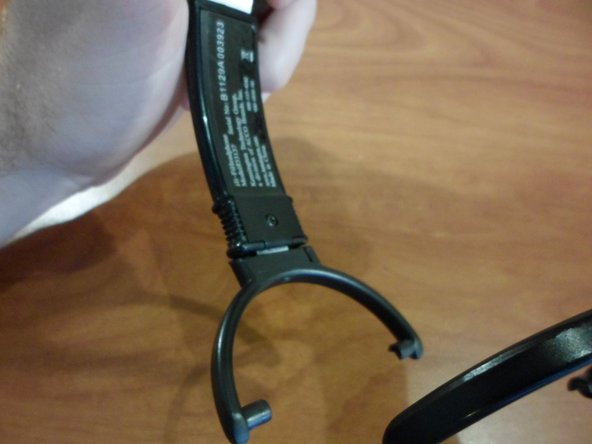
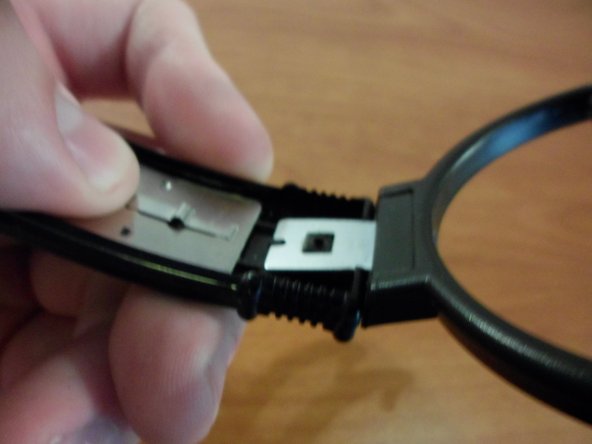
    • Turn the headphones so that the inner tab of the speaker clamp where it attaches to the headband can be seen.

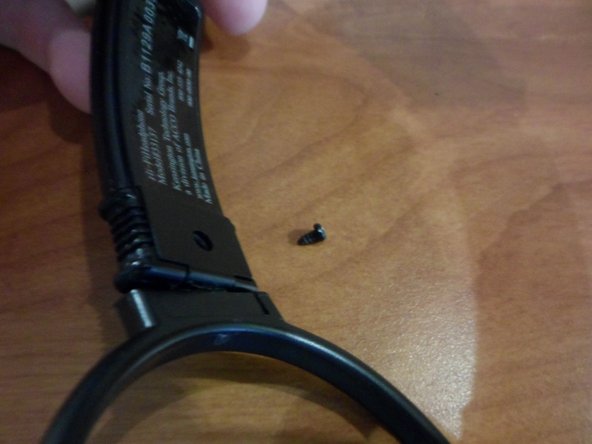
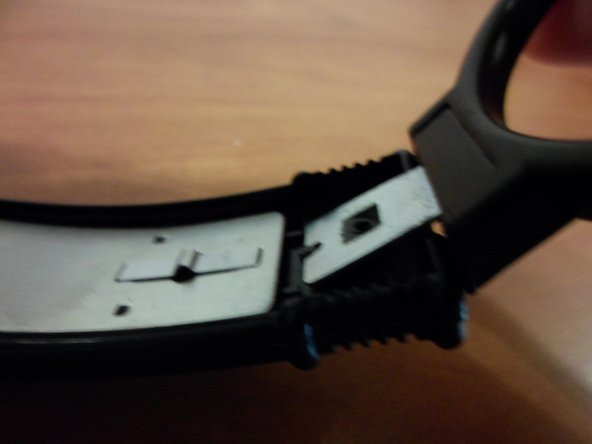
    • Pull the speaker clamp so that the metal lifts free of the headband.

  7. Kensington Hi-Fi Headphones 33137 Headband Adjustment Piece: 手順 7、 1の画像 1
    • Remove the speaker clamp.

    • All steps can be followed on either the left or right arm of the headphones to remove speaker clamps.

  8. Kensington Hi-Fi Headphones 33137 Headband Adjustment Piece, Headband Adjustment Piece: 手順 8、 2の画像 1 Kensington Hi-Fi Headphones 33137 Headband Adjustment Piece, Headband Adjustment Piece: 手順 8、 2の画像 2
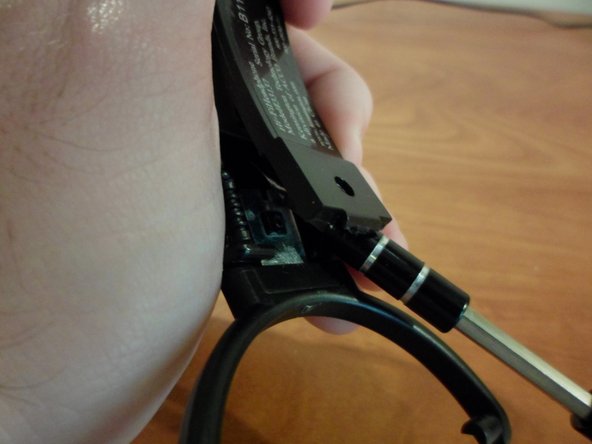
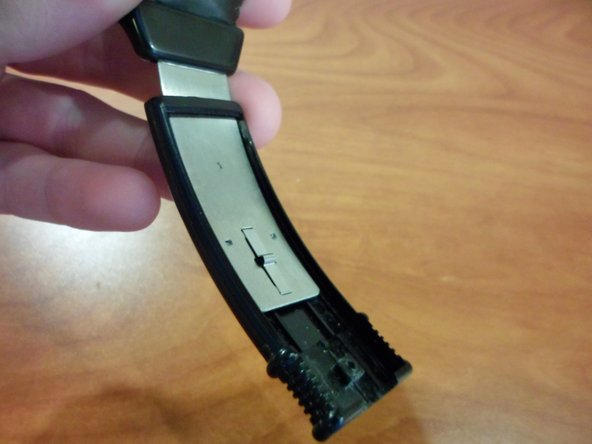
    • Turn the headphones so that the metal pieces inside the headband covering can be seen.

  9. Kensington Hi-Fi Headphones 33137 Headband Adjustment Piece: 手順 9、 2の画像 1 Kensington Hi-Fi Headphones 33137 Headband Adjustment Piece: 手順 9、 2の画像 2
    • With your fingers, lift the small metal headband adjustment piece.

    • Remove the piece and set it aside.

    • All steps can be followed on either the left or right arm of the headphones to remove adjustment pieces.

終わりに

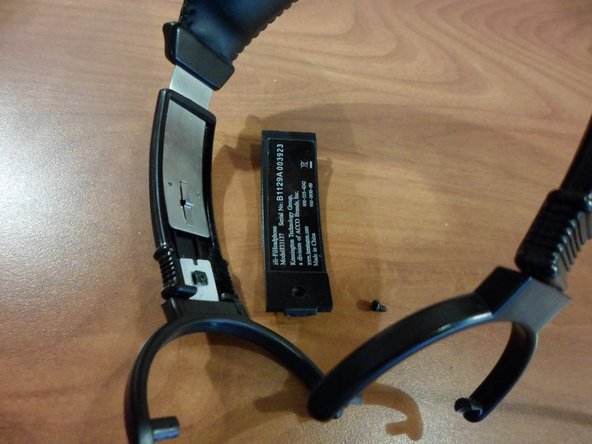
To reassemble your device, follow these instructions in reverse order.

作成者

3人の作成者と共同で作成されました。

Alexis Carr

メンバー登録日: 03/26/14

417 ポイント

4のガイドは作成済み

チーム

Clemson, Team 1-3, Benson Spring 2014 Clemson, Team 1-3, Benson Spring 2014人のメンバー

CLEM-BENSON-S14S1G3

3 メンバー

18のガイドは作成済み

0 件のコメント

コメントを追加

統計データ:

過去 24時間: 0

過去 7 日: 1

過去 30 日: 1

今までの合計 388