メインコンテンツにスキップ

Kenmore 80 Series Washer Water Inlet Valve Replacement

必要な工具と部品

  1. Kenmore 80 Series Washer Water Inlet Valve Replacement, Moving the washer: 手順 1、 1の画像 1
    • Move the washer away from the wall without unplugging any electric outlets or water hoses.

  2. Kenmore 80 Series Washer Water Inlet Valve Replacement, Shut off electricity and water supply: 手順 2、 2の画像 1 Kenmore 80 Series Washer Water Inlet Valve Replacement, Shut off electricity and water supply: 手順 2、 2の画像 2
    • Unplug the washer from the electric wall outlet.

    • Turn off the hot and cold water supply valves by rotating the valves in a clockwise rotation.

  3. Kenmore 80 Series Washer Water Inlet Valve Replacement, Disconnect water hoses (hot and cold): 手順 3、 1の画像 1
    • Use the groove joint pliers to remove the hot and cold water hoses in a counter-clockwise rotation.

    • Place removed hoses in a bucket to catch the leaking residual water.

    • Use a sticky note to distinguish hot and cold hoses if the color-coating metals are not provided.

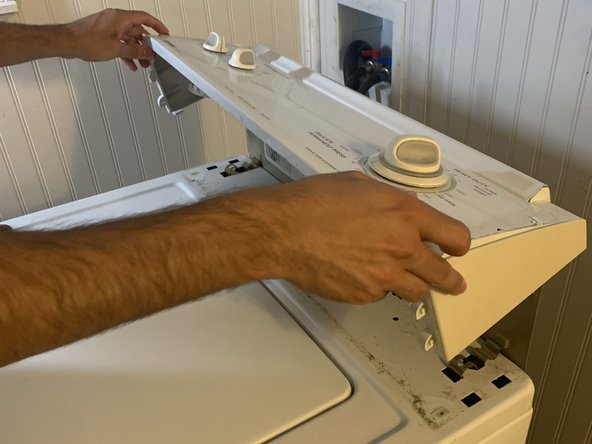
  4. Kenmore 80 Series Washer Water Inlet Valve Replacement, Move the control panel out of the way: 手順 4、 3の画像 1 Kenmore 80 Series Washer Water Inlet Valve Replacement, Move the control panel out of the way: 手順 4、 3の画像 2 Kenmore 80 Series Washer Water Inlet Valve Replacement, Move the control panel out of the way: 手順 4、 3の画像 3
    • Remove plastic endcaps at either end.

    • Unscrew the screws at either end using the Phillips head screwdriver.

    • Rotate the panel up.

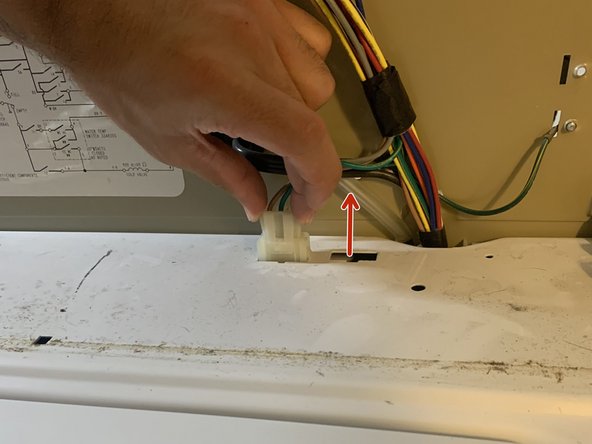
  5. Kenmore 80 Series Washer Water Inlet Valve Replacement, Unplug wire connector: 手順 5、 2の画像 1 Kenmore 80 Series Washer Water Inlet Valve Replacement, Unplug wire connector: 手順 5、 2の画像 2
    • Press sides of upper-connector and pull upwards.

  6. Kenmore 80 Series Washer Water Inlet Valve Replacement, Snap out spring clips: 手順 6、 2の画像 1 Kenmore 80 Series Washer Water Inlet Valve Replacement, Snap out spring clips: 手順 6、 2の画像 2
    • Pry open the spring clips using the flat head screwdriver.

  7. Kenmore 80 Series Washer Water Inlet Valve Replacement, Tilt cabinet towards you: 手順 7、 3の画像 1 Kenmore 80 Series Washer Water Inlet Valve Replacement, Tilt cabinet towards you: 手順 7、 3の画像 2 Kenmore 80 Series Washer Water Inlet Valve Replacement, Tilt cabinet towards you: 手順 7、 3の画像 3
    • Slide out and remove the shell of the washer.

  8. Kenmore 80 Series Washer Water Inlet Valve Replacement, Remove wire connectors from valve (hot and cold): 手順 8、 2の画像 1 Kenmore 80 Series Washer Water Inlet Valve Replacement, Remove wire connectors from valve (hot and cold): 手順 8、 2の画像 2
    • Pull connectors directly towards you.

    • Properly distinguish hot(red) and cold (white) connectors.

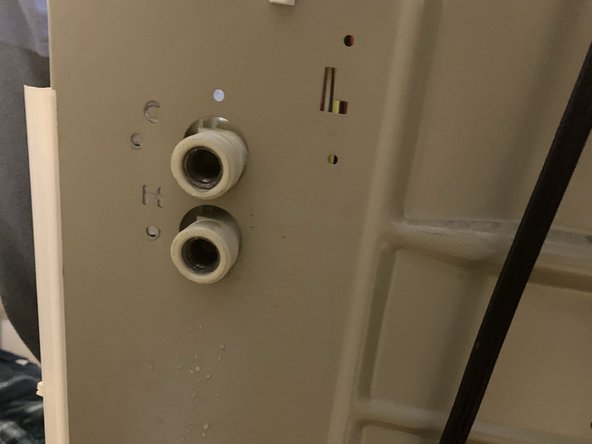
  9. Kenmore 80 Series Washer Water Inlet Valve Replacement, Remove mounting screws: 手順 9、 3の画像 1 Kenmore 80 Series Washer Water Inlet Valve Replacement, Remove mounting screws: 手順 9、 3の画像 2 Kenmore 80 Series Washer Water Inlet Valve Replacement, Remove mounting screws: 手順 9、 3の画像 3
    • Use the 5/16” nutdriver to unscrew both mounting screws.

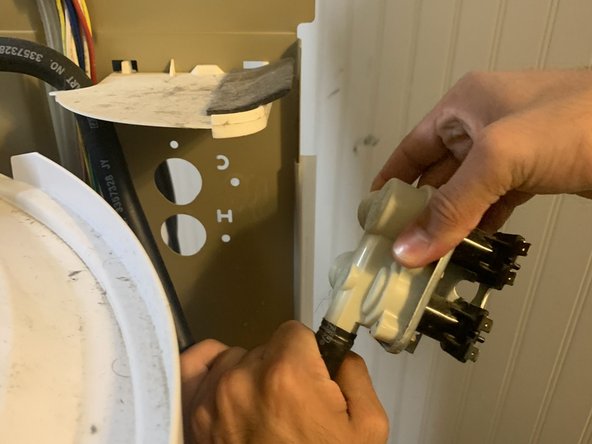
  10. Kenmore 80 Series Washer Water Inlet Valve Replacement, Remove clamp from interior water hose: 手順 10、 3の画像 1 Kenmore 80 Series Washer Water Inlet Valve Replacement, Remove clamp from interior water hose: 手順 10、 3の画像 2 Kenmore 80 Series Washer Water Inlet Valve Replacement, Remove clamp from interior water hose: 手順 10、 3の画像 3
    • Use the groove joint pliers to press clamp and slide down from water hose.

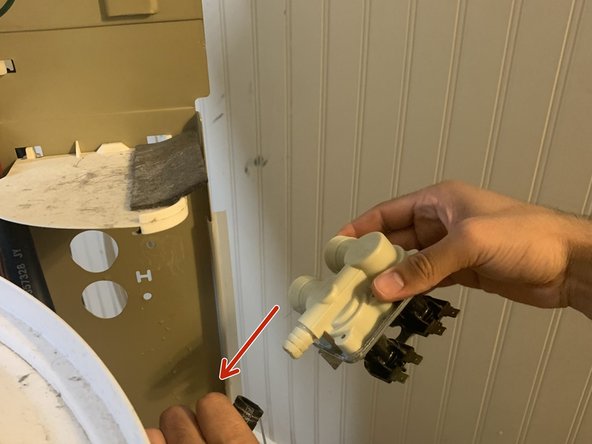
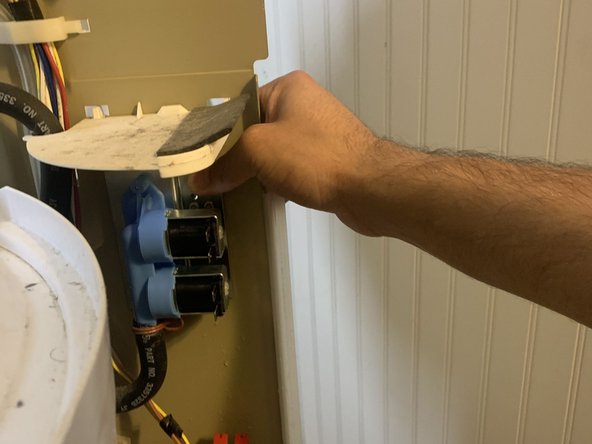
    • Remove valve out from back panel.

    • Remove interior water hose from inlet water valve.

  11. Kenmore 80 Series Washer Water Inlet Valve Replacement, Install new water inlet valve: 手順 11、 3の画像 1 Kenmore 80 Series Washer Water Inlet Valve Replacement, Install new water inlet valve: 手順 11、 3の画像 2 Kenmore 80 Series Washer Water Inlet Valve Replacement, Install new water inlet valve: 手順 11、 3の画像 3
    • Slide the interior water hose over the water inlet valve.

    • Use groove joint pliers to depress the clamp and secure the water hose to the valve.

終わりに

To reassemble your device, follow these instructions in reverse order.

作成者

3人の作成者と共同で作成されました。

Nathan Johnson

メンバー登録日: 04/23/21

193 ポイント

1ガイドが承認済み

コメント 1 件

Nice but you did not share the most complicated part. putting the shell back on. its not just simple. corner slots, getting all slots aligned without damaging the inlet dispenser above the tub. then having the front side seat on the frame. i have spent more time and frustration on getting the shell back on verses the entire valve replacement.

Whiskey Piper - 返信

コメントを追加

統計データ:

過去 24時間: 5

過去 7 日: 42

過去 30 日: 225

今までの合計 2,876