メインコンテンツにスキップ

Kano Computer Kit Complete Display Board Replacement

必要な工具と部品

  1. Kano Computer Kit Complete Display Board Replacement, Display Board: 手順 1、 2の画像 1 Kano Computer Kit Complete Display Board Replacement, Display Board: 手順 1、 2の画像 2
    • Take off the clear backing of the computer and set it aside.

    • The Display board is located in the top right corner of the case.

  2. Kano Computer Kit Complete Display Board Replacement: 手順 2、 2の画像 1 Kano Computer Kit Complete Display Board Replacement: 手順 2、 2の画像 2
    • Always disconnect the battery before performing repairs.

    • Remove the power cable (Circled in red) from the board.

  3. Kano Computer Kit Complete Display Board Replacement: 手順 3、 3の画像 1 Kano Computer Kit Complete Display Board Replacement: 手順 3、 3の画像 2 Kano Computer Kit Complete Display Board Replacement: 手順 3、 3の画像 3
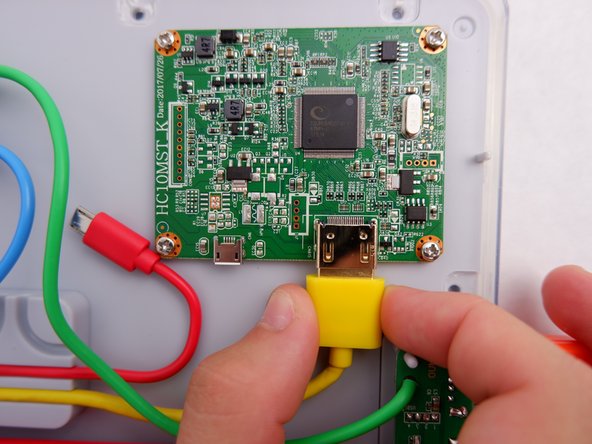
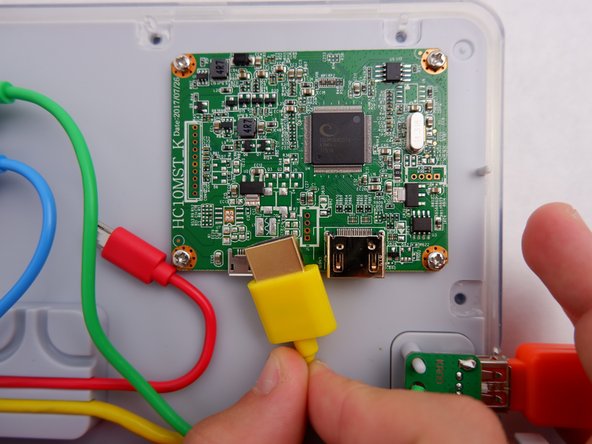
    • Unplug the HDMI cable (Circled in Yellow) from the board

  4. Kano Computer Kit Complete Display Board Replacement: 手順 4、 1の画像 1
    • Unscrew the four 8.5mm screws with your Phillips #1 Screwdriver.

  5. Kano Computer Kit Complete Display Board Replacement: 手順 5、 2の画像 1 Kano Computer Kit Complete Display Board Replacement: 手順 5、 2の画像 2
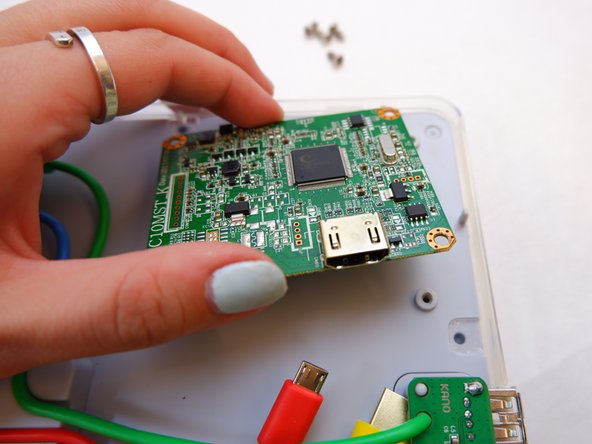
    • Lift the board off the back of the screen.

    • Be gentle as there is a ribbon cable on the underside that will prevent the board from being removed completely.

  6. Kano Computer Kit Complete Display Board Replacement: 手順 6、 2の画像 1 Kano Computer Kit Complete Display Board Replacement: 手順 6、 2の画像 2
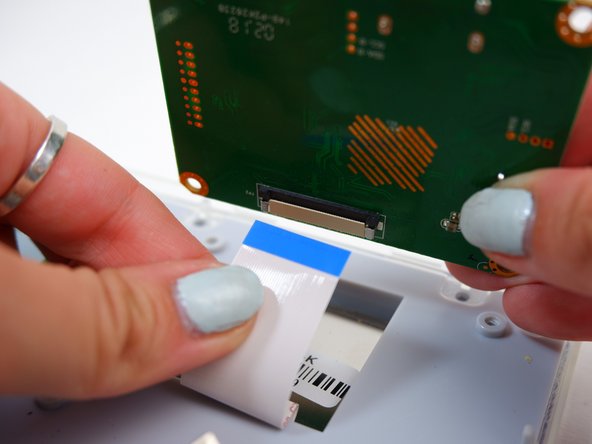
    • Disconnect the white ribbon cable that you find underneath the board.

    • Be careful; it will take some force.

終わりに

To reassemble your device, follow these instructions in reverse order.

ある他の人がこのガイドを完成しました。

作成者

5人の作成者と共同で作成されました。

Julia Sherrill

メンバー登録日: 09/20/19

735 ポイント

5のガイドは作成済み

チーム

0 件のコメント

コメントを追加

統計データ:

過去 24時間: 2

過去 7 日: 9

過去 30 日: 27

今までの合計 1,230