メインコンテンツにスキップ
リペアコミュニティに参加 - アカウントの作成

KATCHY Insect Trap Disassembly and Clean

必要な工具と部品

  1. KATCHY Insect Trap Disassembly and Clean, KATCHY Insect Trap Disassembly and Clean: 手順 1、 2の画像 1 KATCHY Insect Trap Disassembly and Clean, KATCHY Insect Trap Disassembly and Clean: 手順 1、 2の画像 2
    • Unplug the power plug from the device.

    FixBotに聞いてみる
  2. KATCHY Insect Trap Disassembly and Clean: 手順 2、 1の画像 1
    • Open the tray lid to remove the used insect trap.

    FixBotに聞いてみる
  3. KATCHY Insect Trap Disassembly and Clean: 手順 3、 2の画像 1 KATCHY Insect Trap Disassembly and Clean: 手順 3、 2の画像 2
    • Flip the device upside down while leaving the tray lid open.

    FixBotに聞いてみる
  4. KATCHY Insect Trap Disassembly and Clean: 手順 4、 1の画像 1
    • Remove the mesh from the base.

    FixBotに聞いてみる
  5. KATCHY Insect Trap Disassembly and Clean: 手順 5、 1の画像 1
    • Unlock the vent and UV light bar.

    FixBotに聞いてみる
  6. KATCHY Insect Trap Disassembly and Clean: 手順 6、 2の画像 1 KATCHY Insect Trap Disassembly and Clean: 手順 6、 2の画像 2
    • Optional: Push the circuit cover case away from the clip to unclip and clean.

    FixBotに聞いてみる
  7. KATCHY Insect Trap Disassembly and Clean: 手順 7、 2の画像 1 KATCHY Insect Trap Disassembly and Clean: 手順 7、 2の画像 2
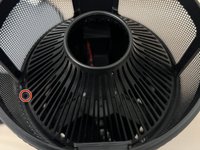
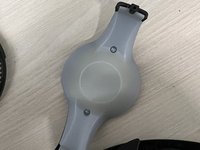
    • Flip the device so that it is no longer upside down.

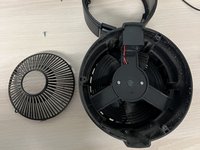
    • If the top cover is stuck, grab onto the base and push the cover out with your thumb.

    FixBotに聞いてみる
  8. KATCHY Insect Trap Disassembly and Clean: 手順 8、 1の画像 1
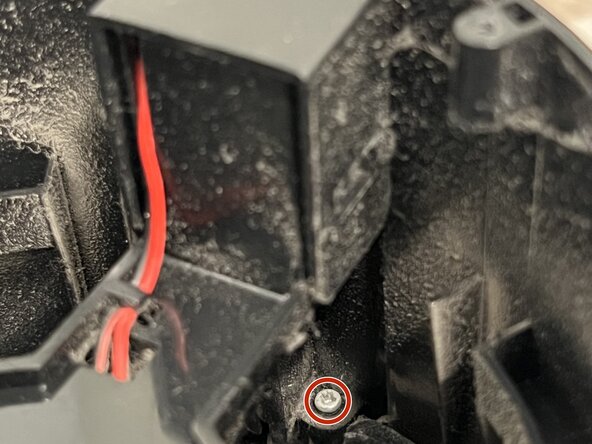
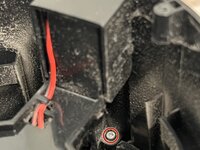
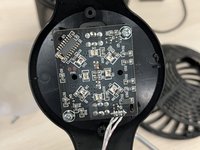
    • Be careful not to damage the wire connecting it to the base. They should be connected still.

    FixBotに聞いてみる
  9. KATCHY Insect Trap Disassembly and Clean: 手順 9、 2の画像 1 KATCHY Insect Trap Disassembly and Clean: 手順 9、 2の画像 2
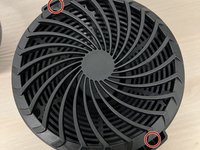
    • (Extra) Two screws are protecting the circuit board if you want to do something with it.

    FixBotに聞いてみる
  10. KATCHY Insect Trap Disassembly and Clean: 手順 10、 1の画像 1
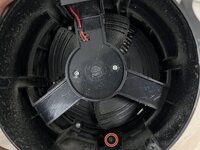
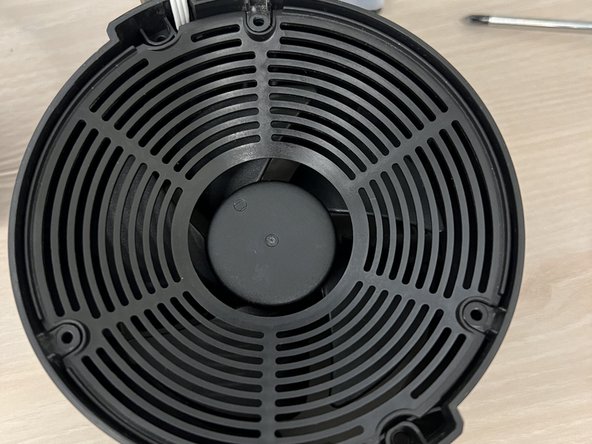
    • Double-check that the fan has no dust to ensure the motor will run more efficiently with less dust.

    FixBotに聞いてみる
終わりに

To reassemble your device, follow these instructions in reverse order. Plug the power supply into the device and check if everything works. The UV light should display like normal.

2 の人々がこのガイドを完成させました。

作成者

4人の作成者と共同で作成されました。

Ryan

メンバー登録日: 03/20/24

244 ポイント

1ガイドが承認済み

チーム

CSU Los Angeles, Team 77-77, Harris Spring 2024 CSU Los Angeles, Team 77-77, Harris Spring 2024人のメンバー

CSULA-HARRIS-S24S77G77

1 メンバー

1のガイドは作成済み

0件のガイドコメント

コメントを追加

統計データ:

過去 24時間: 6

過去 7 日: 67

過去 30 日: 358

今までの合計 3,820