メインコンテンツにスキップ

Justin Bieber Concert Microphone On/Off Switch Replacement

必要な工具と部品

  1. Justin Bieber Concert Microphone On/Off Switch Replacement, Removing back panel: 手順 1、 2の画像 1 Justin Bieber Concert Microphone On/Off Switch Replacement, Removing back panel: 手順 1、 2の画像 2
    この手順で使用する道具:
    Flathead 1.5 mm Screwdriver
    $5.49
    購入する
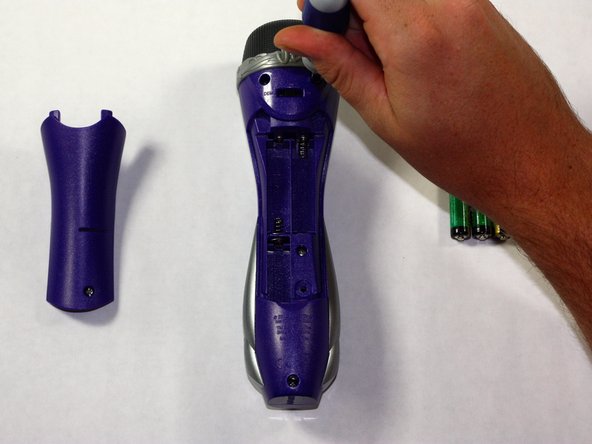
    • Remove the back panel of the device by unscrewing the single #8 11.6 mm Flathead screw on the back of the device.

  2. Justin Bieber Concert Microphone On/Off Switch Replacement, Removing batteries: 手順 2、 1の画像 1
    • Remove the 3 AAA batteries from the device.

  3. Justin Bieber Concert Microphone On/Off Switch Replacement, Removing back half of device: 手順 3、 2の画像 1 Justin Bieber Concert Microphone On/Off Switch Replacement, Removing back half of device: 手順 3、 2の画像 2
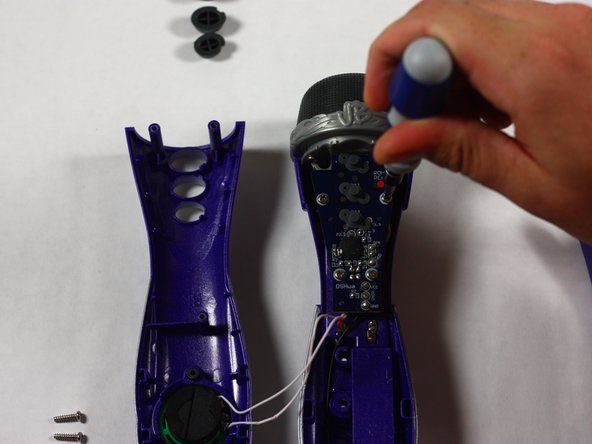
    • Unscrew the other 4, #8 11.6 mm Phillips Head screws to remove the entire back half of the device.

    • Pull apart the device once screws are loose, splitting the device in half.

  4. Justin Bieber Concert Microphone On/Off Switch Replacement, Positioning device: 手順 4、 1の画像 1
    • Keeping all wires connected to their attachments, place the front half of the device face down.

  5. Justin Bieber Concert Microphone On/Off Switch Replacement, Removing PCB: 手順 5、 2の画像 1 Justin Bieber Concert Microphone On/Off Switch Replacement, Removing PCB: 手順 5、 2の画像 2
    • Remove the 2, #8 11.7 mm Phillips Head screws as well as the 2, #8 7.5 mm screws on the printed circuit board.

  6. Justin Bieber Concert Microphone On/Off Switch Replacement, Removing on/off switch: 手順 6、 2の画像 1 Justin Bieber Concert Microphone On/Off Switch Replacement, Removing on/off switch: 手順 6、 2の画像 2
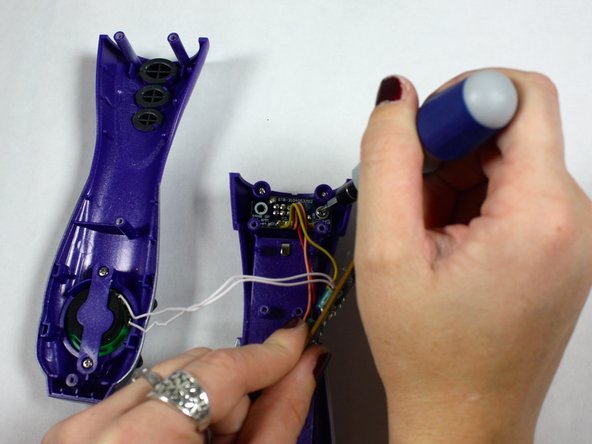
    • Remove the 2, #8 11.7 mm Phillips Head screws on the On/Off Switch Board

  7. Justin Bieber Concert Microphone On/Off Switch Replacement, Replacing on/off switch: 手順 7、 2の画像 1 Justin Bieber Concert Microphone On/Off Switch Replacement, Replacing on/off switch: 手順 7、 2の画像 2
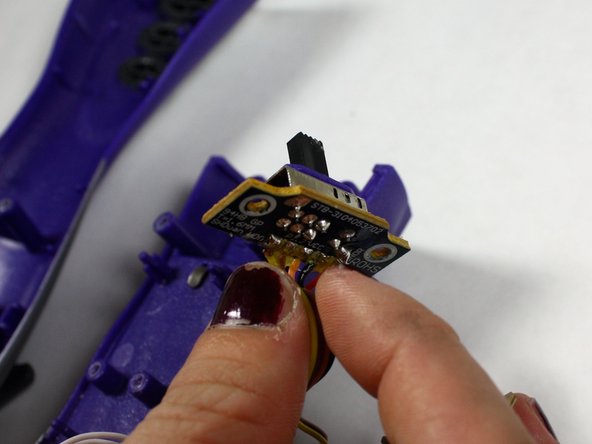
    • Remove On/Off Switch Board from its holding and detach the wires.

    • Replace the On/Off Switch Board with a new one and reattach the wires using this soldering guide

終わりに

To reassemble your device, follow these instructions in reverse order.

作成者

2人の作成者と共同で作成されました。

Mike Seyman

メンバー登録日: 10/19/14

437 ポイント

4のガイドは作成済み

チーム

Baylor, Team 4-1, Williams Fall 2014 Baylor, Team 4-1, Williams Fall 2014人のメンバー

BU-WILLIAMS-F14S4G1

3 メンバー

4のガイドは作成済み

0 件のコメント

コメントを追加

統計データ:

過去 24時間: 0

過去 7 日: 0

過去 30 日: 0

今までの合計 153