メインコンテンツにスキップ

Jura Impressa S Model Brewing Unit Removal

必要な工具と部品

  1. Jura Impressa S Model Brewing Unit Removal, How to open a Jura Impressa S model cover: 手順 1、 2の画像 1 Jura Impressa S Model Brewing Unit Removal, How to open a Jura Impressa S model cover: 手順 1、 2の画像 2
    • Always remove the power cord from the wall outlet.

    • Lift out the coffee tray

    • Remove the lid sealing the coffee bean container

    • Remove all of the coffee beans you can possibly remove.

    • Pull the adjuster of the coffee bean grinder straight up

    • Remove the four T15 Torx screws

  2. Jura Impressa S Model Brewing Unit Removal: 手順 2、 2の画像 1 Jura Impressa S Model Brewing Unit Removal: 手順 2、 2の画像 2
    • Remove the cup heat plate.

    • It can be opened like a book.

    • Below the cup heat plate there are three more T15 Torx screws. Remove them.

  3. Jura Impressa S Model Brewing Unit Removal: 手順 3、 1の画像 1
    • The top cover is now free. Lift ´er up and set ´er aside.

  4. Jura Impressa S Model Brewing Unit Removal, Jura Impressa S model front cover: 手順 4、 2の画像 1 Jura Impressa S Model Brewing Unit Removal, Jura Impressa S model front cover: 手順 4、 2の画像 2
    • Remove the knob for the steam valve by simply pulling it off.

    • The front cover is secured with a Torx T15 screw. Remove it.

  5. Jura Impressa S Model Brewing Unit Removal: 手順 5、 1の画像 1
    • Now the front cover can be opened like a door for a few inches. The hinge is on the left.

  6. Jura Impressa S Model Brewing Unit Removal: 手順 6、 1の画像 1
    • Various hoses hinder the further opening of the front cover. You need to remove the steam valve keypad from the cover.

    • Use a spudger to lift the two notches at the top of the front cover a bit to release the keypad at the top.

    • Lift the keypad upwards and pull it to the back. The steam pipe will slide out from its connection.

    • All hoses can remain connected.

  7. Jura Impressa S Model Brewing Unit Removal: 手順 7、 1の画像 1
    • Remove the silicone hose leading from the steam valve to the coffee spout. If it is secured with a cable tie which must be removed first.

    • The front cover is now free and can be opened.

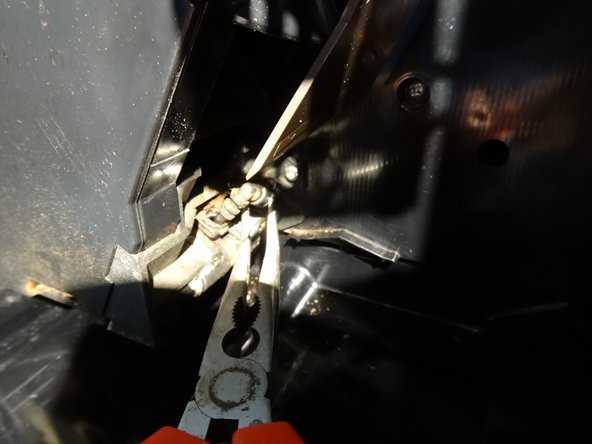
  8. Jura Impressa S Model Brewing Unit Removal, Removing the Jura Impressa S model brewgroup: 手順 8、 2の画像 1 Jura Impressa S Model Brewing Unit Removal, Removing the Jura Impressa S model brewgroup: 手順 8、 2の画像 2
    • The hot water from the boiler flows using a pressure hose with elbow connector towards the drainage valve. The connector is secured with a clamp.

    • On older models, the hose is plugged in without a connection bracket. It is tricky to reconnect this hose during reassembly. If you want to make it easier, then buy this connection angle, it is not expensive.

    • Pull the clamp from the connector.

    • Lift the elbow connector up from the drainage valve. You may need some force.

    • The connector is sealed with an O-ring. The ring may remain either on the connector itself or in the drainage valve. Replace it when reassembling.

  9. Jura Impressa S Model Brewing Unit Removal: 手順 9、 2の画像 1 Jura Impressa S Model Brewing Unit Removal: 手順 9、 2の画像 2
    • Remove the three Torx T15 screws, one on the lower left side, two on the lower right side.

    • Now the brew group can be removed. It is fixed on the upper edge with latches. First pull on the lower edge, then lower the brew group. You can remove it, wenn the latches on the upper edge come free.

    • For dissassembling and maintanace of the brew group use this guide.

    • For dissassembling and maintanace of the drainage valve use this guide.

終わりに

Work through the steps in reverse order to reassemble your device.

2 の人々がこのガイドを完成させました。

以下の翻訳者の皆さんにお礼を申し上げます:

de en

100%

shingleさんは世界中で修理する私たちを助けてくれています! あなたも貢献してみませんか?
翻訳を始める ›

作成者

1人の作成者と共同作成されました。

VauWeh

メンバー登録日: 10/19/15

203,693 ポイント

246のガイドは作成済み

チーム

Repair is War on Entropy Repair is War on Entropy人のメンバー

Community

25 メンバー

1,126のガイドは作成済み

0 件のコメント

コメントを追加

統計データ:

過去 24時間: 1

過去 7 日: 13

過去 30 日: 31

今までの合計 1,221