はじめに
Many models of Jura Krups or AEG coffee makers have this "thermoblock" installed. You have to replace it if the coffee is too cold or the flow is - mostly disturbed by limescale. Older models are equipped with another type of heater if so use this guide.
必要な工具と部品
-
-
The instructions are suitable for nearly every model of Jura and similar ones e.g. AEG and Krups.
-
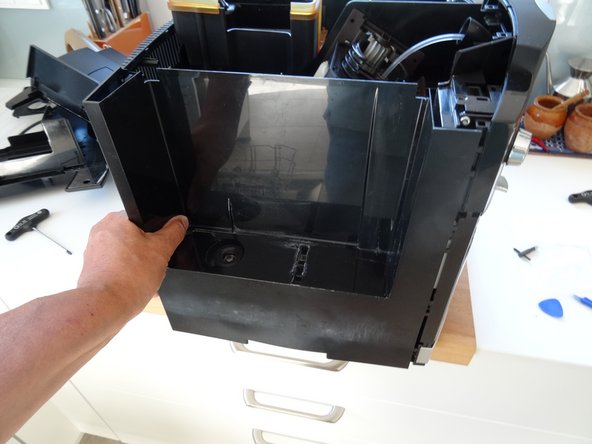
Remove the water reservoir.
-
-
-
Using an oval head bit you can screw them out. If you haven´t got one you can carefully use pliers. It is a good idea to later change the screws for normal ones.
-
Beneath both top side covers are two Torx T15 screws. Remove those. Now lift off the whole top cover. Sometimes it jams and you have to use a bit of force.
-
The side covers must be pushed backwards by about 1 cm. Sometimes this is a little bit difficult to move. If necessary, wedge a plastic opening tool into the gap between the side covers and the front panel. The rear cover can be easily removed.
-
-
-
-
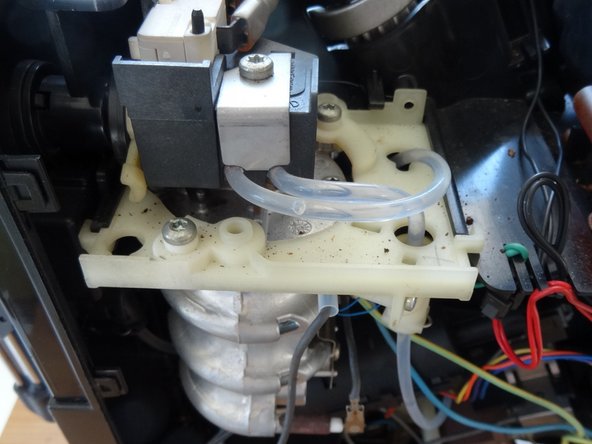
The block is marked red here.
-
There are three connections for water or steam.
-
Three cable feeders.
-
A thermocouple.
-
-
-
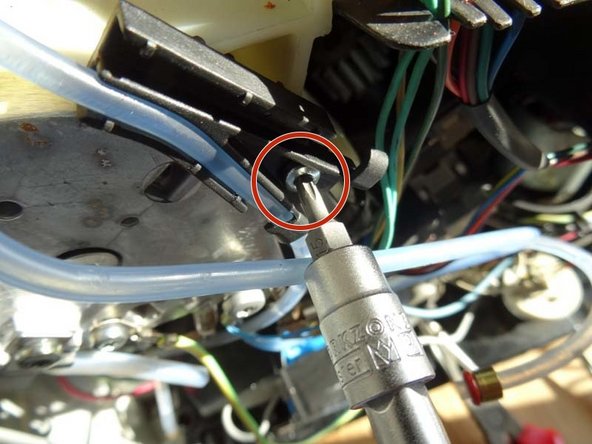
First, pull the clips on the tubing connectors, then pull out the tubing.
-
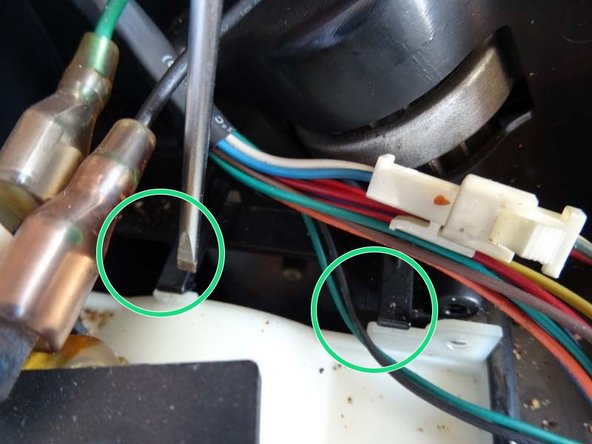
Then remove the power cables: A gray cable leading to the thermal fuse, a blue one directly from the heater (can also be pulled later) and the green-yellow protective cable is unscrewed.
-
Two small blue cables lead to the temperature sensor, it is unscrewed.
-
The hexagon screw in the middle can be loosened.
-
Unscrew the tube holder, then the block is free.
-
-
-
Here lies the block. If you are lucky you can push out blockages from the openings with a wire. Mostly that does not work. The block can not be opened and must then be replaced.
-
This is the thermal fuse. First remove the cable lug, then unscrew and fix together with the cable on the new block, as well as the yellow-green protective cable.
-
-
-
For mounting, the light carrier must be pulled out by loosening the marked screw.
-
It is attached with two hooks, you can lift them with a screwdriver.
-
The steam valve is actuated by a plastic disc with a cross-shaped cut. To loosen, you have to pull the whole front wall carefully outwards, then you can pull out the entire unit.
-
-
-
Now you can see why all this was necessary: on the back of the carrier is a recess. Inside is loosely the lock nut to the big screw with which the block is attached.
-
Thus, first the new block is screwed into the carrier.
-
And now go through all the steps again in reverse order!
-


Repeat the steps in reverse order to reassemble your device.
Repeat the steps in reverse order to reassemble your device.
5 の人々がこのガイドを完成させました。


チーム
