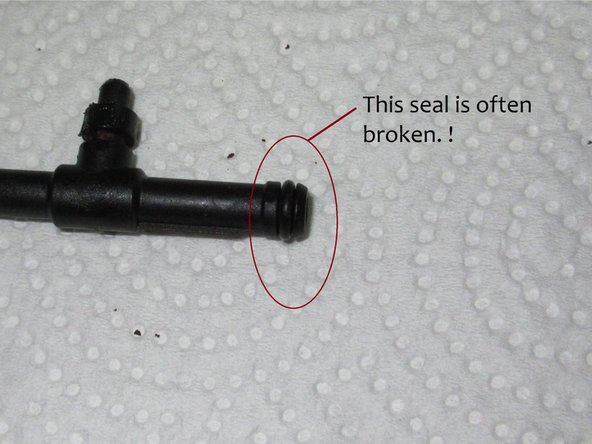
メインコンテンツにスキップ

Jura Drainage valve (2)

必要な工具と部品

  1. Jura Drainage valve (2), Jura Drainage valve (2): 手順 1、 3の画像 1 Jura Drainage valve (2), Jura Drainage valve (2): 手順 1、 3の画像 2 Jura Drainage valve (2), Jura Drainage valve (2): 手順 1、 3の画像 3
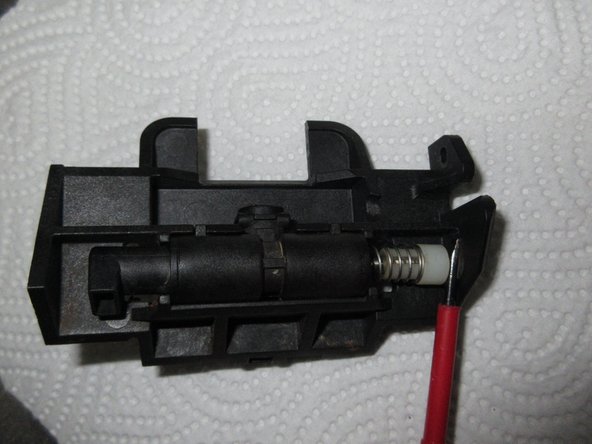
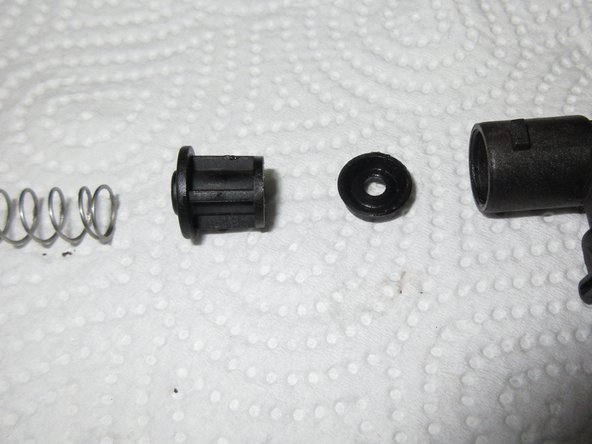
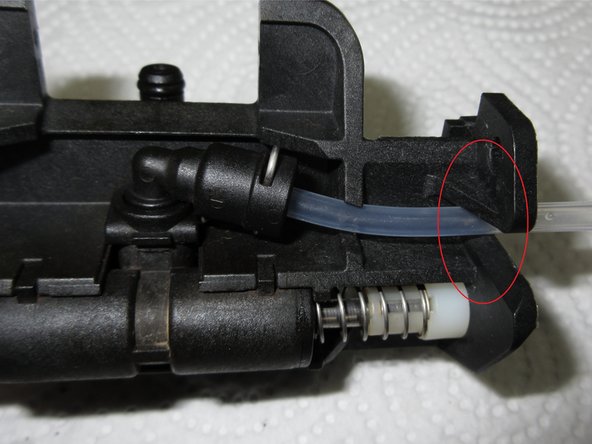
    • The brewing group has already been removed and disassembled. Now it's time for the drainage valve.

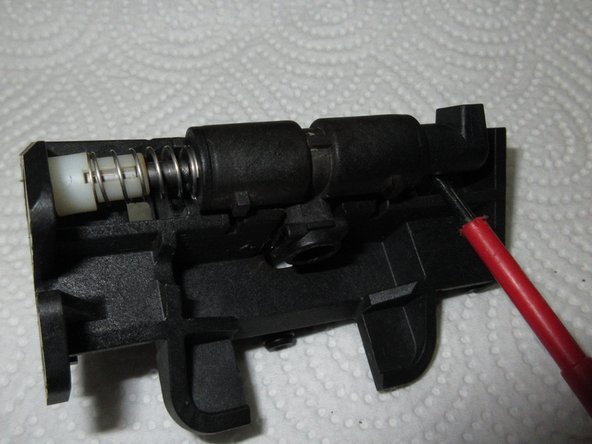
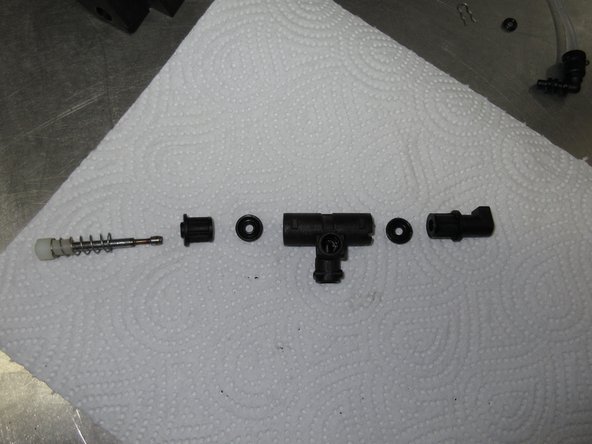
    • There will be many pictures

    • All you need a small flathead screwdriver.
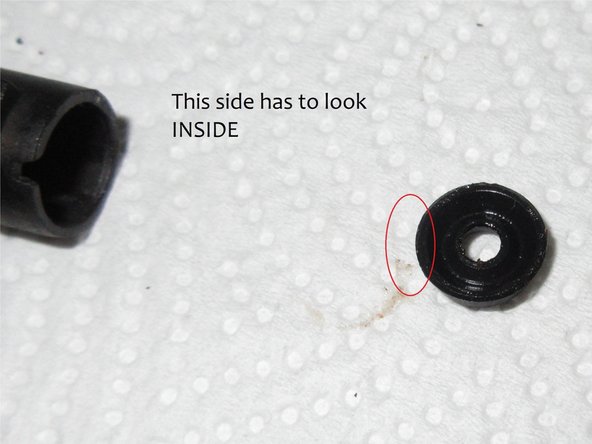
  2. Jura Drainage valve (2): 手順 2、 3の画像 1 Jura Drainage valve (2): 手順 2、 3の画像 2 Jura Drainage valve (2): 手順 2、 3の画像 3
    • Images front and back

  3. Jura Drainage valve (2): 手順 3、 3の画像 1 Jura Drainage valve (2): 手順 3、 3の画像 2 Jura Drainage valve (2): 手順 3、 3の画像 3
    • Pull off the clamp and pull out the inlet hose. At the end there is a seal, it often gets stuck in the drainage valve. Swap them out when reassembling.

  4. Jura Drainage valve (2): 手順 4、 3の画像 1 Jura Drainage valve (2): 手順 4、 3の画像 2 Jura Drainage valve (2): 手順 4、 3の画像 3
    • Pull out the clip on the docking tube

    • Pry out the valve body. Make sure the white cap slides out of its hole.

    • Detach the docking nozzle.

  5. Jura Drainage valve (2): 手順 5、 3の画像 1 Jura Drainage valve (2): 手順 5、 3の画像 2 Jura Drainage valve (2): 手順 5、 3の画像 3
    • Detailed photos.

    • The position of the sealing rings are marked green in picture 3.

    • The sealing ring on the docking socket is marked in red in picture 2. It is especially important. It's a little thinner than the other two.

    • The brackets are marked in red.

  6. Jura Drainage valve (2): 手順 6、 3の画像 1 Jura Drainage valve (2): 手順 6、 3の画像 2 Jura Drainage valve (2): 手順 6、 3の画像 3
    • Here all the parts of the valve.

  7. Jura Drainage valve (2): 手順 7、 1の画像 1
    • Here is the entire valve in one picture

  8. Jura Drainage valve (2): 手順 8、 3の画像 1 Jura Drainage valve (2): 手順 8、 3の画像 2 Jura Drainage valve (2): 手順 8、 3の画像 3
    • Reassembly

    • When assembling, make sure that the lips of the seals point to the pressure side, i.e. inward, and the flat side outward.

    • When installing, make sure that the pressure hose runs through the slot in the valve carrier.

終わりに

Follow the steps in reverse order to reassemble your device.

3 の人々がこのガイドを完成させました。

以下の翻訳者の皆さんにお礼を申し上げます:

de en

100%

これらの翻訳者の方々は世界を修理する私たちのサポートをしてくれています。 あなたも貢献してみませんか?
翻訳を始める ›

作成者

2人の作成者と共同で作成されました。

Schwarzstein

メンバー登録日: 07/15/13

2,813 ポイント

13のガイドは作成済み

0 件のコメント

コメントを追加

統計データ:

過去 24時間: 7

過去 7 日: 59

過去 30 日: 208

今までの合計 7,861