メインコンテンツにスキップ

Jensen JTA-230 Motor Replacement

必要な工具と部品

  1. Jensen JTA-230 Motor Replacement, Turntable Platter: 手順 1、 1の画像 1
    • Remove Cover from record player.

  2. Jensen JTA-230 Motor Replacement: 手順 2、 1の画像 1
    • Remove the 4 rubber plugs which hold the turntable platter in place

    • Gently but firmly pull the turntable platter off the axle.

  3. Jensen JTA-230 Motor Replacement: 手順 3、 1の画像 1
    • Take replacement turntable platter affix it firmly and gently to the axle.

  4. Jensen JTA-230 Motor Replacement: 手順 4、 1の画像 1
    • Replace rubber plugs

  5. Jensen JTA-230 Motor Replacement: 手順 5、 1の画像 1
    • Replace Cover

  6. Jensen JTA-230 Motor Replacement, Motor: 手順 6、 2の画像 1 Jensen JTA-230 Motor Replacement, Motor: 手順 6、 2の画像 2
    • After removal of the turntable platter, 3 small screws can be seen. Remove the 3 screws which hold the motor in place.

    • On both the right and left side, there are 3 screws, remove each of them.

  7. Jensen JTA-230 Motor Replacement: 手順 7、 2の画像 1 Jensen JTA-230 Motor Replacement: 手順 7、 2の画像 2
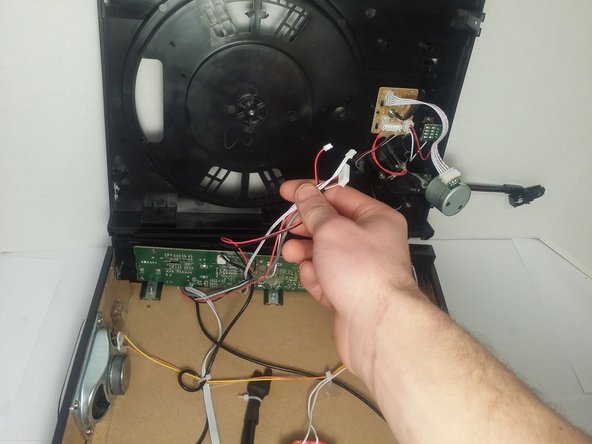
    • Gently Pull the top off of the sides and flip over to reveal the circuitry.

    • To remove the top entirely, remove each electrical connection with a pair of tweezers. There are 3, each connecting to the speakers.

  8. Jensen JTA-230 Motor Replacement: 手順 8、 1の画像 1
    • Remove the Motor from the record player

    • Using a soldering iron, remove the motor from the circuitry.

    • Replace motor with new one.

終わりに

To reassemble your device, follow these instructions in reverse order.

作成者

2人の作成者と共同で作成されました。

Robert Wilcox

メンバー登録日: 03/04/16

227 ポイント

2のガイドは作成済み

チーム

UMass Dartmouth, Team 8-8, Botvin Spring 2016 UMass Dartmouth, Team 8-8, Botvin Spring 2016人のメンバー

UMASSD-BOTVIN-S16S8G8

3 メンバー

5のガイドは作成済み

0 件のコメント

コメントを追加

統計データ:

過去 24時間: 2

過去 7 日: 8

過去 30 日: 13

今までの合計 1,941