メインコンテンツにスキップ

Jensen CD Player Electric Motor Wire Replacement

必要な工具と部品

  1. Jensen CD Player Electric Motor Wire Replacement, Electric Motor Wire: 手順 1、 1の画像 1
    • Place the CD player face up on a clean surface.

  2. Jensen CD Player Electric Motor Wire Replacement: 手順 2、 1の画像 1
    • Upturn the CD player and take out the batteries.

    • To take out the batteries, pull back and lift the battery cover.

    • Ensure that the batteries are properly removed, at this step.

  3. Jensen CD Player Electric Motor Wire Replacement: 手順 3、 2の画像 1 Jensen CD Player Electric Motor Wire Replacement: 手順 3、 2の画像 2
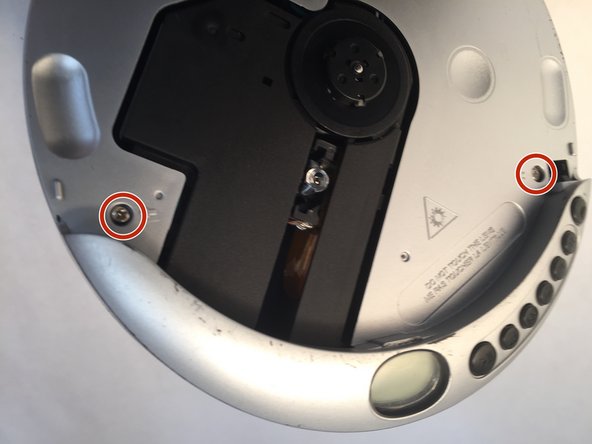
    • Flip the CD player back and open the lid. You will see two 10 mm Phillips screws on the left and right side under the lid.

    • To open the lid, push the button on the far right with an ejection symbol. Once the button is pushed, carefully lift the lid.

  4. Jensen CD Player Electric Motor Wire Replacement: 手順 4、 2の画像 1 Jensen CD Player Electric Motor Wire Replacement: 手順 4、 2の画像 2
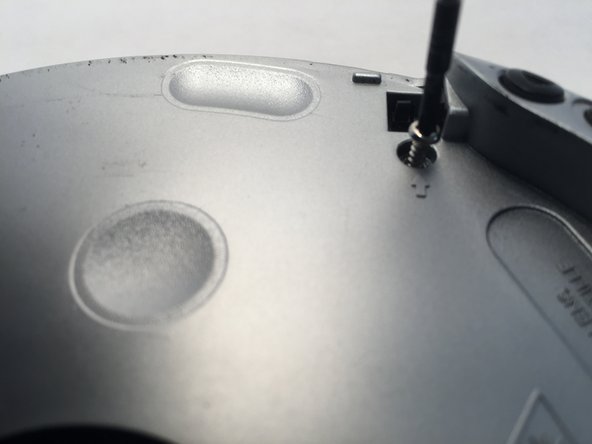
    • Unscrew each 10 mm Phillips screw with the screwdriver, and place them outside safely.

    • Note the order in which you took the screws out.

  5. Jensen CD Player Electric Motor Wire Replacement: 手順 5、 2の画像 1 Jensen CD Player Electric Motor Wire Replacement: 手順 5、 2の画像 2
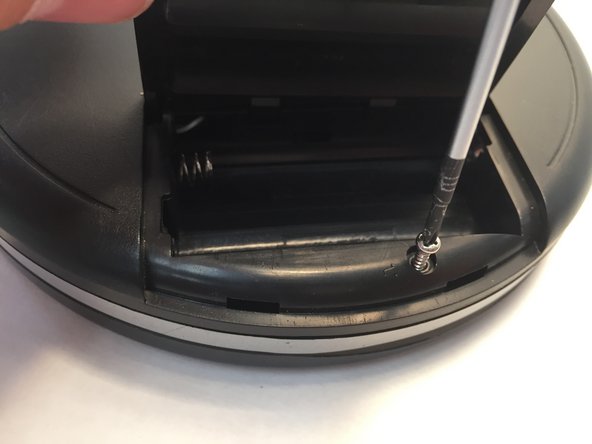
    • Turn the CD player upside down and open the battery compartment. You will see one more 10 mm Phillips screw inside. Unscrew it.

    • Use the Phillips screwdriver to remove the screw. Place the screw outside safely.

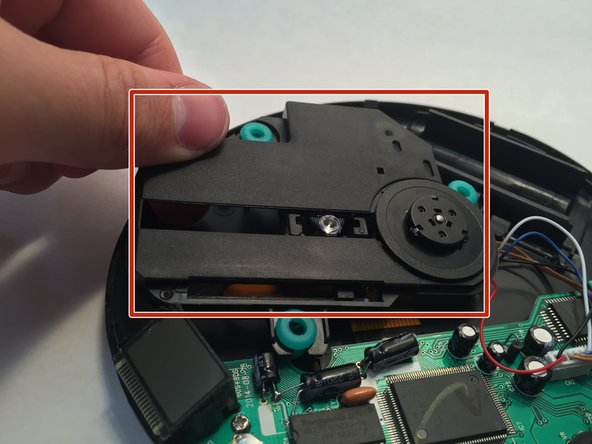
  6. Jensen CD Player Electric Motor Wire Replacement: 手順 6、 3の画像 1 Jensen CD Player Electric Motor Wire Replacement: 手順 6、 3の画像 2 Jensen CD Player Electric Motor Wire Replacement: 手順 6、 3の画像 3
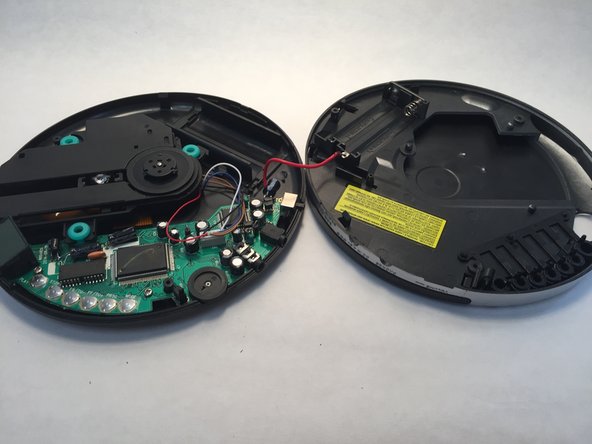
    • Now, open the CD player, and check the components inside.

    • Be careful as this step requires some force.

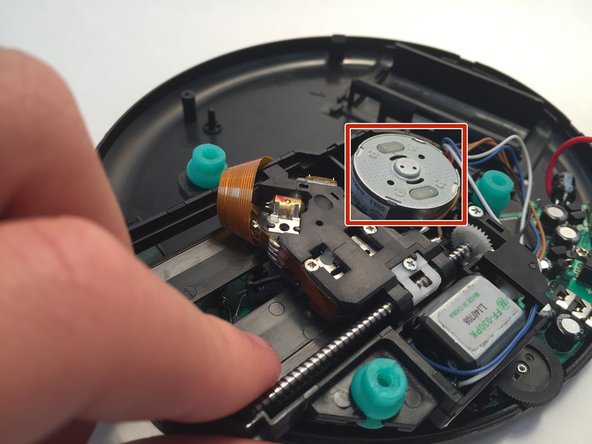
  7. Jensen CD Player Electric Motor Wire Replacement: 手順 7、 3の画像 1 Jensen CD Player Electric Motor Wire Replacement: 手順 7、 3の画像 2 Jensen CD Player Electric Motor Wire Replacement: 手順 7、 3の画像 3
    • Locate the motor on the bottom portion of the CD player. Lift the motor up and turn it over.

    • Operate the motor carefully, since it is still connected to some wires.

  8. Jensen CD Player Electric Motor Wire Replacement: 手順 8、 1の画像 1
    • Locate these two small wires.

    • Check whether both the wires are connected to the electric motor. If not, that is a probable reason why the CDs are not spinning once the device is turned on.

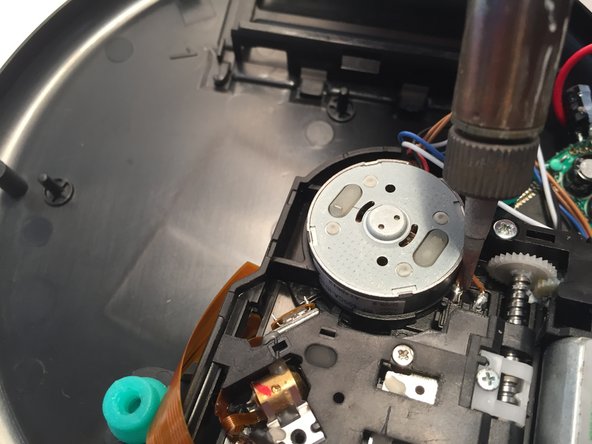
  9. Jensen CD Player Electric Motor Wire Replacement: 手順 9、 2の画像 1 Jensen CD Player Electric Motor Wire Replacement: 手順 9、 2の画像 2
    • Resolder the disconnected wires. This is a lengthy procedure.

    • Be cautious, as the soldering iron is hot and may cause skin burns.

    • Make sure to wash your hands after dealing with the solder.

終わりに

To reassemble your device, follow these instructions in reverse order.

2 の人々がこのガイドを完成させました。

作成者

4人の作成者と共同で作成されました。

Garrik Kaufman

メンバー登録日: 05/31/16

148 ポイント

1ガイドが承認済み

チーム

Central Coast New Tech High, Team 6-2, Rushing Spring 2016 Central Coast New Tech High, Team 6-2, Rushing Spring 2016人のメンバー

CCNTH-RUSHING-S16S6G2

2 メンバー

1のガイドは作成済み

0 件のコメント

コメントを追加

統計データ:

過去 24時間: 2

過去 7 日: 5

過去 30 日: 7

今までの合計 733