はじめに
The instructions below assume the back cover of your tablet has already been removed. If your tablet still has the back cover on it refer to the prerequisite guide on cover removal and attachment (steps 1-3). If your back cover has already been removed begin on step 4.
必要な工具と部品
-
-
On the top of the tablet there are two 1cm screws that hold the back cover on. Locate these screws and remove them using a Phillips head #0 screw driver.
-
-
-
This is what your tablet should look like once the back cover is removed. You are now ready to begin repairing your tablet. Follow the corresponding guide for instructions on repairing major components.
-
To reattach the back cover begin by sliding the cover on making sure the buttons and the speaker are in their designated holes on the back cover. Then attach the two covers by pressing them together until you hear the plastic tabs interlock.
-
With the two screens held together the last step is to put the two 1cm screws on the top of the tablet back in. Your tablet is now ready for use again!
-
-
-
-
The first step is to remove the motherboard from the touch screen panel. To do this use a phillips head #0 screwdriver to remove the three 1cm screws that hold the motherboard to the panel. The screws are located at the top of the motherboard.
-
-
-
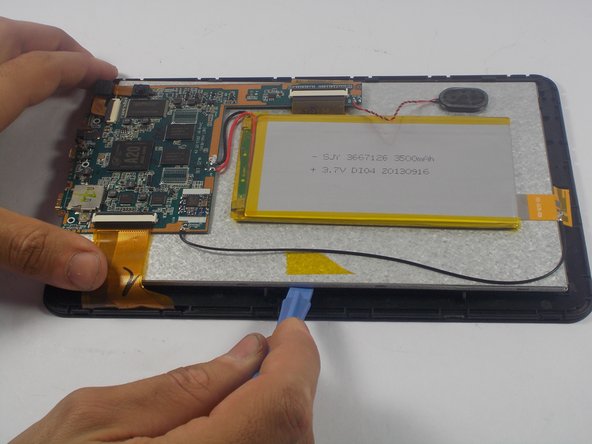
With the touch screen panel free of all electrical connections it now can be removed from the screen and motherboard.
-
There are 9 plastic tabs holding the screen to the touch screen panel. These tabs are circled in the photo. To remove the tabs use a spudger to pry the screen out of the touch screen panel.
-
-
-
Once the tabs are all removed the touch screen panel will be free and can be removed from the screen and motherboard.
-
You can now attach the new touch screen panel to the screen and motherboard. start by pressing the screen into the new touch screen panel in the nine locations previously located.
-


To reassemble your device, follow the back cover prerequisite guide.
To reassemble your device, follow the back cover prerequisite guide.
チーム

UMass Dartmouth, Team 1-7, Shastany Spring 2015 UMass Dartmouth, Team 1-7, Shastany Spring 2015人のメンバー
UMASSD-SHASTANY-S15S1G7
3 メンバー
4のガイドは作成済み