メインコンテンツにスキップ

JVC KW-V820BT Touch Screen Replacement

必要な工具と部品

  1. JVC KW-V820BT Touch Screen Replacement, Front Panel Assembly: 手順 1、 3の画像 1 JVC KW-V820BT Touch Screen Replacement, Front Panel Assembly: 手順 1、 3の画像 2 JVC KW-V820BT Touch Screen Replacement, Front Panel Assembly: 手順 1、 3の画像 3
    • Remove the four 1/8-inch black machine screws using a Phillips #00 screwdriver.

  2. JVC KW-V820BT Touch Screen Replacement: 手順 2、 2の画像 1 JVC KW-V820BT Touch Screen Replacement: 手順 2、 2の画像 2
    • Remove three steel-finish, pan-head, 1/64 x 3/16" machine screws identified in the photograph, using the Phillips #0 screwdriver.

  3. JVC KW-V820BT Touch Screen Replacement: 手順 3、 3の画像 1 JVC KW-V820BT Touch Screen Replacement: 手順 3、 3の画像 2 JVC KW-V820BT Touch Screen Replacement: 手順 3、 3の画像 3
    • Using your fingers and/or a metal spudger, gently release the plastic locking tabs of the front panel assembly from the steel enclosure while prying the front panel assembly away from the steel enclosure with your fingers.

  4. JVC KW-V820BT Touch Screen Replacement: 手順 4、 1の画像 1
    • Gently remove the front panel from the steel enclosure.

  5. JVC KW-V820BT Touch Screen Replacement: 手順 5、 3の画像 1 JVC KW-V820BT Touch Screen Replacement: 手順 5、 3の画像 2 JVC KW-V820BT Touch Screen Replacement: 手順 5、 3の画像 3
    • Gently separate the ribbon cable from from ZIF connector on the circuit board using a metal smudger.

    • Be careful not to scratch or damage components or features of the circuit board with the metal spudger

  6. JVC KW-V820BT Touch Screen Replacement, Touch Screen: 手順 6、 3の画像 1 JVC KW-V820BT Touch Screen Replacement, Touch Screen: 手順 6、 3の画像 2 JVC KW-V820BT Touch Screen Replacement, Touch Screen: 手順 6、 3の画像 3
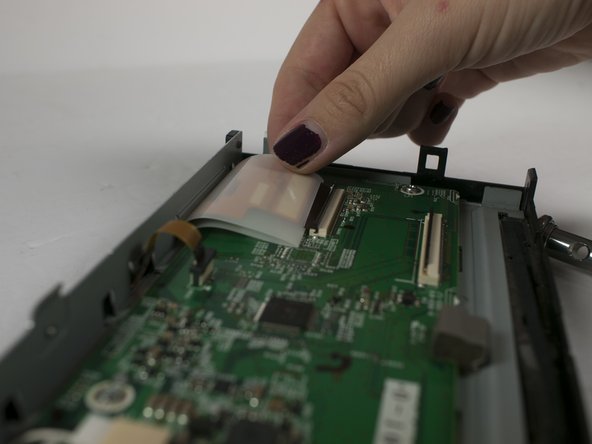
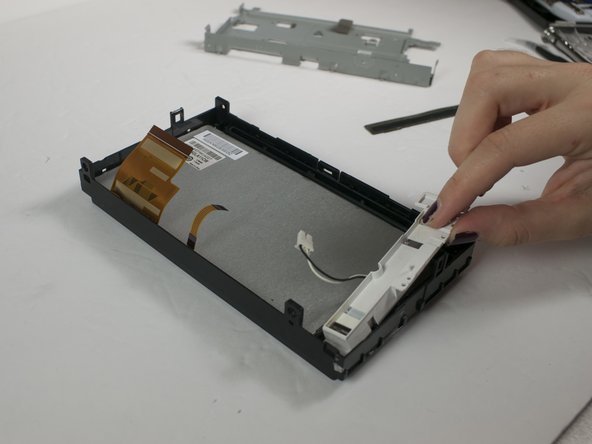
    • Remove the power connector gently using tweezers or your fingers.

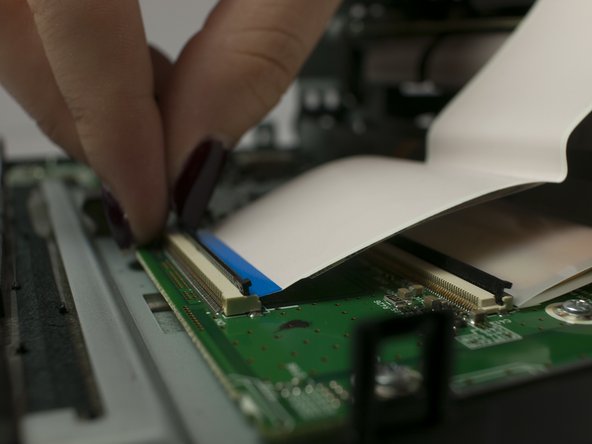
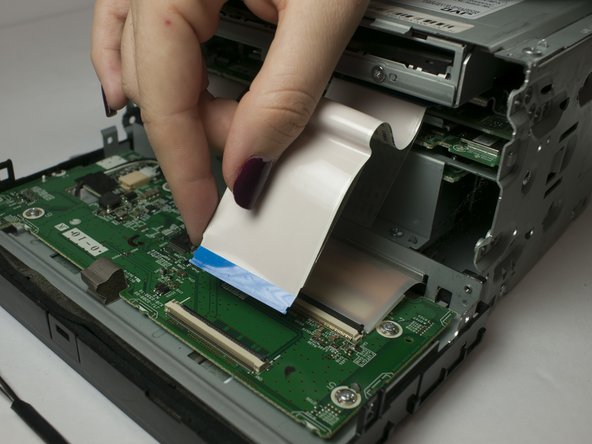
    • Remove the ribbon cable ZIF connector by flipping the black plastic bar and sliding the ribbon out.

    • Be careful not to scratch or damage components or features of the circuit board with the metal spudger

  7. JVC KW-V820BT Touch Screen Replacement: 手順 7、 3の画像 1 JVC KW-V820BT Touch Screen Replacement: 手順 7、 3の画像 2 JVC KW-V820BT Touch Screen Replacement: 手順 7、 3の画像 3
    • Remove the four pan-head 0-80 x 1/8" stainless steel machine screws using the Phillips #00 screwdriver.

    • Remove 2 pan-head 0-80 x 1/8" black finish machines screws using Phillips #00 screwdriver.

    • Remove 2 pan head zinc plated 1/64 x 3/16" machine screws using Phillips #0 screwdriver.

    • Make sure to keep screws of different sizes organized for easier reassembly

  8. JVC KW-V820BT Touch Screen Replacement: 手順 8、 3の画像 1 JVC KW-V820BT Touch Screen Replacement: 手順 8、 3の画像 2 JVC KW-V820BT Touch Screen Replacement: 手順 8、 3の画像 3
    • Remove the metal retaining shroud.

    • Remove the fabric disk drive passage liner.

    • Remove the white plastic button retainer.

  9. JVC KW-V820BT Touch Screen Replacement: 手順 9、 3の画像 1 JVC KW-V820BT Touch Screen Replacement: 手順 9、 3の画像 2 JVC KW-V820BT Touch Screen Replacement: 手順 9、 3の画像 3
    • Remove LCD display.

    • Remove touch-activated side button display.

    • Remove global touch screen assembly.

    • Be careful when handling glass, especially broke glass. It is suggested to wear cut-resistant gloves when handling glass.

終わりに

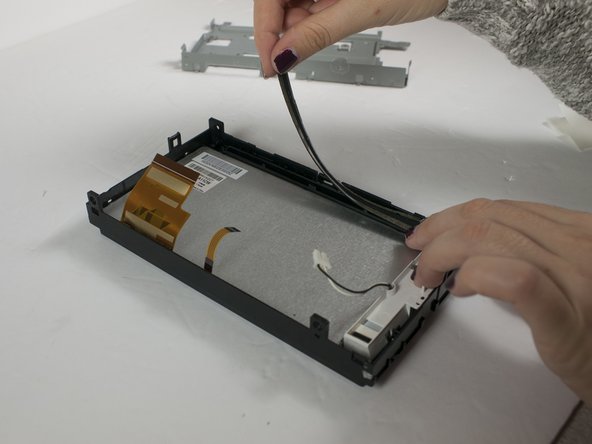
To reassemble your device, follow these instructions in reverse order.

2 の人々がこのガイドを完成させました。

作成者

3人の作成者と共同で作成されました。

Marshall Andersen

メンバー登録日: 10/02/18

665 ポイント

6のガイドは作成済み

チーム

Linn Benton Community College, Team S1-G6, Johnson Fall 2018 Linn Benton Community College, Team S1-G6, Johnson Fall 2018人のメンバー

LBCC-JOHNSON-F18S1G6

3 メンバー

8のガイドは作成済み

3 件のコメント

To whom it may concern,

I successfully replaced the touch screen to my JVC, KW-V820Bt but ran into a small snag.

My screen is back to life but it does not respond to any touch.

Does it need to be calibrated ?

Thank You,

Much Appreciated for any help.

Arturo R.

pantepec00@gmail.com

Arturo Ramirez - 返信

Hi Arturo, without looking at the device, I can only guess. But, if it doesn’t respond to any touch whatsoever, you might take a second look at the touchscreen component itself (that is the clear glass sheet, step 9, picture 3) and be sure you have that thing connected properly and there is no damage to that little ribbon cable itself. I’m not aware of any calibration procedure, but I could be wrong.

Marshall Andersen - 返信

Hi

I have a bootloop issue with JVC KW-V820BT

How do I go about finding what is causing it ?

Thanks

Slevin Mclaine - 返信

コメントを追加

統計データ:

過去 24時間: 6

過去 7 日: 18

過去 30 日: 42

今までの合計 4,554