メインコンテンツにスキップ

JVC KW-V820BT Rear Panel Removal and Replacement

必要な工具と部品

  1. JVC KW-V820BT Rear Panel Removal and Replacement, Front Panel Assembly: 手順 1、 3の画像 1 JVC KW-V820BT Rear Panel Removal and Replacement, Front Panel Assembly: 手順 1、 3の画像 2 JVC KW-V820BT Rear Panel Removal and Replacement, Front Panel Assembly: 手順 1、 3の画像 3
    • Remove the four 1/8-inch black machine screws using a Phillips #00 screwdriver.

  2. JVC KW-V820BT Rear Panel Removal and Replacement: 手順 2、 2の画像 1 JVC KW-V820BT Rear Panel Removal and Replacement: 手順 2、 2の画像 2
    • Remove three steel-finish, pan-head, 1/64 x 3/16" machine screws identified in the photograph, using the Phillips #0 screwdriver.

  3. JVC KW-V820BT Rear Panel Removal and Replacement: 手順 3、 3の画像 1 JVC KW-V820BT Rear Panel Removal and Replacement: 手順 3、 3の画像 2 JVC KW-V820BT Rear Panel Removal and Replacement: 手順 3、 3の画像 3
    • Using your fingers and/or a metal spudger, gently release the plastic locking tabs of the front panel assembly from the steel enclosure while prying the front panel assembly away from the steel enclosure with your fingers.

  4. JVC KW-V820BT Rear Panel Removal and Replacement: 手順 4、 1の画像 1
    • Gently remove the front panel from the steel enclosure.

  5. JVC KW-V820BT Rear Panel Removal and Replacement: 手順 5、 3の画像 1 JVC KW-V820BT Rear Panel Removal and Replacement: 手順 5、 3の画像 2 JVC KW-V820BT Rear Panel Removal and Replacement: 手順 5、 3の画像 3
    • Gently separate the ribbon cable from from ZIF connector on the circuit board using a metal smudger.

    • Be careful not to scratch or damage components or features of the circuit board with the metal spudger

  6. JVC KW-V820BT Rear Panel Removal and Replacement, Top Panel Removal: 手順 6、 3の画像 1 JVC KW-V820BT Rear Panel Removal and Replacement, Top Panel Removal: 手順 6、 3の画像 2 JVC KW-V820BT Rear Panel Removal and Replacement, Top Panel Removal: 手順 6、 3の画像 3
    • Remove seven 1/64 x 3/16" screws from the top panel using the Phillips #0 screwdriver.

    • Remove the top panel.

  7. JVC KW-V820BT Rear Panel Removal and Replacement, Rear Panel Removal and Replacement: 手順 7、 3の画像 1 JVC KW-V820BT Rear Panel Removal and Replacement, Rear Panel Removal and Replacement: 手順 7、 3の画像 2 JVC KW-V820BT Rear Panel Removal and Replacement, Rear Panel Removal and Replacement: 手順 7、 3の画像 3
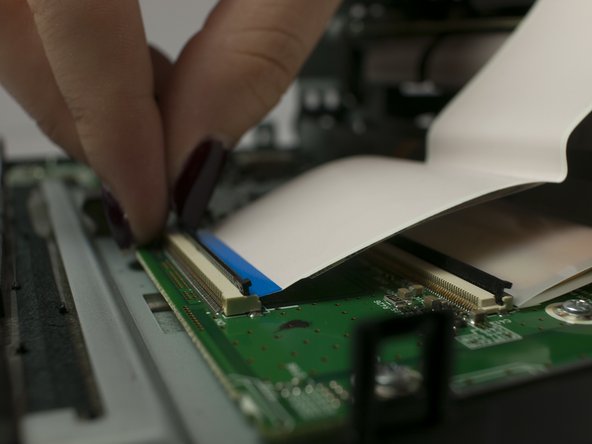
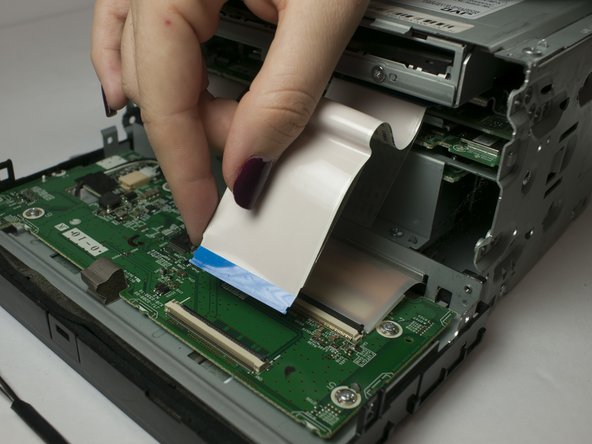
    • Disconnect Video Out/Rear View Camera cable from circuit board.

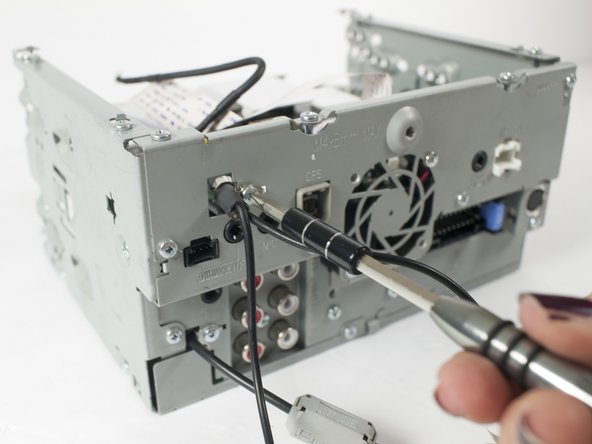
    • Remove the Video Out/Rear View Camera cable retaining clip using after removing 0-64 x 3/16" machine screw using a Phillips #0 screwdriver.

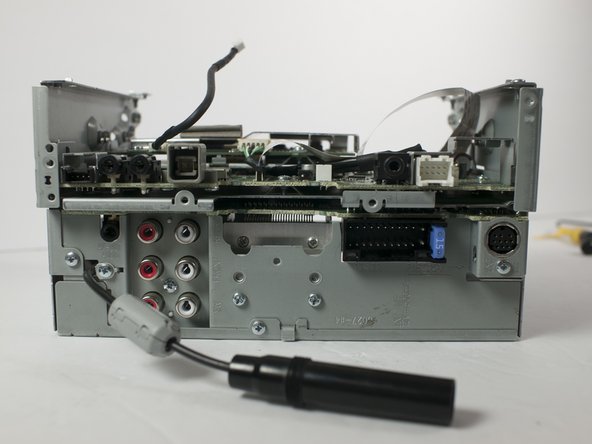
    • Withdraw Video Out/Rear View Camera cable from rear panel.

  8. JVC KW-V820BT Rear Panel Removal and Replacement: 手順 8、 3の画像 1 JVC KW-V820BT Rear Panel Removal and Replacement: 手順 8、 3の画像 2 JVC KW-V820BT Rear Panel Removal and Replacement: 手順 8、 3の画像 3
    • Remove the five 1/64 x 3/16" machine screws from the rear panel identified in the photograph.

    • Remove rear panel.

終わりに

To reassemble your device, follow these instructions in reverse order.

作成者

3人の作成者と共同で作成されました。

Roxanne Shelton

メンバー登録日: 09/27/18

211 ポイント

2のガイドは作成済み

チーム

Linn Benton Community College, Team S1-G6, Johnson Fall 2018 Linn Benton Community College, Team S1-G6, Johnson Fall 2018人のメンバー

LBCC-JOHNSON-F18S1G6

3 メンバー

8のガイドは作成済み

0 件のコメント

コメントを追加

統計データ:

過去 24時間: 0

過去 7 日: 0

過去 30 日: 2

今までの合計 351