メインコンテンツにスキップ

JVC GR-D93U Eye Piece Replacement

必要な工具と部品

  1. JVC GR-D93U Eye Piece Replacement, Eye Piece: 手順 1、 2の画像 1 JVC GR-D93U Eye Piece Replacement, Eye Piece: 手順 1、 2の画像 2
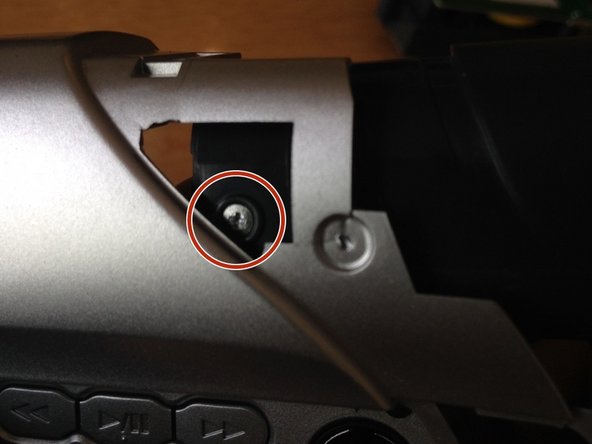
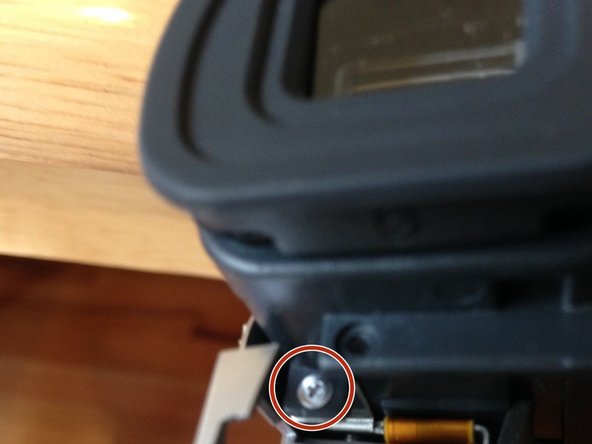
    • Unscrew two 3mm Phillips #0 screw from the bottom of the camera to remove blue plastic casing.

  2. JVC GR-D93U Eye Piece Replacement: 手順 2、 2の画像 1 JVC GR-D93U Eye Piece Replacement: 手順 2、 2の画像 2
    • Unscrew two 3mm Phillips #0 screws. Then remove 6 3mm Philips #0 screws from the bottom of the camera.

  3. JVC GR-D93U Eye Piece Replacement: 手順 3、 1の画像 1
    • Unscrew 3mm Phillips #0 screws from the batter port under the eye piece.

  4. JVC GR-D93U Eye Piece Replacement: 手順 4、 2の画像 1 JVC GR-D93U Eye Piece Replacement: 手順 4、 2の画像 2
    • Now the camera can be split into two pieces. Be careful when removing the two sides and remove the cables connecting the two halves. There are also cables that need to be disconnected from the battery pack section.

  5. JVC GR-D93U Eye Piece Replacement: 手順 5、 3の画像 1 JVC GR-D93U Eye Piece Replacement: 手順 5、 3の画像 2 JVC GR-D93U Eye Piece Replacement: 手順 5、 3の画像 3
    • Unscrew two 3mm Phillips #0 screws from around the eye piece. Then flip the camera over and unscrew 3mm Phillips #0 screw. Then unscrew 3mm Phillips #0 screw from under the eye piece.

  6. JVC GR-D93U Eye Piece Replacement: 手順 6、 2の画像 1 JVC GR-D93U Eye Piece Replacement: 手順 6、 2の画像 2
    • Unscrew 3mm Phillips #0 screw and disconnect cable. This will disconnect the eye piece from the camera.

終わりに

To reassemble your device, follow these instructions in reverse order.

作成者

1人の作成者と共同作成されました。

Lindsay

メンバー登録日: 03/16/15

267 ポイント

2のガイドは作成済み

チーム

Colorado Springs, Team 1-5, May Spring 2015 Colorado Springs, Team 1-5, May Spring 2015人のメンバー

UCCS-MAY-S15S1G5

4 メンバー

3のガイドは作成済み

0 件のコメント

コメントを追加

統計データ:

過去 24時間: 0

過去 7 日: 1

過去 30 日: 2

今までの合計 281