メインコンテンツにスキップ

JBL On Stage II Speakers Replacement

必要な工具と部品

  1. JBL On Stage II Speakers Replacement, Cracking the Case: 手順 1、 1の画像 1
    • Turn the device upside down so that the three rubber pads are facing up.

  2. JBL On Stage II Speakers Replacement: 手順 2、 1の画像 1
    • Use a heat gun (set to low) to apply heat to one of the rubber pads until you can easily remove the pad. This step takes around 5-7 minutes.

  3. JBL On Stage II Speakers Replacement: 手順 3、 1の画像 1
    • Remove the heated rubber pad with a plastic opening tool.

    • Repeat steps 2 and 3 for the two remaining rubber pads.

  4. JBL On Stage II Speakers Replacement: 手順 4、 2の画像 1 JBL On Stage II Speakers Replacement: 手順 4、 2の画像 2
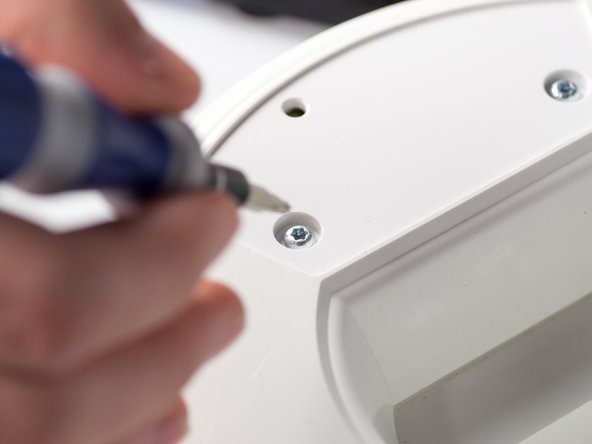
    • Remove the six 1cm T-10 torx screws on the bottom of the device (found under the rubber pads) using a T-10 Torx screwdriver.

  5. JBL On Stage II Speakers Replacement: 手順 5、 3の画像 1 JBL On Stage II Speakers Replacement: 手順 5、 3の画像 2 JBL On Stage II Speakers Replacement: 手順 5、 3の画像 3
    • Open the device along its seam.

    • Be careful when separating the device because there are wires connecting the two seperate halves.

  6. JBL On Stage II Speakers Replacement: 手順 6、 1の画像 1
    • Disconnect the ribbon cable connector from the top half of the device by pulling outward and parallel to the connecting pins.

  7. JBL On Stage II Speakers Replacement: 手順 7、 2の画像 1 JBL On Stage II Speakers Replacement: 手順 7、 2の画像 2
    • Locate and disconnect the two molex connectors found on either side of the ribbon cable connector on the bottom half of the device.

  8. JBL On Stage II Speakers Replacement, The Speakers: 手順 8、 2の画像 1 JBL On Stage II Speakers Replacement, The Speakers: 手順 8、 2の画像 2
    • Separate speakers from their slots using a metal spudger.

    • Careful, as this step may cause damage to the device.

  9. JBL On Stage II Speakers Replacement: 手順 9、 2の画像 1 JBL On Stage II Speakers Replacement: 手順 9、 2の画像 2
    • Cut the black wire (leading to the speaker you are replacing) with a pair of wire cutters.

    • Cut the red wire (leading to the speaker you are replacing) with a pair of wire cutters.

    • Notice that two black wires and two red wires connect to the speaker, be sure to reattach both wires to the new speaker.

終わりに

To reassemble your device, follow these directions in reverse order.

5 の人々がこのガイドを完成させました。

作成者

4人の作成者と共同で作成されました。

Janessa D Cabrera

メンバー登録日: 01/23/14

514 ポイント

4のガイドは作成済み

チーム

Cal Poly, Team 9-28, Maness Winter 2014 Cal Poly, Team 9-28, Maness Winter 2014人のメンバー

CPSU-MANESS-W14S9G28

4 メンバー

7のガイドは作成済み

8 件のコメント

Where can I buy the replacement speaker?

Gilberto Ruiz - 返信

I join Gןilberto question,can someone attach a link to replacement speakers or tell what is the p/n of the speakers ?

Thanks !

Oded Hafuta -

little bit late i just order it after 2 years searching

https://es.aliexpress.com/item/2pcs-For-...

Marcos Jaime - 返信

Do these work as original driver are 8 ohm?

pikachu chuuu -

Thank you for posting this! I need to fix my speakers.

prak - 返信

コメントを追加

統計データ:

過去 24時間: 1

過去 7 日: 16

過去 30 日: 50

今までの合計 14,269