メインコンテンツにスキップ

JBL Charge 5 Speakers Replacement

必要な工具と部品

  1. JBL Charge 5 Speakers Replacement, Fabric Case: 手順 1、 3の画像 1 JBL Charge 5 Speakers Replacement, Fabric Case: 手順 1、 3の画像 2 JBL Charge 5 Speakers Replacement, Fabric Case: 手順 1、 3の画像 3
    • Ensure that the device is fully powered off and no cables are attached before proceeding with the repair.

    • This fabric cover is secured with plastic clips only. Depending on the model, the cover may be secured by both plastic clips and screws.

    • Insert the flat end of the Jimmy into the seam located between the fabric cover on the right side of the seam.

    • Pry upward on the fabric cover to release plastic clips on the right side of the seam.

  2. JBL Charge 5 Speakers Replacement: 手順 2、 3の画像 1 JBL Charge 5 Speakers Replacement: 手順 2、 3の画像 2 JBL Charge 5 Speakers Replacement: 手順 2、 3の画像 3
    • Insert the flat end of the Jimmy into the seam between the fabric cover at the center of the seam and the left side of the seam.

    • Use the Jimmy to pry open the edge with the rubber texture, releasing the remaining plastic clips.

  3. JBL Charge 5 Speakers Replacement: 手順 3、 3の画像 1 JBL Charge 5 Speakers Replacement: 手順 3、 3の画像 2 JBL Charge 5 Speakers Replacement: 手順 3、 3の画像 3
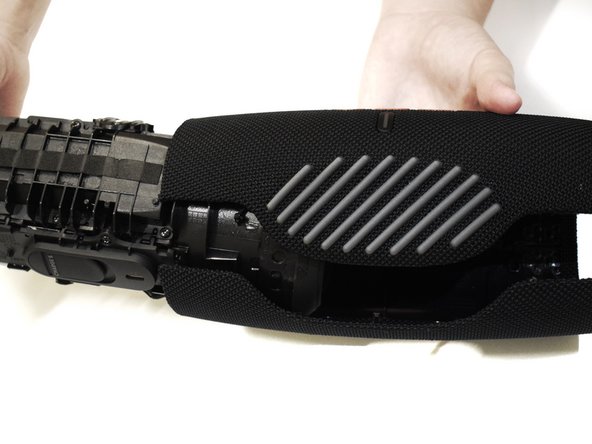
    • Use your hands to gently open the two halves of the casing and slide the fabric cover off of the interior housing.

  4. JBL Charge 5 Speakers Replacement, Speakers: 手順 4、 3の画像 1 JBL Charge 5 Speakers Replacement, Speakers: 手順 4、 3の画像 2 JBL Charge 5 Speakers Replacement, Speakers: 手順 4、 3の画像 3
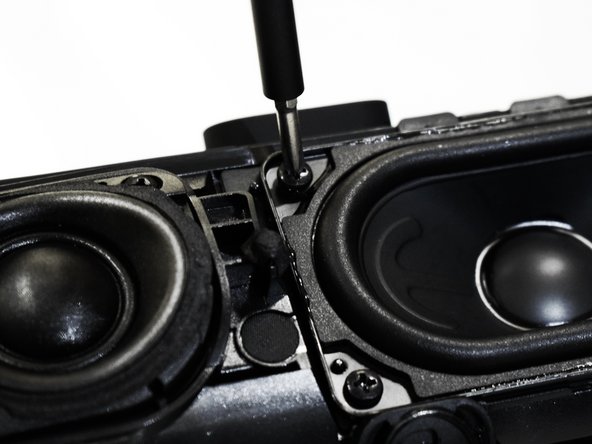
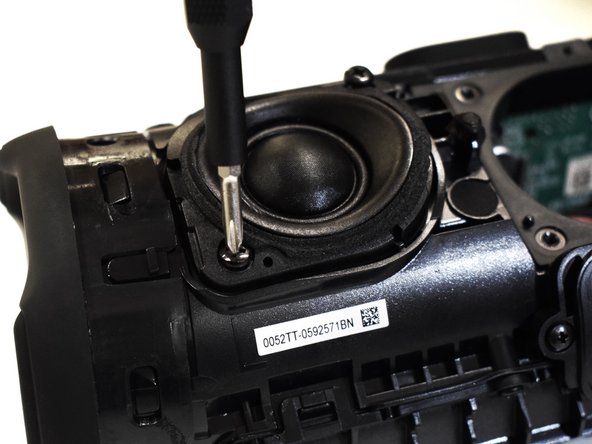
    • Using a Phillips #1 screwdriver, remove the four 16.5 mm screws on the corners around the oval speaker.

  5. JBL Charge 5 Speakers Replacement: 手順 5、 3の画像 1 JBL Charge 5 Speakers Replacement: 手順 5、 3の画像 2 JBL Charge 5 Speakers Replacement: 手順 5、 3の画像 3
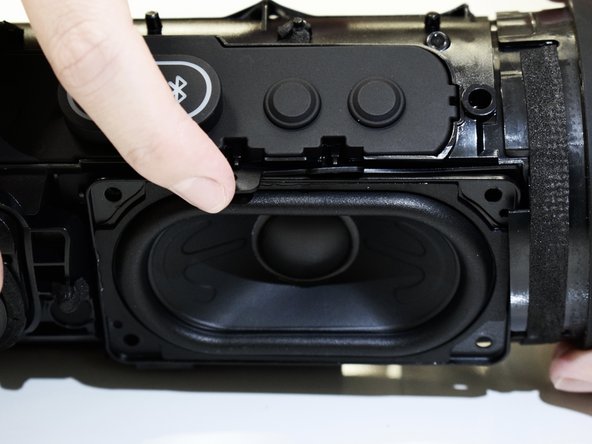
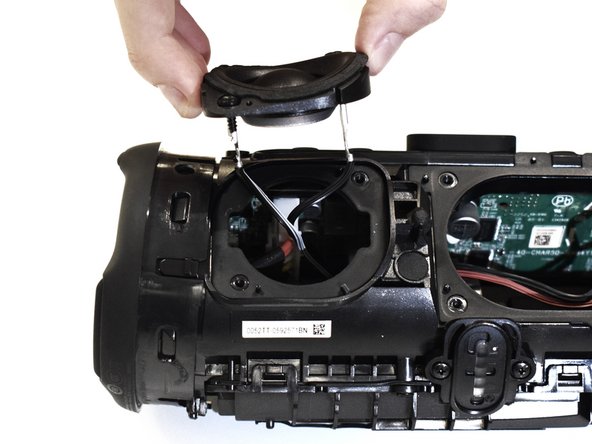
    • Gently use your hands to undo the flaps located at the top of the speaker.

    • Grip the speaker on the top and bottom left of the square platform.

    • Gently remove the speaker from the casing.

    • Be careful of the wires attached to the back of the speaker when removing.

  6. JBL Charge 5 Speakers Replacement: 手順 6、 3の画像 1 JBL Charge 5 Speakers Replacement: 手順 6、 3の画像 2 JBL Charge 5 Speakers Replacement: 手順 6、 3の画像 3
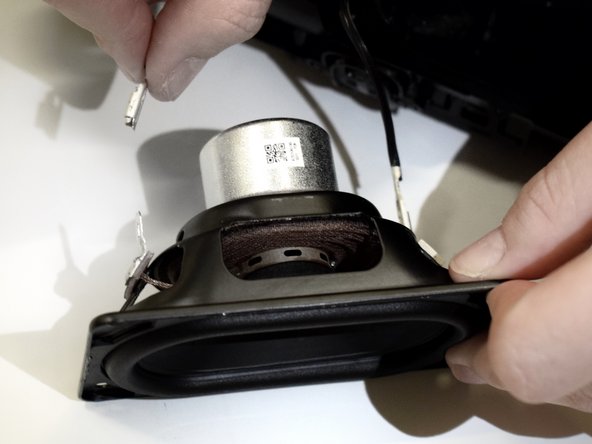
    • Holding the speaker firmly in place, gently remove the red wire from the speaker by pinching it at the silver base near the connection and pulling.

  7. JBL Charge 5 Speakers Replacement: 手順 7、 2の画像 1 JBL Charge 5 Speakers Replacement: 手順 7、 2の画像 2
    • Repeat the previous step for the black wire.

  8. JBL Charge 5 Speakers Replacement: 手順 8、 3の画像 1 JBL Charge 5 Speakers Replacement: 手順 8、 3の画像 2 JBL Charge 5 Speakers Replacement: 手順 8、 3の画像 3
    • Using a Phillips #1 screwdriver, remove the two 16.5 mm screws in the small round speaker's top right and bottom left corners.

    • Gently use your hands to grip the speaker and remove it from the device.

    • Be careful of the wires attached to the back of the speaker when removing.

  9. JBL Charge 5 Speakers Replacement: 手順 9、 2の画像 1 JBL Charge 5 Speakers Replacement: 手順 9、 2の画像 2
    • Pinch the white wire gently at the silver base near the connection.

    • Carefully disconnect the wire from the speaker by pulling it.

  10. JBL Charge 5 Speakers Replacement: 手順 10、 2の画像 1 JBL Charge 5 Speakers Replacement: 手順 10、 2の画像 2
    • Repeat the previous steps for the black wire.

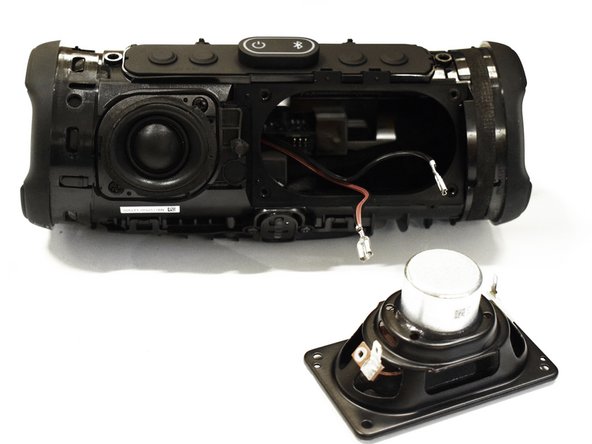
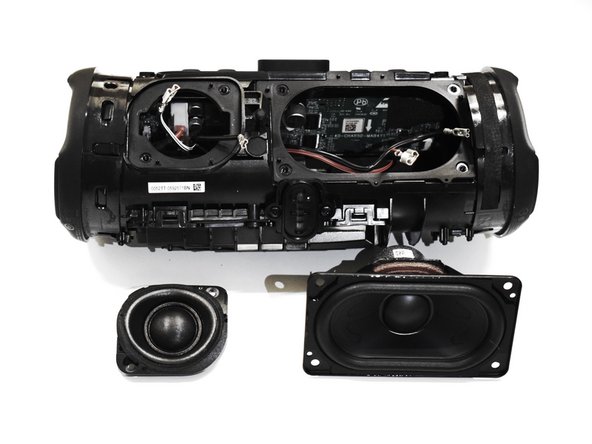
    • Both speakers should be properly detached.

終わりに

To reassemble your device, follow these instructions in reverse order.

作成者

2人の作成者と共同で作成されました。

Kat Whaley

メンバー登録日: 09/13/23

753 ポイント

6のガイドは作成済み

チーム

Western Carolina University, Team 1-2, Virtue Fall 2023 Western Carolina University, Team 1-2, Virtue Fall 2023人のメンバー

WCU-VIRTUE-F23S1G2

5 メンバー

10のガイドは作成済み

0 件のコメント

コメントを追加

統計データ:

過去 24時間: 2

過去 7 日: 32

過去 30 日: 160

今までの合計 884