メインコンテンツにスキップ

Insignia Sport NS-4V17 Front Case Cover Replacement

必要な工具と部品

  1. Insignia Sport NS-4V17 Front Case Cover Replacement, Battery: 手順 1、 1の画像 1
    • Remove the 3mm Phillips #00 screw on the back of the Insignia NS-4v17.

  2. Insignia Sport NS-4V17 Front Case Cover Replacement: 手順 2、 2の画像 1 Insignia Sport NS-4V17 Front Case Cover Replacement: 手順 2、 2の画像 2
    • Detach the back cover by carefully pulling up and out on the back plastic casing.

    • Do not pull apart the red wire connecting the battery to the device.

  3. Insignia Sport NS-4V17 Front Case Cover Replacement: 手順 3、 1の画像 1
    • Use the plastic opening tool to reach underneath the battery, opposite from the side with the red wire, and remove it from its plastic case.

    • Be careful to not tear the wires while opening the case.

  4. Insignia Sport NS-4V17 Front Case Cover Replacement: 手順 4、 1の画像 1
    • Reach under the white plastic wire connector using the plastic opening tool and disconnect it from the socket.

    • Do not disconnect wires from plastic connector.

  5. Insignia Sport NS-4V17 Front Case Cover Replacement, Front Case Cover: 手順 5、 2の画像 1 Insignia Sport NS-4V17 Front Case Cover Replacement, Front Case Cover: 手順 5、 2の画像 2
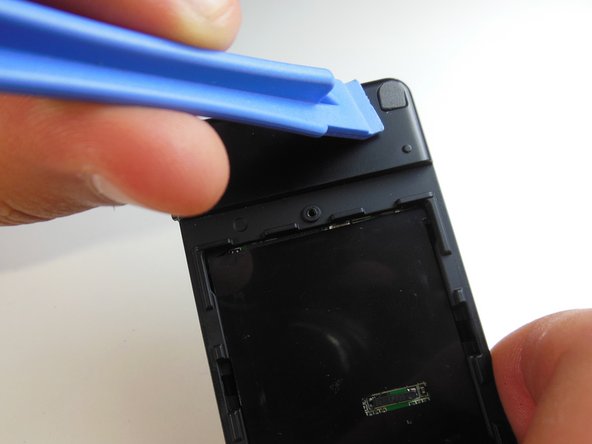
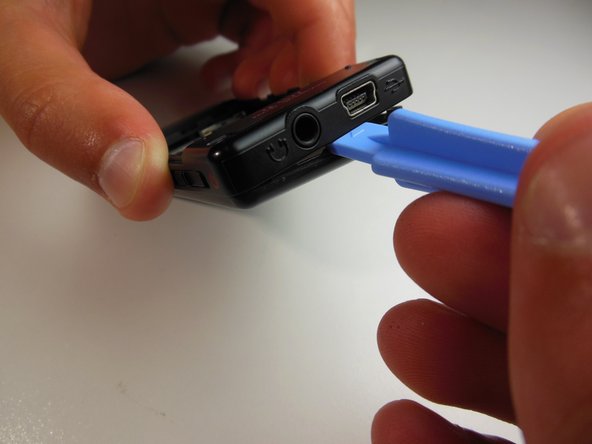
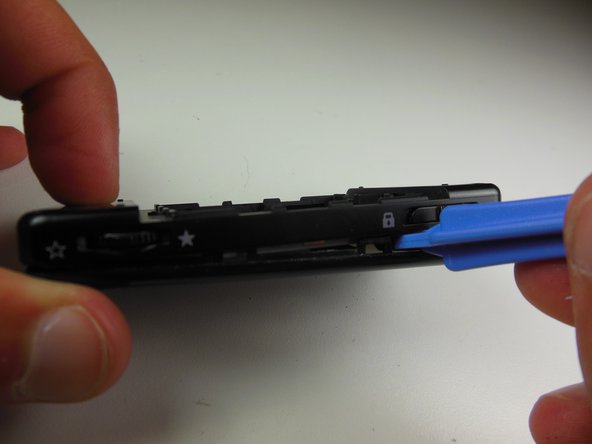
    • Remove the four corner plastic covers on the back of the device using the plastic opening tool.

  6. Insignia Sport NS-4V17 Front Case Cover Replacement: 手順 6、 1の画像 1
    • Using a Philips #00 screwdriver remove all four 4.5mm corner screws located underneath the corner pads.

  7. Insignia Sport NS-4V17 Front Case Cover Replacement: 手順 7、 3の画像 1 Insignia Sport NS-4V17 Front Case Cover Replacement: 手順 7、 3の画像 2 Insignia Sport NS-4V17 Front Case Cover Replacement: 手順 7、 3の画像 3
    • Carefully wedge the plastic opening tool into either long side of the device.

    • Slowly move the plastic opening tool along the side of the device, separating the front and back case covers.

    • Repeat these steps on the other side of the device.

  8. Insignia Sport NS-4V17 Front Case Cover Replacement: 手順 8、 1の画像 1
    • Once the front cover is loose, use your fingers to remove the front case cover for a new installation.

終わりに

To reassemble your device, follow these instructions in reverse order.

ある他の人がこのガイドを完成しました。

作成者

5人の作成者と共同で作成されました。

Wesley Ballar

メンバー登録日: 04/18/13

88 ポイント

4のガイドは作成済み

チーム

Cal Poly, Team 12-36, Amido Spring 2013 Cal Poly, Team 12-36, Amido Spring 2013人のメンバー

CPSU-AMIDO-S13S12G36

4 メンバー

5のガイドは作成済み

0 件のコメント

コメントを追加

統計データ:

過去 24時間: 0

過去 7 日: 0

過去 30 日: 0

今までの合計 347