メインコンテンツにスキップ

この修理ガイドは変更されています。最新の未承認バージョンに切り替えます。

Insignia NS-F12R6-SS Oscillation Arm Replacement

必要な工具と部品

  1. Insignia NS-F12R6-SS Oscillation Arm Replacement, Front Cage: 手順 1、 2の画像 1 Insignia NS-F12R6-SS Oscillation Arm Replacement, Front Cage: 手順 1、 2の画像 2
    • Unplug your fan.

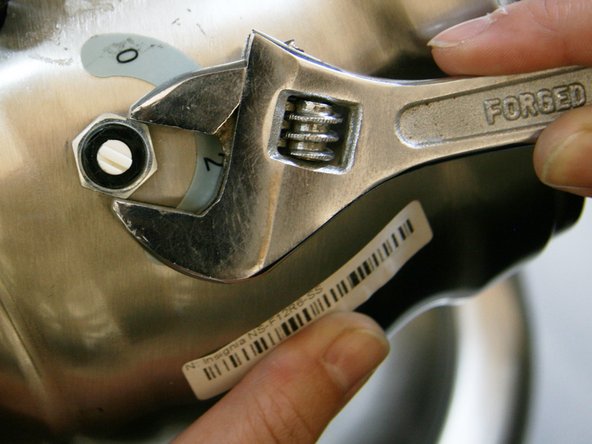
    • Remove the 20 mm bolt that fastens the fan ring located at the bottom of the fan cage with a Phillips #3 screwdriver.

  2. Insignia NS-F12R6-SS Oscillation Arm Replacement: 手順 2、 1の画像 1
    • Remove the ring that runs around the edge of the fan cage.

  3. Insignia NS-F12R6-SS Oscillation Arm Replacement: 手順 3、 1の画像 1
    • Remove the front of the fan cage.

  4. Insignia NS-F12R6-SS Oscillation Arm Replacement, Fan Blade: 手順 4、 1の画像 1
    • Remove the 8 mm bolt fastening the fan blades to the rotor with a Phillip #3 screwdriver.

  5. Insignia NS-F12R6-SS Oscillation Arm Replacement: 手順 5、 1の画像 1
    • Take caution when removing the fan blades. They can be sharp!

    • Slide the fan blade off the end of the rotor.

  6. Insignia NS-F12R6-SS Oscillation Arm Replacement, Back Cage: 手順 6、 1の画像 1
    • Unscrew the four 8 mm bolts that fasten the back of the fan cage back to the motor housing with a Phillips #3 screwdriver.

  7. Insignia NS-F12R6-SS Oscillation Arm Replacement: 手順 7、 1の画像 1
    • Pull the back cage off.

  8. Insignia NS-F12R6-SS Oscillation Arm Replacement, Oscillation Button: 手順 8、 2の画像 1 Insignia NS-F12R6-SS Oscillation Arm Replacement, Oscillation Button: 手順 8、 2の画像 2
    • Unscrew the 10 mm screw in the center hole of the oscillation knob with a Phillips #3 screwdriver.

  9. Insignia NS-F12R6-SS Oscillation Arm Replacement: 手順 9、 1の画像 1
    • Remove the oscillation knob.

  10. Insignia NS-F12R6-SS Oscillation Arm Replacement, Motor Housing: 手順 10、 1の画像 1
    • Use your fingers to gently pull the power knob directly away from the motor housing.

  11. Insignia NS-F12R6-SS Oscillation Arm Replacement: 手順 11、 1の画像 1
    • Unscrew the flat 17 mm nut fastened at the bottom of the power knob with a small crescent wrench.

  12. Insignia NS-F12R6-SS Oscillation Arm Replacement: 手順 12、 2の画像 1 Insignia NS-F12R6-SS Oscillation Arm Replacement: 手順 12、 2の画像 2
    • Remove the four 6 mm bolts and small washers that secure the front face of the motor housing with a Phillips #3 screwdriver and remove the washers.

  13. Insignia NS-F12R6-SS Oscillation Arm Replacement: 手順 13、 1の画像 1
    • Pull the front face of the motor housing off toward the front of the rotor.

  14. Insignia NS-F12R6-SS Oscillation Arm Replacement: 手順 14、 2の画像 1 Insignia NS-F12R6-SS Oscillation Arm Replacement: 手順 14、 2の画像 2
    • Remove the 10 mm triangular-headed bolt with a Phillips #3 screwdriver.

  15. Insignia NS-F12R6-SS Oscillation Arm Replacement: 手順 15、 1の画像 1
    • Slide the back end of the motor housing away from the front of the rotor.

  16. Insignia NS-F12R6-SS Oscillation Arm Replacement: 手順 16、 1の画像 1
    • Remove the small piece of paper hanging on the power button.

  17. Insignia NS-F12R6-SS Oscillation Arm Replacement, Oscillation Arm: 手順 17、 2の画像 1 Insignia NS-F12R6-SS Oscillation Arm Replacement, Oscillation Arm: 手順 17、 2の画像 2
    • Using a Phillips #3 screwdriver, unscrew the the 16 mm long screw fastening the oscillation arm to the lower oscillation gear screw.

  18. Insignia NS-F12R6-SS Oscillation Arm Replacement: 手順 18、 2の画像 1 Insignia NS-F12R6-SS Oscillation Arm Replacement: 手順 18、 2の画像 2
    • Using a Phillips #3 screwdriver, unscrew and remove the 4 mm long bolt on the front face of the base that fastens the motor assembly to the base bolt.

  19. Insignia NS-F12R6-SS Oscillation Arm Replacement: 手順 19、 1の画像 1
    • Remove the fan motor assembly from the base.

  20. Insignia NS-F12R6-SS Oscillation Arm Replacement: 手順 20、 2の画像 1 Insignia NS-F12R6-SS Oscillation Arm Replacement: 手順 20、 2の画像 2
    • Using a Phillips #3 screwdriver, unscrew the 15 mm long bolt fastening the oscillation arm to the fan base bolt.

  21. Insignia NS-F12R6-SS Oscillation Arm Replacement: 手順 21、 1の画像 1
    • Remove the oscillation arm.

終わりに

To reassemble your device, follow these instructions in reverse order.

ある他の人がこのガイドを完成しました。

作成者

1人の作成者と共同作成されました。

Hank

メンバー登録日: 09/17/18

1,091 ポイント

8のガイドは作成済み

チーム

CSU Fullerton, Team S2-G1, Bruce Fall 2018 CSU Fullerton, Team S2-G1, Bruce Fall 2018人のメンバー

CSUF-BRUCE-F18S2G1

4 メンバー

8のガイドは作成済み

0 件のコメント

コメントを追加

統計データ:

過去 24時間: 0

過去 7 日: 1

過去 30 日: 6

今までの合計 396