メインコンテンツにスキップ

Insignia NS-DS9PDVD15 Disc Tray Replacement

必要な工具と部品

  1. Insignia NS-DS9PDVD15 Disc Tray Replacement, Bottom Cover: 手順 1、 2の画像 1 Insignia NS-DS9PDVD15 Disc Tray Replacement, Bottom Cover: 手順 1、 2の画像 2
    • Turn the power off. Slide the power button to OFF.

  2. Insignia NS-DS9PDVD15 Disc Tray Replacement: 手順 2、 2の画像 1 Insignia NS-DS9PDVD15 Disc Tray Replacement: 手順 2、 2の画像 2
    • Unplug AC adapter from car cigarette lighter.

  3. Insignia NS-DS9PDVD15 Disc Tray Replacement: 手順 3、 1の画像 1
    • Make sure there is no DVD or CD in the disc tray

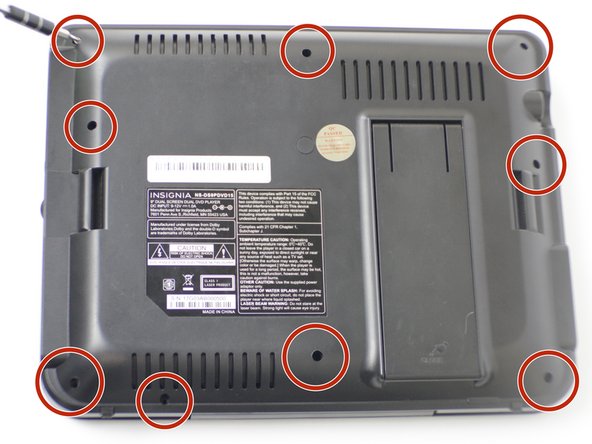
  4. Insignia NS-DS9PDVD15 Disc Tray Replacement: 手順 4、 2の画像 1 Insignia NS-DS9PDVD15 Disc Tray Replacement: 手順 4、 2の画像 2
    • Unscrew the nine 9mm screws with a JIS #000 screwdriver.

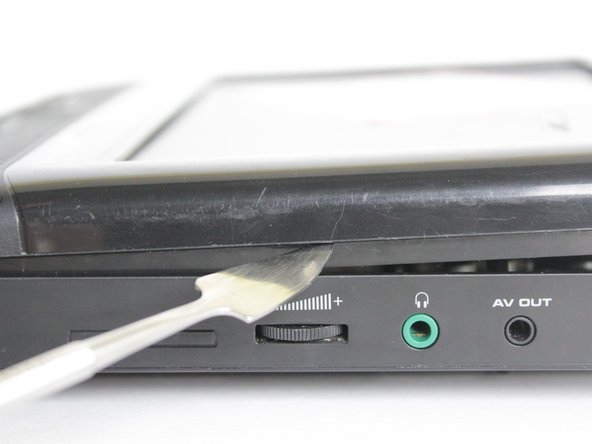
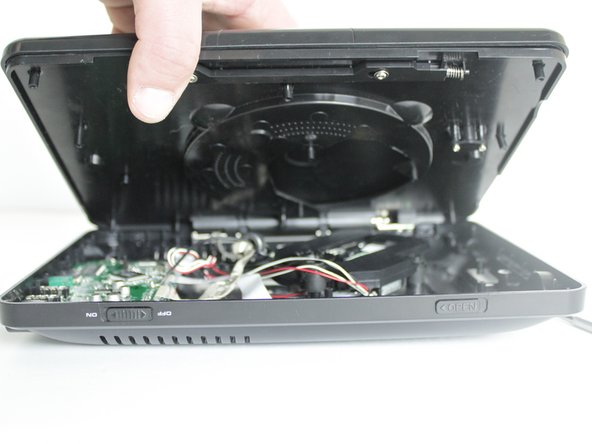
  5. Insignia NS-DS9PDVD15 Disc Tray Replacement: 手順 5、 3の画像 1 Insignia NS-DS9PDVD15 Disc Tray Replacement: 手順 5、 3の画像 2 Insignia NS-DS9PDVD15 Disc Tray Replacement: 手順 5、 3の画像 3
    • Pry off back panel with prying tool, then remove by hand.

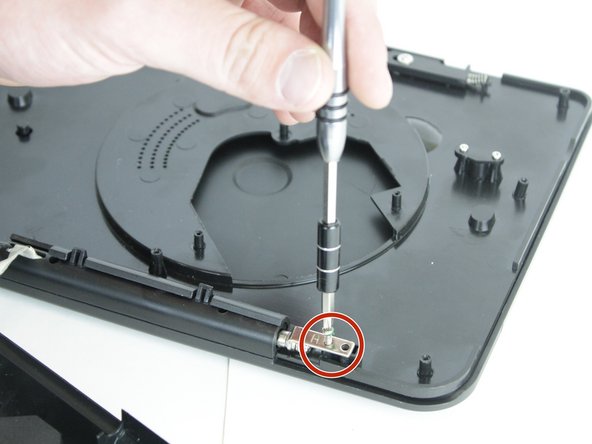
  6. Insignia NS-DS9PDVD15 Disc Tray Replacement, Disc Tray: 手順 6、 2の画像 1 Insignia NS-DS9PDVD15 Disc Tray Replacement, Disc Tray: 手順 6、 2の画像 2
    • After the back is removed and the disk tray is loose from the bottom, locate the two, 3 mm screws that hold the tray to the hinge.

    • Unscrew them with the JIS #000 screwdriver.

  7. Insignia NS-DS9PDVD15 Disc Tray Replacement: 手順 7、 1の画像 1
    • Slide the tray up and off of the hinge completely.

終わりに

To reassemble your device, follow these instructions in reverse order.

作成者

2人の作成者と共同で作成されました。

Conner Kaer

メンバー登録日: 04/05/18

85 ポイント

1ガイドが承認済み

チーム

0 件のコメント

コメントを追加

統計データ:

過去 24時間: 0

過去 7 日: 2

過去 30 日: 7

今までの合計 131