メインコンテンツにスキップ

Insignia NS-BCDCAS1 Tape Cassette Player Replacement

必要な工具と部品

  1. Insignia NS-BCDCAS1 Tape Cassette Player Replacement, Outer Panels: 手順 1、 2の画像 1 Insignia NS-BCDCAS1 Tape Cassette Player Replacement, Outer Panels: 手順 1、 2の画像 2
    • Turn the boombox around to see the back, and then flip it upside down.

    • Insert a 2.5mm flathead driver into the two holes next to the battery compartment.

    • Turn the driver counterclockwise several times to loosen and pull out the 17mm screw.

  2. Insignia NS-BCDCAS1 Tape Cassette Player Replacement: 手順 2、 1の画像 1
    • Peel off the two black square foams in front of the battery compartment to reveal a screw under each one.

  3. Insignia NS-BCDCAS1 Tape Cassette Player Replacement: 手順 3、 2の画像 1 Insignia NS-BCDCAS1 Tape Cassette Player Replacement: 手順 3、 2の画像 2
    • Remove the two 8mm screws using a 2.5mm flathead driver.

    • The front grey panel will loosen up once the final screw is removed.

  4. Insignia NS-BCDCAS1 Tape Cassette Player Replacement: 手順 4、 1の画像 1
    • Turn the boombox on its back.

    • Release the front panel by pushing down on the latches holding the panels together.

    • There are four silver latches on the top side of the panel and one on the bottom.

    • Do not force the panel comletely off, there are cables attached inside.

  5. Insignia NS-BCDCAS1 Tape Cassette Player Replacement: 手順 5、 2の画像 1 Insignia NS-BCDCAS1 Tape Cassette Player Replacement: 手順 5、 2の画像 2
    • Turn the boombox around to view the back and lift the handle up.

    • Using the same driver with 2.5mm flathead, remove the two 14mm screws under the handle.

    • Gently lift the black top but do not pull completely away.

  6. Insignia NS-BCDCAS1 Tape Cassette Player Replacement, Tape Cassette Player: 手順 6、 1の画像 1
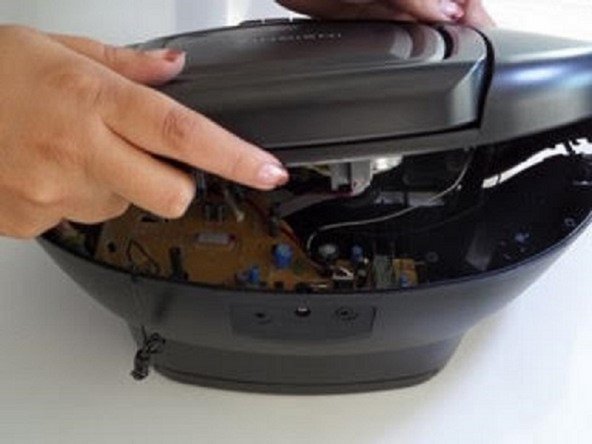
    • Face the bottom of the opened boombox, and detach the front panel from the back in the following order:

  7. Insignia NS-BCDCAS1 Tape Cassette Player Replacement: 手順 7、 3の画像 1 Insignia NS-BCDCAS1 Tape Cassette Player Replacement: 手順 7、 3の画像 2 Insignia NS-BCDCAS1 Tape Cassette Player Replacement: 手順 7、 3の画像 3
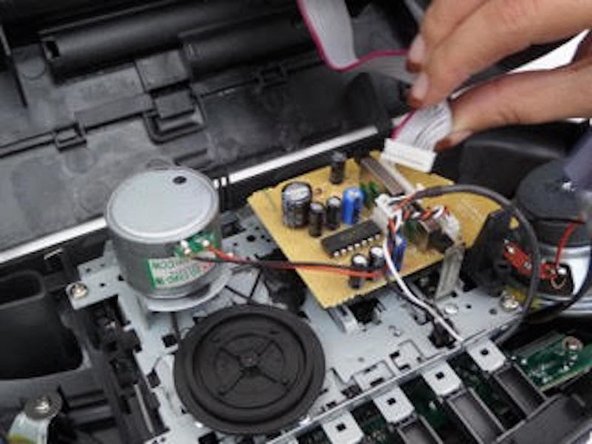
    • Unplug the 4 wires (1 red, 2 black, 1 white) from the yellow motherboard on the front panel, by pulling upwards.

    • Pull the black tape attached to the white plug on the yellow motherboard by tugging upwards.

    • Detach the thicker, white and pink cord on the smaller yellow plate on the front panel by pulling away.

  8. Insignia NS-BCDCAS1 Tape Cassette Player Replacement: 手順 8、 2の画像 1 Insignia NS-BCDCAS1 Tape Cassette Player Replacement: 手順 8、 2の画像 2
    • Facing the inside of the front panel, on the corners of the grey plate, there are four screws. Unscrew these with a phillips 1.

  9. Insignia NS-BCDCAS1 Tape Cassette Player Replacement: 手順 9、 2の画像 1 Insignia NS-BCDCAS1 Tape Cassette Player Replacement: 手順 9、 2の画像 2
    • Face the inside of the front panel. Push the buttons down gently to slide the cassette player unit out.

  10. Insignia NS-BCDCAS1 Tape Cassette Player Replacement: 手順 10、 1の画像 1
    この手順で使用する道具:
    Tweezers
    $4.99
    購入する
    • On the back of the unit to the right of the motherboard and between the motor and black circle, there is a rubber band that allows the spinning wheels to spin the knobs. Using tweezers, remove the rubber band and replace it.

終わりに

To reassemble your device, follow these instructions in reverse order.

作成者

3人の作成者と共同で作成されました。

Erin King

メンバー登録日: 09/12/16

215 ポイント

2のガイドは作成済み

チーム

CSU Fullerton, Team 2-5, Bruce Fall 2016 CSU Fullerton, Team 2-5, Bruce Fall 2016人のメンバー

CSUF-BRUCE-F16S2G5

4 メンバー

4のガイドは作成済み

0 件のコメント

コメントを追加

統計データ:

過去 24時間: 0

過去 7 日: 3

過去 30 日: 12

今までの合計 564