メインコンテンツにスキップ

Insignia NS-BCDCAS1 Cassette Door Latch Replacement

必要な工具と部品

  1. Insignia NS-BCDCAS1 Cassette Door Latch Replacement, Outer Panels: 手順 1、 2の画像 1 Insignia NS-BCDCAS1 Cassette Door Latch Replacement, Outer Panels: 手順 1、 2の画像 2
    • Turn the boombox around to see the back, and then flip it upside down.

    • Insert a 2.5mm flathead driver into the two holes next to the battery compartment.

    • Turn the driver counterclockwise several times to loosen and pull out the 17mm screw.

  2. Insignia NS-BCDCAS1 Cassette Door Latch Replacement: 手順 2、 1の画像 1
    • Peel off the two black square foams in front of the battery compartment to reveal a screw under each one.

  3. Insignia NS-BCDCAS1 Cassette Door Latch Replacement: 手順 3、 2の画像 1 Insignia NS-BCDCAS1 Cassette Door Latch Replacement: 手順 3、 2の画像 2
    • Remove the two 8mm screws using a 2.5mm flathead driver.

    • The front grey panel will loosen up once the final screw is removed.

  4. Insignia NS-BCDCAS1 Cassette Door Latch Replacement: 手順 4、 1の画像 1
    • Turn the boombox on its back.

    • Release the front panel by pushing down on the latches holding the panels together.

    • There are four silver latches on the top side of the panel and one on the bottom.

    • Do not force the panel comletely off, there are cables attached inside.

  5. Insignia NS-BCDCAS1 Cassette Door Latch Replacement: 手順 5、 2の画像 1 Insignia NS-BCDCAS1 Cassette Door Latch Replacement: 手順 5、 2の画像 2
    • Turn the boombox around to view the back and lift the handle up.

    • Using the same driver with 2.5mm flathead, remove the two 14mm screws under the handle.

    • Gently lift the black top but do not pull completely away.

  6. Insignia NS-BCDCAS1 Cassette Door Latch Replacement, Cassette Door Latch: 手順 6、 1の画像 1
    • Start by unplugging the red and black cable connected to the motherboard

  7. Insignia NS-BCDCAS1 Cassette Door Latch Replacement: 手順 7、 1の画像 1
    • Unplug the red and pink wires connecting the top of the device to the motherboard

  8. Insignia NS-BCDCAS1 Cassette Door Latch Replacement: 手順 8、 3の画像 1 Insignia NS-BCDCAS1 Cassette Door Latch Replacement: 手順 8、 3の画像 2 Insignia NS-BCDCAS1 Cassette Door Latch Replacement: 手順 8、 3の画像 3
    • Disconnect the black shiny tape connecting the motherboard to the front of the device

    • Also disconnect the pink and white wires connecting the cassette unit to the device.

  9. Insignia NS-BCDCAS1 Cassette Door Latch Replacement: 手順 9、 1の画像 1
    • After disconnecting all the wires, the front panel is now free and easy to work on.

  10. Insignia NS-BCDCAS1 Cassette Door Latch Replacement: 手順 10、 1の画像 1
    この手順で使用する道具:
    Flathead 3/32" or 2.5 mm Screwdriver
    $5.49
    購入する
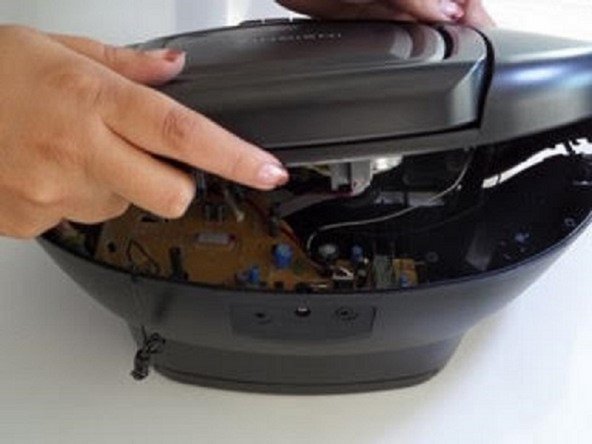
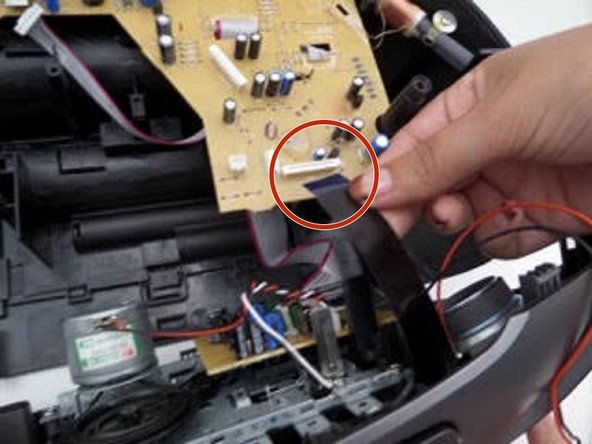
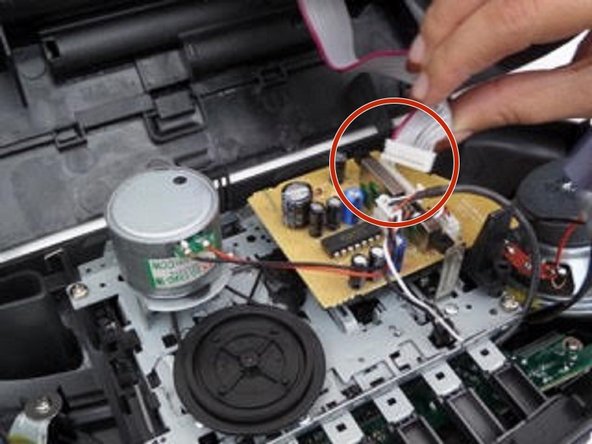
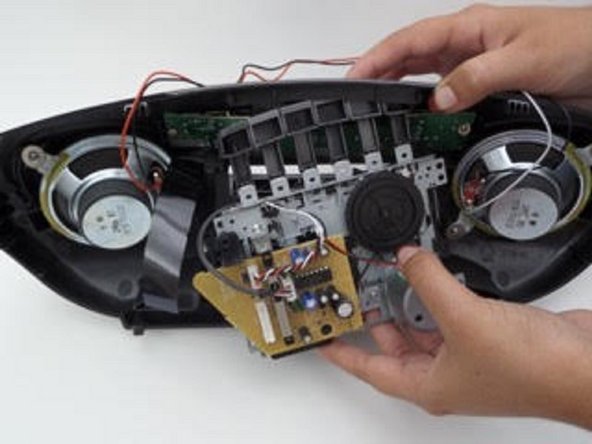
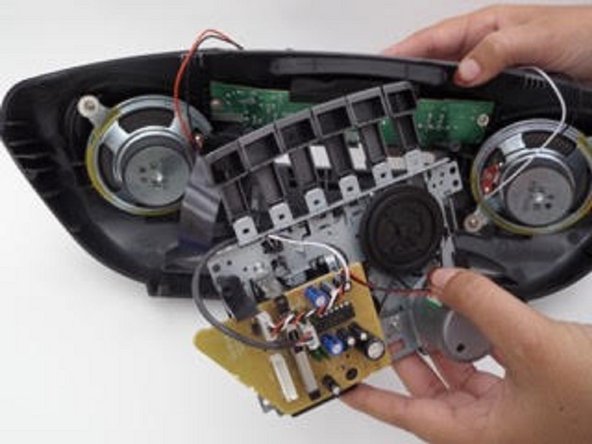
    • To remove the cassette unit, use a 2.5mm flathead on the 4 screws holding the unit together.

  11. Insignia NS-BCDCAS1 Cassette Door Latch Replacement: 手順 11、 3の画像 1 Insignia NS-BCDCAS1 Cassette Door Latch Replacement: 手順 11、 3の画像 2 Insignia NS-BCDCAS1 Cassette Door Latch Replacement: 手順 11、 3の画像 3
    • While pressing the eject bottom, pull the cassette unit down and away from the front panel.

  12. Insignia NS-BCDCAS1 Cassette Door Latch Replacement: 手順 12、 1の画像 1
    • The door latch is located on the bottom corner of the cassette unit.

終わりに

To reassemble your device, follow these instructions in reverse order.

作成者

3人の作成者と共同で作成されました。

diego geldres

メンバー登録日: 09/12/16

148 ポイント

1ガイドが承認済み

チーム

CSU Fullerton, Team 2-5, Bruce Fall 2016 CSU Fullerton, Team 2-5, Bruce Fall 2016人のメンバー

CSUF-BRUCE-F16S2G5

4 メンバー

4のガイドは作成済み

0 件のコメント

コメントを追加

統計データ:

過去 24時間: 1

過去 7 日: 5

過去 30 日: 6

今までの合計 597