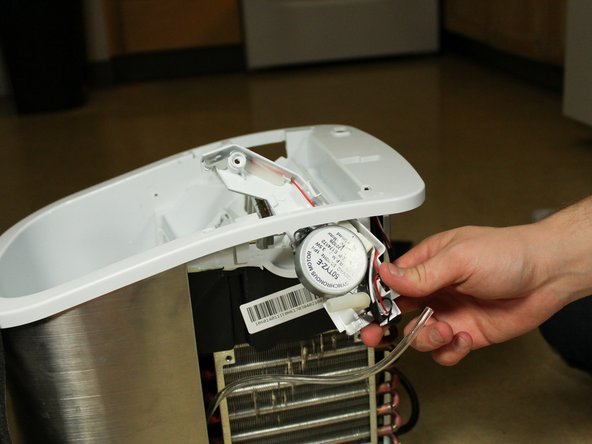
メインコンテンツにスキップ

Insignia Ice Maker NS-IMP26SS7 Water Pump Replacement

必要な工具と部品

  1. Insignia Ice Maker NS-IMP26SS7 Water Pump Replacement, Water Tray: 手順 1、 3の画像 1 Insignia Ice Maker NS-IMP26SS7 Water Pump Replacement, Water Tray: 手順 1、 3の画像 2 Insignia Ice Maker NS-IMP26SS7 Water Pump Replacement, Water Tray: 手順 1、 3の画像 3
    • Remove the 6 screws holding the rear casing on.

    • Remove the rear casing

  2. Insignia Ice Maker NS-IMP26SS7 Water Pump Replacement: 手順 2、 3の画像 1 Insignia Ice Maker NS-IMP26SS7 Water Pump Replacement: 手順 2、 3の画像 2 Insignia Ice Maker NS-IMP26SS7 Water Pump Replacement: 手順 2、 3の画像 3
    • Remove the 4 screws holding the Ice Tray to the body of the Ice Maker.

  3. Insignia Ice Maker NS-IMP26SS7 Water Pump Replacement: 手順 3、 3の画像 1 Insignia Ice Maker NS-IMP26SS7 Water Pump Replacement: 手順 3、 3の画像 2 Insignia Ice Maker NS-IMP26SS7 Water Pump Replacement: 手順 3、 3の画像 3
    • Remove the 4 screws holding the Ice Tray from the top.

  4. Insignia Ice Maker NS-IMP26SS7 Water Pump Replacement: 手順 4、 2の画像 1 Insignia Ice Maker NS-IMP26SS7 Water Pump Replacement: 手順 4、 2の画像 2
    • Lift the Water Pump out of the way

  5. Insignia Ice Maker NS-IMP26SS7 Water Pump Replacement: 手順 5、 3の画像 1 Insignia Ice Maker NS-IMP26SS7 Water Pump Replacement: 手順 5、 3の画像 2 Insignia Ice Maker NS-IMP26SS7 Water Pump Replacement: 手順 5、 3の画像 3
    • Remove the final 2 screws.

  6. Insignia Ice Maker NS-IMP26SS7 Water Pump Replacement: 手順 6、 3の画像 1 Insignia Ice Maker NS-IMP26SS7 Water Pump Replacement: 手順 6、 3の画像 2 Insignia Ice Maker NS-IMP26SS7 Water Pump Replacement: 手順 6、 3の画像 3
    • Remove the plastic cover from the circuit board by pressing the lever on the side. A pry tool may be required.

    • Disconnect the water tray cord.

  7. Insignia Ice Maker NS-IMP26SS7 Water Pump Replacement, Water Pump: 手順 7、 3の画像 1 Insignia Ice Maker NS-IMP26SS7 Water Pump Replacement, Water Pump: 手順 7、 3の画像 2 Insignia Ice Maker NS-IMP26SS7 Water Pump Replacement, Water Pump: 手順 7、 3の画像 3
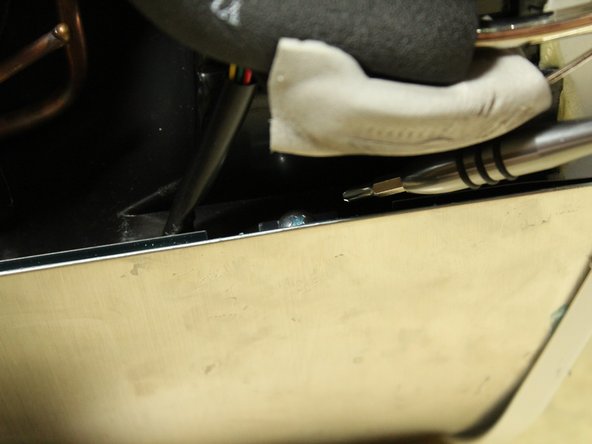
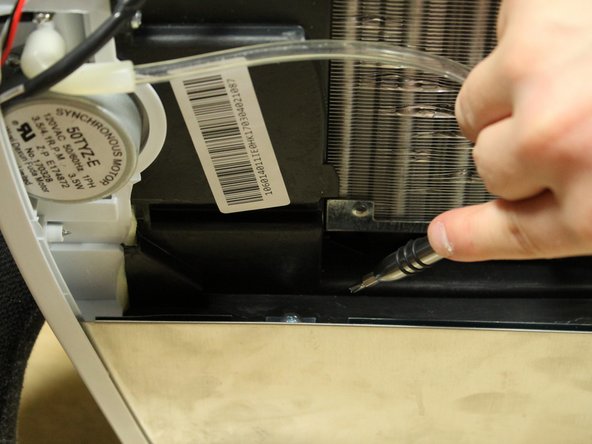
    • Disconnect the water hose

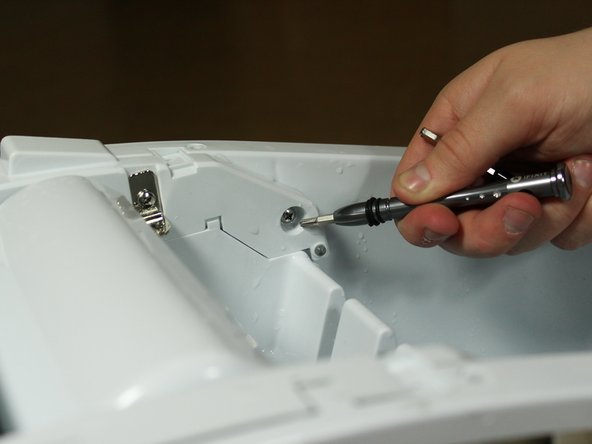
    • Remove the 2 screws holding the pump to the Ice Tray attachment.

  8. Insignia Ice Maker NS-IMP26SS7 Water Pump Replacement: 手順 8、 2の画像 1 Insignia Ice Maker NS-IMP26SS7 Water Pump Replacement: 手順 8、 2の画像 2
    • Remove the plastic covering over the circuit board by pressing against the latch on one side. A prying tool may be needed.

  9. Insignia Ice Maker NS-IMP26SS7 Water Pump Replacement: 手順 9、 2の画像 1 Insignia Ice Maker NS-IMP26SS7 Water Pump Replacement: 手順 9、 2の画像 2
    • Disconnect the power supply as well as the control cables from the circuit board.

    • You may have to cut through some electrical tape to free the wires.

終わりに

To reassemble your device, follow these instructions in reverse order.

作成者

3人の作成者と共同で作成されました。

Evan Taylor

メンバー登録日: 01/18/18

616 ポイント

5のガイドは作成済み

チーム

Cal Poly, Team S21-G3, Banghart Winter 2018 Cal Poly, Team S21-G3, Banghart Winter 2018人のメンバー

CPSU-BANGHART-W18S21G3

2 メンバー

5のガイドは作成済み

コメント 1 件

This is not fixing the water pump but instead the Synchronous Motor that moves the water tray mechanism where the freezing nozzles are. The water pump is located at the end of the clear tube at the bottom right of the unit (the side the fan is on). It literally has a friction fit that is on the other side of the screen you see in the water reservoir (bottom right). Both mine and another person (remember not to cut yourself) who made a video on YouTube’s problem was hair in the pump. Easy to take apart and either clean or replace (around $15). Thank you cats in my case! Most of these portable ice makers are the exact same on the inside and I’m sure massed produced in China then branded to reflect the price… ie you’re paying for the name in most cases! Good luck and happy fixing! - George

georgeApolymath - 返信

コメントを追加

統計データ:

過去 24時間: 2

過去 7 日: 19

過去 30 日: 69

今までの合計 2,947