メインコンテンツにスキップ

Insignia Flex 8 NS-P08A7100 Battery Replacement

必要な工具と部品

  1. Insignia Flex 8 NS-P08A7100 Battery Replacement, Battery: 手順 1、 2の画像 1 Insignia Flex 8 NS-P08A7100 Battery Replacement, Battery: 手順 1、 2の画像 2
    • Begin by using the opening tool to pry open the back cover. Continue around the edge until the back cover pops off.

  2. Insignia Flex 8 NS-P08A7100 Battery Replacement: 手順 2、 2の画像 1 Insignia Flex 8 NS-P08A7100 Battery Replacement: 手順 2、 2の画像 2
    • Use the opening tool to flip the LCD flex circuit plug upwards. The flex circuit should now be loose. Remove flex circuit by pulling outwards.

  3. Insignia Flex 8 NS-P08A7100 Battery Replacement: 手順 3、 2の画像 1 Insignia Flex 8 NS-P08A7100 Battery Replacement: 手順 3、 2の画像 2
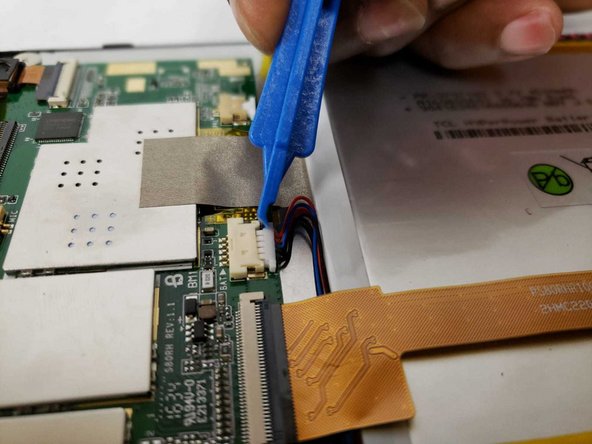
    • Use the opening tool to remove the battery cable from the circuit board.

  4. Insignia Flex 8 NS-P08A7100 Battery Replacement: 手順 4、 1の画像 1
    • Remove the adhesive tape from the bottom of the battery.

  5. Insignia Flex 8 NS-P08A7100 Battery Replacement: 手順 5、 1の画像 1
    • Remove plastic adhesive tape from the side of the battery.

  6. Insignia Flex 8 NS-P08A7100 Battery Replacement: 手順 6、 2の画像 1 Insignia Flex 8 NS-P08A7100 Battery Replacement: 手順 6、 2の画像 2
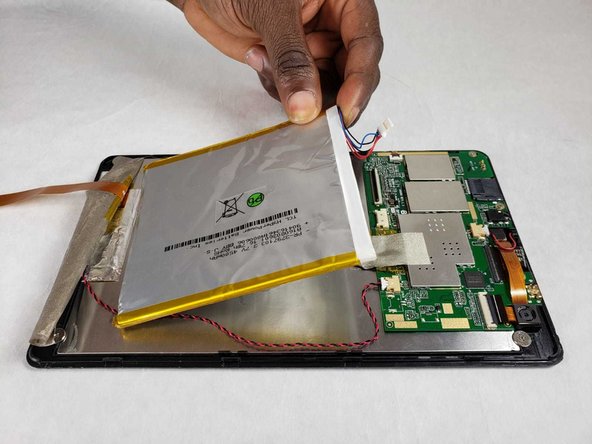
    • Pry the battery from the back of the LCD screen using the opening tool. Due to the strong adhesive between the battery and screen, this may take some time.

終わりに

To reassemble your device, follow these instructions in reverse order.

作成者

2人の作成者と共同で作成されました。

Lavina Pillai

メンバー登録日: 07/08/19

133 ポイント

1ガイドが承認済み

チーム

IUPUI, Team S1-G1, Renguette Summer 2019 IUPUI, Team S1-G1, Renguette Summer 2019人のメンバー

IUPUI-RENGUETTE-SU19S1G1

3 メンバー

2のガイドは作成済み

0 件のコメント

コメントを追加

統計データ:

過去 24時間: 0

過去 7 日: 0

過去 30 日: 1

今までの合計 227