メインコンテンツにスキップ

Insignia Flex 8 NS-15AT08 Battery Replacement

必要な工具と部品

  1. Insignia Flex 8 NS-15AT08 Battery Replacement, Back Casing: 手順 1、 2の画像 1 Insignia Flex 8 NS-15AT08 Battery Replacement, Back Casing: 手順 1、 2の画像 2
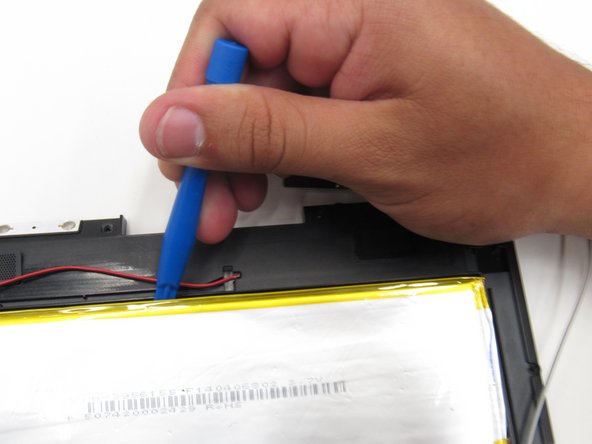
    • Insert a plastic opening tool into the seam between the back casing and the screen to separate the back casing from the tablet.

    • You may need to use a metal opening tool for extra prying power, but beware that it can scratch your device or damage the internal components if the tool is inserted too deep.

    • You will hear the tabs pop as you separate the back casing around the tablet.

  2. Insignia Flex 8 NS-15AT08 Battery Replacement: 手順 2、 2の画像 1 Insignia Flex 8 NS-15AT08 Battery Replacement: 手順 2、 2の画像 2
    • Lift the back casing away from the rest of the device which should include the exposed circuit board and screen.

    • Set the casing aside.

  3. Insignia Flex 8 NS-15AT08 Battery Replacement, Battery: 手順 3、 2の画像 1 Insignia Flex 8 NS-15AT08 Battery Replacement, Battery: 手順 3、 2の画像 2
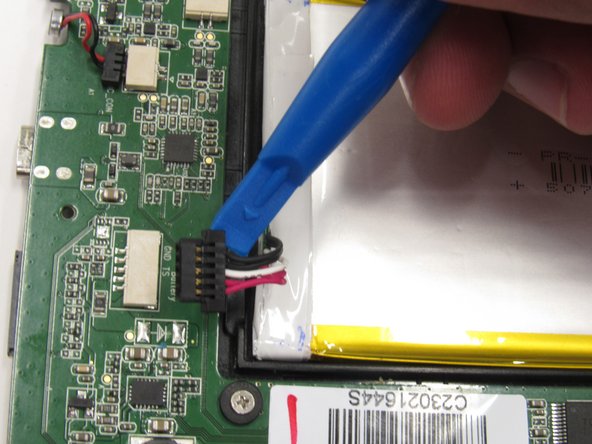
    • Wedge a plastic opening tool in between the male, black module and female, white module to disconnect the wires module from the circuit board.

  4. Insignia Flex 8 NS-15AT08 Battery Replacement: 手順 4、 3の画像 1 Insignia Flex 8 NS-15AT08 Battery Replacement: 手順 4、 3の画像 2 Insignia Flex 8 NS-15AT08 Battery Replacement: 手順 4、 3の画像 3
    • Use a plastic opening tool to pry the battery from the circuit board by wedging it around the perimeter of the battery.

  5. Insignia Flex 8 NS-15AT08 Battery Replacement: 手順 5、 1の画像 1
    • Remove the battery from the circuit board by lifting it with the spudger or finger.

終わりに

To reassemble your device, follow these instructions in reverse order.

4 の人々がこのガイドを完成させました。

作成者

2人の作成者と共同で作成されました。

Jeremy Anaya

メンバー登録日: 09/23/15

316 ポイント

2のガイドは作成済み

チーム

Baylor, Team 6-7, Williams Fall 2015 Baylor, Team 6-7, Williams Fall 2015人のメンバー

BU-WILLIAMS-F15S6G7

3 メンバー

10のガイドは作成済み

0 件のコメント

コメントを追加

統計データ:

過去 24時間: 0

過去 7 日: 1

過去 30 日: 4

今までの合計 1,905