メインコンテンツにスキップ

Infant Optics DXR-8 Monitor Replacement

アーカイブされたガイド
このガイドは将来的な使用のためにのみ保存されてます。ご自身の修理作業には更新バージョンをご利用ください。

必要な工具と部品

  1. Infant Optics DXR-8 Monitor Replacement, Monitor: 手順 1、 1の画像 1
    • Start by gently inserting the plastic opening tool between the led and casing.

  2. Infant Optics DXR-8 Monitor Replacement: 手順 2、 1の画像 1
    • Slowly pry the cover away from the bottom using the plastic opening tool.

  3. Infant Optics DXR-8 Monitor Replacement: 手順 3、 1の画像 1
    • Glide the tool around the entire cover to reveal the screws, which are 5.0 mm.

    This photo is a little blurry

    Patty Remmell - 返信

  4. Infant Optics DXR-8 Monitor Replacement: 手順 4、 1の画像 1
    • Remove the cover and set it aside.

  5. Infant Optics DXR-8 Monitor Replacement: 手順 5、 2の画像 1 Infant Optics DXR-8 Monitor Replacement: 手順 5、 2の画像 2
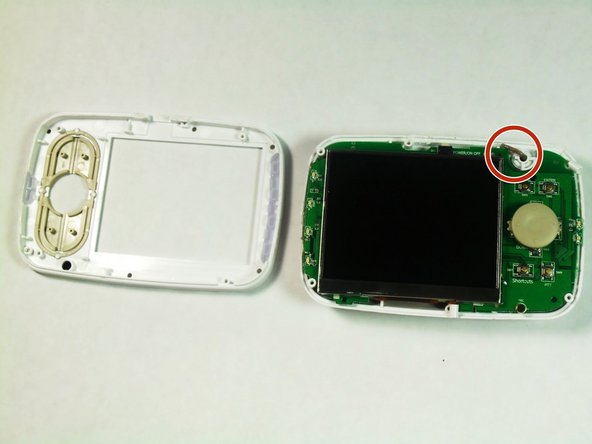
    • Remove the four corner screws, 5.0 mm, using a J1 bit.

    • Lift the top away from the bottom using the metal spudger. Be careful not to rip the antenna wire.

    Lift it how? With a tool? With fingers?

    Patty Remmell - 返信

終わりに

To reassemble your device, follow these instructions in reverse order.

6 の人々がこのガイドを完成させました。

作成者

5人の作成者と共同で作成されました。

Larsha Johnson

メンバー登録日: 08/26/15

526 ポイント

3のガイドは作成済み

チーム

USF Tampa, Team 6-4, Remmell Fall 2015 USF Tampa, Team 6-4, Remmell Fall 2015人のメンバー

USFT-REMMELL-F15S6G4

4 メンバー

3のガイドは作成済み

2 件のコメント

What is the part number for the LCD?

jstarion - 返信

From the pictures LQ035NC111 seem to be the part number.

Michael C -

コメントを追加

統計データ:

過去 24時間: 0

過去 7 日: 1

過去 30 日: 2

今までの合計 5,830