メインコンテンツにスキップ

India Mark II Pipe Replacement

アーカイブされたガイド
このガイドは将来的な使用のためにのみ保存されてます。ご自身の修理作業には更新バージョンをご利用ください。

必要な工具と部品

  1. India Mark II Pipe Replacement, Cover Plate: 手順 1、 1の画像 1
    • Use a wrench to remove the bolt on the top of the cover plate.

    • When replacing the cover plate, this bolt only needs to be hand tight.

  2. India Mark II Pipe Replacement: 手順 2、 1の画像 1
    • Remove the top cover by pulling it straight off the pump.

    • Store the top cover in a sanitary place, preferably above ground, to prevent contamination.

  3. India Mark II Pipe Replacement, Head Section: 手順 3、 3の画像 1 India Mark II Pipe Replacement, Head Section: 手順 3、 3の画像 2 India Mark II Pipe Replacement, Head Section: 手順 3、 3の画像 3
    • Pull the pump handle all the way down and hold it in this position, exposing the pump rod.

    • Place the spacer around the pump rod and under the chain attachment point.

    • Make sure the spacer is beveled side down, and flat side up.

    • Lift the pump lever until there is no tension in the chain and hold it in this position.

  4. India Mark II Pipe Replacement: 手順 4、 2の画像 1 India Mark II Pipe Replacement: 手順 4、 2の画像 2
    • Remove the bolt connecting the chain to the pump handle.

    • Remove the chain from the handle.

  5. India Mark II Pipe Replacement: 手順 5、 3の画像 1 India Mark II Pipe Replacement: 手順 5、 3の画像 2 India Mark II Pipe Replacement: 手順 5、 3の画像 3
    • There are 4 bolts securing the head section to the water tank, located at the corners of head section base.

    • Continue supporting the pump handle so the pump head doesn't fall off when all the bolts are removed.

    • Remove the 4 bolts on the base of the water tank.

  6. India Mark II Pipe Replacement: 手順 6、 1の画像 1
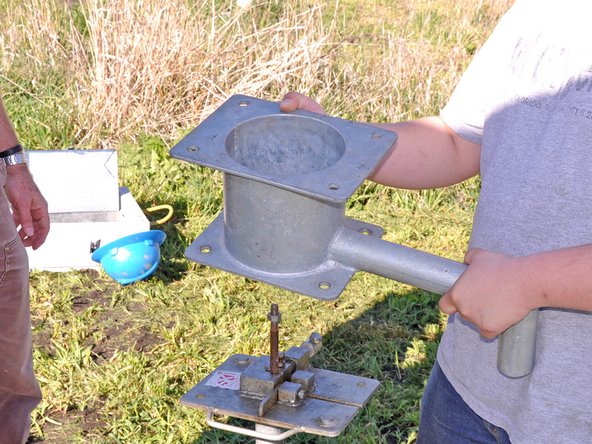
    • Lift the pump head off of the water tank and place in a sanitary place, preferably above ground, to prevent contamination.

  7. India Mark II Pipe Replacement, Water Tank: 手順 7、 3の画像 1 India Mark II Pipe Replacement, Water Tank: 手順 7、 3の画像 2 India Mark II Pipe Replacement, Water Tank: 手順 7、 3の画像 3
    • Lift the plunger assembly and separator plate and place a rod clamp below the separator plate.

    • Tighten the rod clamp and gently set the separator plate on top of it.

    • Remove the spacer.

  8. India Mark II Pipe Replacement: 手順 8、 3の画像 1 India Mark II Pipe Replacement: 手順 8、 3の画像 2 India Mark II Pipe Replacement: 手順 8、 3の画像 3
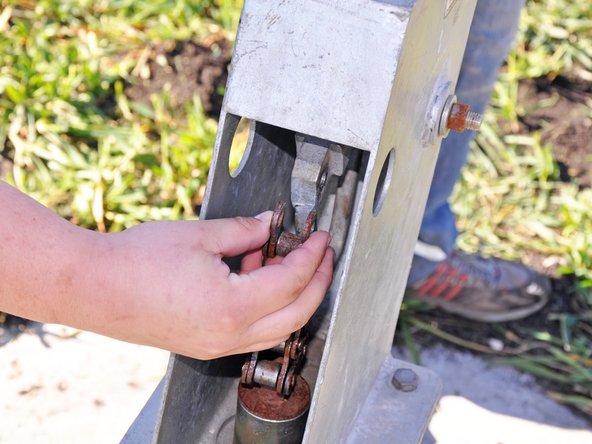
    • Hold the rod clamp steady while removing the chain from the pump rod. Check the chain for signs of damage.

    • Extend the chain sideways and use it as a lever as demonstrated in the first picture.

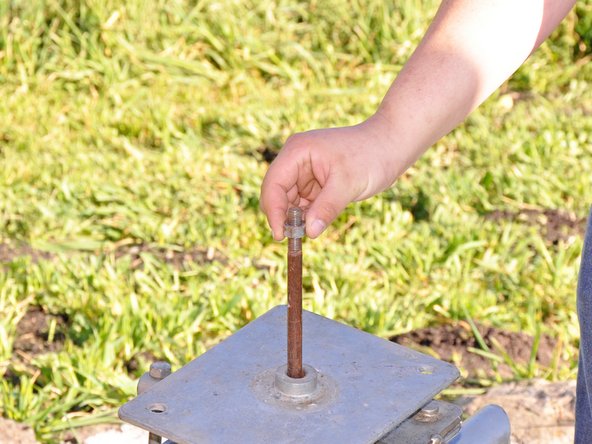
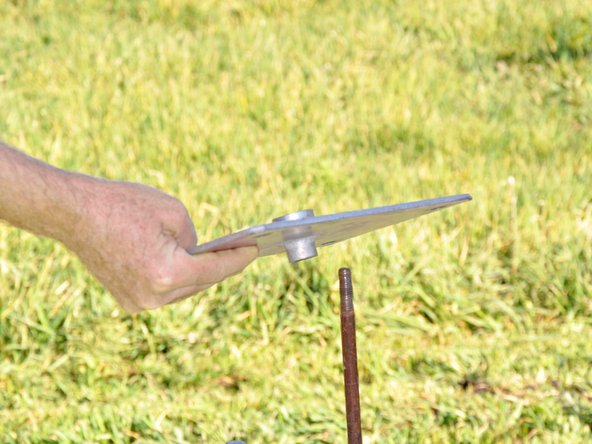
    • Remove the lock nut by turning it counterclockwise.

    • Remove the separator plate.

  9. India Mark II Pipe Replacement: 手順 9、 2の画像 1 India Mark II Pipe Replacement: 手順 9、 2の画像 2
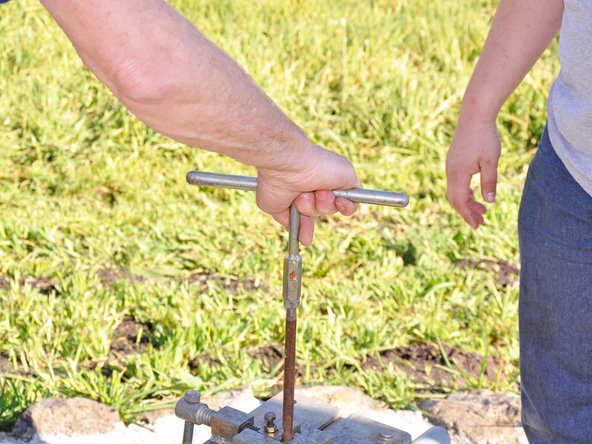
    • Reinstall the lock nut.

    • Install a T-handle, screwing it down against the lock nut.

  10. India Mark II Pipe Replacement: 手順 10、 2の画像 1 India Mark II Pipe Replacement: 手順 10、 2の画像 2
    • Lift up on the T-handle to take pressure off the rod clamp.

    • Remove the rod clamp and slowly lower the T-handle.

    • The pump rod will rest on the end cap, located below the cylinder of the pump. It is important to lower the T-handle slowly to prevent damage to the pump.

  11. India Mark II Pipe Replacement: 手順 11、 1の画像 1
    • There are 4 bolts securing the water tank to the pump base. They are located at the bottom corners of the water tank.

    • Remove the 4 bolts on the base of the water tank.

  12. India Mark II Pipe Replacement: 手順 12、 3の画像 1 India Mark II Pipe Replacement: 手順 12、 3の画像 2 India Mark II Pipe Replacement: 手順 12、 3の画像 3
    • Lift the water tank up approximately 1 foot.

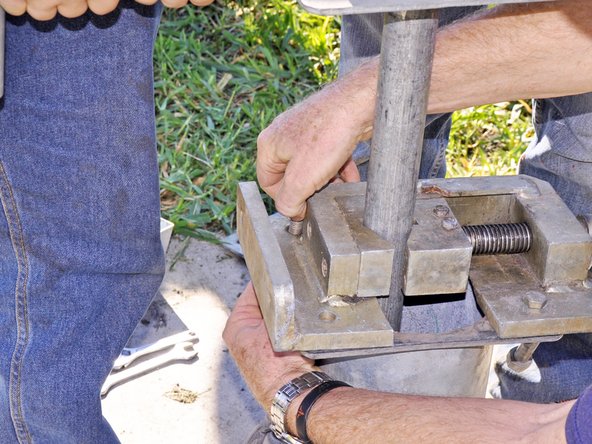
    • Place a base clamp around the exposed pipe and tighten it against the riser main.

  13. India Mark II Pipe Replacement: 手順 13、 2の画像 1 India Mark II Pipe Replacement: 手順 13、 2の画像 2
    • Secure the base clamp to the pump base with two bolt and nut sets installed on opposite sides of each other.

    • Hand tight will be sufficient for securing the base clamp.

    • Use the nuts and bolts removed from the water tank base or head section base.

  14. India Mark II Pipe Replacement: 手順 14、 2の画像 1 India Mark II Pipe Replacement: 手順 14、 2の画像 2
    • Turn the water tank counterclockwise until it comes free from the pipe.

    • Make sure to keep the tank level to prevent cross threading.

    • Lift the water tank up against the T-handle and secure the rod clamp to the pump rod.

  15. India Mark II Pipe Replacement: 手順 15、 2の画像 1 India Mark II Pipe Replacement: 手順 15、 2の画像 2
    • Remove the T-handle.

    • Remove the water tank and check for signs of blockage.

    • Store in a sanitary place to prevent contamination.

  16. India Mark II Pipe Replacement, Pipe: 手順 16、 2の画像 1 India Mark II Pipe Replacement, Pipe: 手順 16、 2の画像 2
    • Place a pipe coupler over the pump rod.

    • Install the T-handle onto the pump rod.

  17. India Mark II Pipe Replacement: 手順 17、 2の画像 1 India Mark II Pipe Replacement: 手順 17、 2の画像 2
    • Lift up on the T-handle to take pressure off the rod clamp.

    • Loosen and remove the rod clamp.

    • Screw the pipe coupling onto the threaded riser main end and slowly lower the T-handle.

  18. India Mark II Pipe Replacement: 手順 18、 3の画像 1 India Mark II Pipe Replacement: 手順 18、 3の画像 2 India Mark II Pipe Replacement: 手順 18、 3の画像 3
    • You will need at least three people to perform pipe lifting. Two people to lift, and one person to operate the base clamp. Workers should constantly be communicating whether they are ready, lifting, and whether or not the base clamp is secure.

    • Have two people place C wrenches on the riser main on opposite sides of each other.

    • C-wrenches should always be placed such that their openings are opposite and they do not contact each other, the base clamp, or the pipe coupling.

    • Have the two people with C-wrenches apply light upward pressure to the riser main while the base clamp operator loosens the clamp.

    • Lift the pipe evenly, not exceeding the comfortable lifting height of either lifter. Re-secure the base clamp once the maximum lifting height has been reached.

    • Lower the C-wrenches and repeat this step until the pipe coupling reaches the base clamp.

  19. India Mark II Pipe Replacement: 手順 19、 2の画像 1 India Mark II Pipe Replacement: 手順 19、 2の画像 2
    • When you reach the pipe coupling, open the clamp more to allow it to pass through. Lift the riser main approximately one foot above the clamp and re-secure the pipe.

    • Make multiple lifts if necessary to achieve the desired coupling height.

  20. India Mark II Pipe Replacement: 手順 20、 3の画像 1 India Mark II Pipe Replacement: 手順 20、 3の画像 2 India Mark II Pipe Replacement: 手順 20、 3の画像 3
    • Place one pipe wrench on the exposed coupling and another on the riser main above the coupling. Have a third person stabilize the upper pipe.

    • Be sure to place the open end of the pipe wrench towards the direction that you will turning the wrenches.

    • Hold the wrench on the coupling steady while the wrench on the riser main is rotated counterclockwise until the pipe comes free.

    • Lift the upper pipe and place the rod clamp onto the pump rod below the pump rod coupling.

  21. India Mark II Pipe Replacement: 手順 21、 3の画像 1 India Mark II Pipe Replacement: 手順 21、 3の画像 2 India Mark II Pipe Replacement: 手順 21、 3の画像 3
    • Lift and hold the upper pipe high enough to expose the pump rod coupling.

    • Place one open end wrench over the lower portion of the pump rod coupling. Hold this wrench steady.

    • Place another wrench on the upper portion of the pump rod coupling. Turn this wrench counterclockwise until the coupling separates.

    • Pull the upper pipe away from the pump and lay it on its side away from the pump.

    • Do not lay the pipe directly in grass or dirt, as you may get contaminants into the pipe that could obstruct water flow.

  22. India Mark II Pipe Replacement: 手順 22、 3の画像 1 India Mark II Pipe Replacement: 手順 22、 3の画像 2 India Mark II Pipe Replacement: 手順 22、 3の画像 3
    • Remove the T-handle from the pump rod.

    • Install the T-handle on the pump rod still in the well.

  23. India Mark II Pipe Replacement: 手順 23、 3の画像 1 India Mark II Pipe Replacement: 手順 23、 3の画像 2 India Mark II Pipe Replacement: 手順 23、 3の画像 3
    • Lift up on the T-handle to take pressure off the rod clamp.

    • Loosen and remove the rod clamp.

    • Gently lower the T-handle.

    • Repeat steps 18 through 23 until you reach the pump cylinder.

    • The pump cylinder will not fit through the base clamp, but should be visible through the base clamp.

終わりに

To reassemble your device, follow these instructions in reverse order.

作成者

4人の作成者と共同で作成されました。

Phillip Takahashi

メンバー登録日: 08/22/11

86,704 ポイント

87のガイドは作成済み

0 件のコメント

コメントを追加

統計データ:

過去 24時間: 0

過去 7 日: 0

過去 30 日: 1

今までの合計 959