メインコンテンツにスキップ

InFocus Screenplay 4805 Lamp Replacement

必要な工具と部品

  1. InFocus Screenplay 4805 Lamp Replacement, Remove the lamp door: 手順 1、 1の画像 1
    • Front panel assembly removal is not required.

    • To remove the lamp door, use a metal or plastic pry tool and unclip the lamp door from the projector. Set this aside for reassembly.

  2. InFocus Screenplay 4805 Lamp Replacement, Disconnect the lamp: 手順 2、 3の画像 1 InFocus Screenplay 4805 Lamp Replacement, Disconnect the lamp: 手順 2、 3の画像 2 InFocus Screenplay 4805 Lamp Replacement, Disconnect the lamp: 手順 2、 3の画像 3
    • If you are replacing the lamp as an assembly, follow this guide in reverse from this step.

    • Remove the two gold 1 cm screws and washers on the side of lens housing using the 4.0 flat-head bit

    • Pinch the white wire tab to gently detach the side that connects with the lens housing.

  3. InFocus Screenplay 4805 Lamp Replacement, **REBUILD ONLY** Housing disassembly: 手順 3、 2の画像 1 InFocus Screenplay 4805 Lamp Replacement, **REBUILD ONLY** Housing disassembly: 手順 3、 2の画像 2
    • This step is only required when rebuilding the old lamp with a replacement bulb.

    • Slide the bulb housing out of the projector.

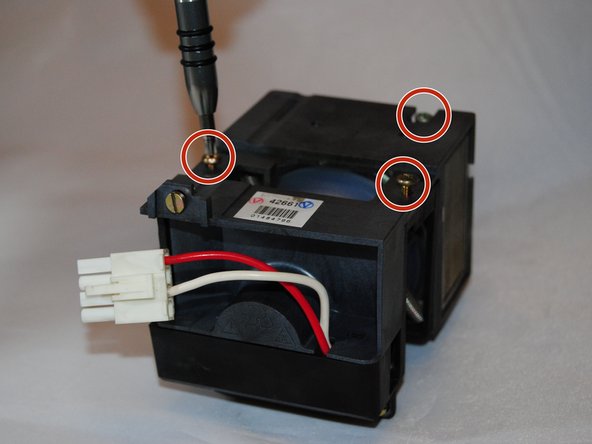
    • Use the Phillips #1 screwdriver to remove the three 1 cm gold screws on the bulb housing.

  4. InFocus Screenplay 4805 Lamp Replacement, **REBUILD ONLY** Housing disassembly: 手順 4、 2の画像 1 InFocus Screenplay 4805 Lamp Replacement, **REBUILD ONLY** Housing disassembly: 手順 4、 2の画像 2
    • This step is only required when rebuilding the old lamp with a replacement bulb.

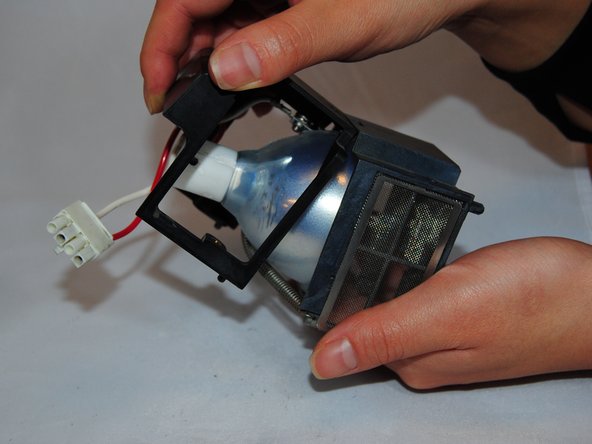
    • Gently pull the top of the bulb housing off.

    • Lift up the middle of the bulb housing to remove it.

    • Be careful of loose parts, such as the metal housing and the glass focusing lens.

  5. InFocus Screenplay 4805 Lamp Replacement, **REBUILD ONLY** Housing disassembly: 手順 5、 3の画像 1 InFocus Screenplay 4805 Lamp Replacement, **REBUILD ONLY** Housing disassembly: 手順 5、 3の画像 2 InFocus Screenplay 4805 Lamp Replacement, **REBUILD ONLY** Housing disassembly: 手順 5、 3の画像 3
    • This step is only required when rebuilding the old lamp with a replacement bulb.

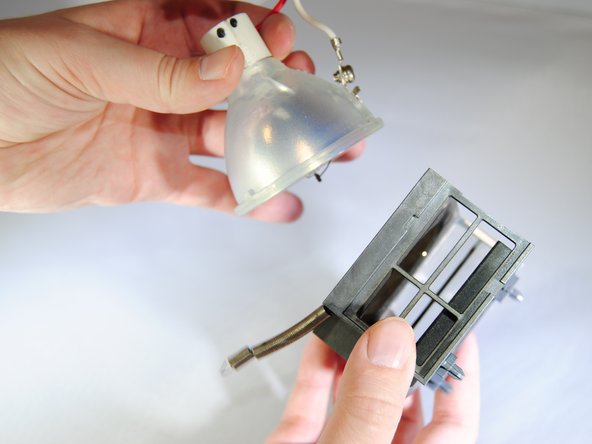
    • Unhook the spring from the bulb housing.

    • Gently remove the bulb.

終わりに

To reassemble the device, follow these instructions in reverse order.

ある他の人がこのガイドを完成しました。

作成者

5人の作成者と共同で作成されました。

Marilyn Urness

メンバー登録日: 09/28/17

671 ポイント

6のガイドは作成済み

チーム

Eastern Washington University, Team S2-G3, Crane Fall 2017 Eastern Washington University, Team S2-G3, Crane Fall 2017人のメンバー

EWU-CRANE-F17S2G3

5 メンバー

6のガイドは作成済み

3 件のコメント

To remove and later disassemble the lamp, you don’t need to remove whole cover. Just open the lamp bay door and follow the steps starting  from 6!

madyogi - 返信

madyogi, exactly. You are absolutely right!

ilya.zhizhin - 返信

I was able to fix an old projector I got for $40. Thank you so much for the tutorial.

Madelyn Tapia - 返信

コメントを追加

統計データ:

過去 24時間: 0

過去 7 日: 8

過去 30 日: 12

今までの合計 1,448